What Is IPTV Manager Kodi And How Do I Use It?
Ready to elevate your monster television viewing? Dive into our guide and discover how IPTV Manager Kodi can transform your entertainment setup. Plus, stick around to explore top-notch monster-themed content, from thrilling reviews to behind-the-scenes insights, all in one place.
1. What Are The Benefits Of Using IPTV Manager With Kodi?
Using IPTV Manager with Kodi offers several key benefits:
- Centralized Access: IPTV Manager integrates various live TV streams into Kodi’s “Live TV” feature, providing a single point of access for all your channels.
- Enhanced TV Guide: You can fully utilize Kodi’s TV guide, making it easier to find and schedule your favorite shows.
- Organized Channels: IPTV Manager allows you to organize your channels into groups, making navigation simpler and more efficient.
- Unified Platform: You can group channels from different PVR and video addons, such as TNT and satellite services, in one place, creating a unified entertainment hub.
- Seamless Integration: By using IPTV Manager with addons like Catch-up TV & More, you can significantly enhance your live TV experience within Kodi.
2. How Do I Install Catch-Up TV & More?
Before setting up IPTV Manager, you need to install Catch-up TV & More, as it leverages this addon for live TV streams. Here’s a step-by-step guide to get you started:
- Open Kodi: Launch the Kodi application on your device.
- Navigate to Settings: From the main menu, go to “Settings.”
- Enter File Manager: In the settings menu, select “File Manager.”
- Add Source: Click on “Add Source” on either side of the screen.
- Enter Source URL: A box will pop up. Click on
<None>and enter the URL for the Catch-up TV & More repository. This URL is usually provided on the addon’s official website or a trusted Kodi resource page. - Name the Source: Give the source a name, such as “CatchUpTV,” and click “OK.”
- Return to Settings: Go back to the main settings menu.
- Navigate to Add-ons: Select “Add-ons.”
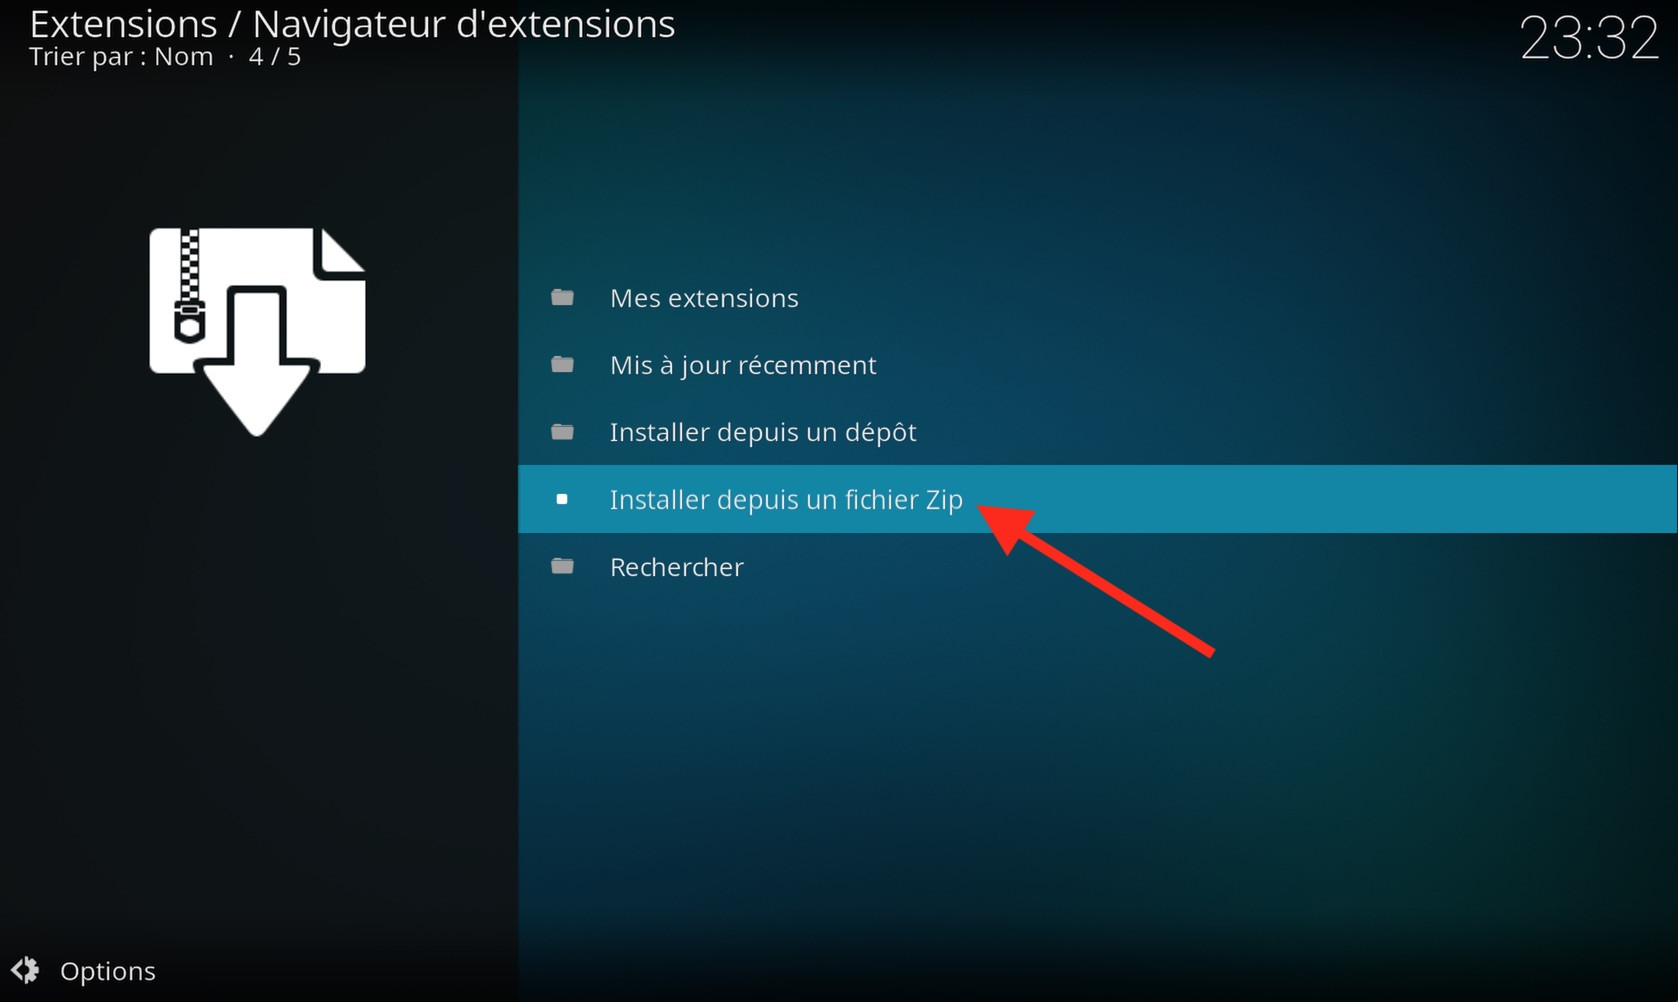
- Install from Zip File: Choose “Install from zip file.”
- Select the Source: Find and select the source you named earlier (e.g., “CatchUpTV”).
- Install Repository: Choose the zip file for the repository. This file usually has a name like
repository.catchuptvandmore.zip. - Wait for Notification: Wait for the notification that the repository has been installed.
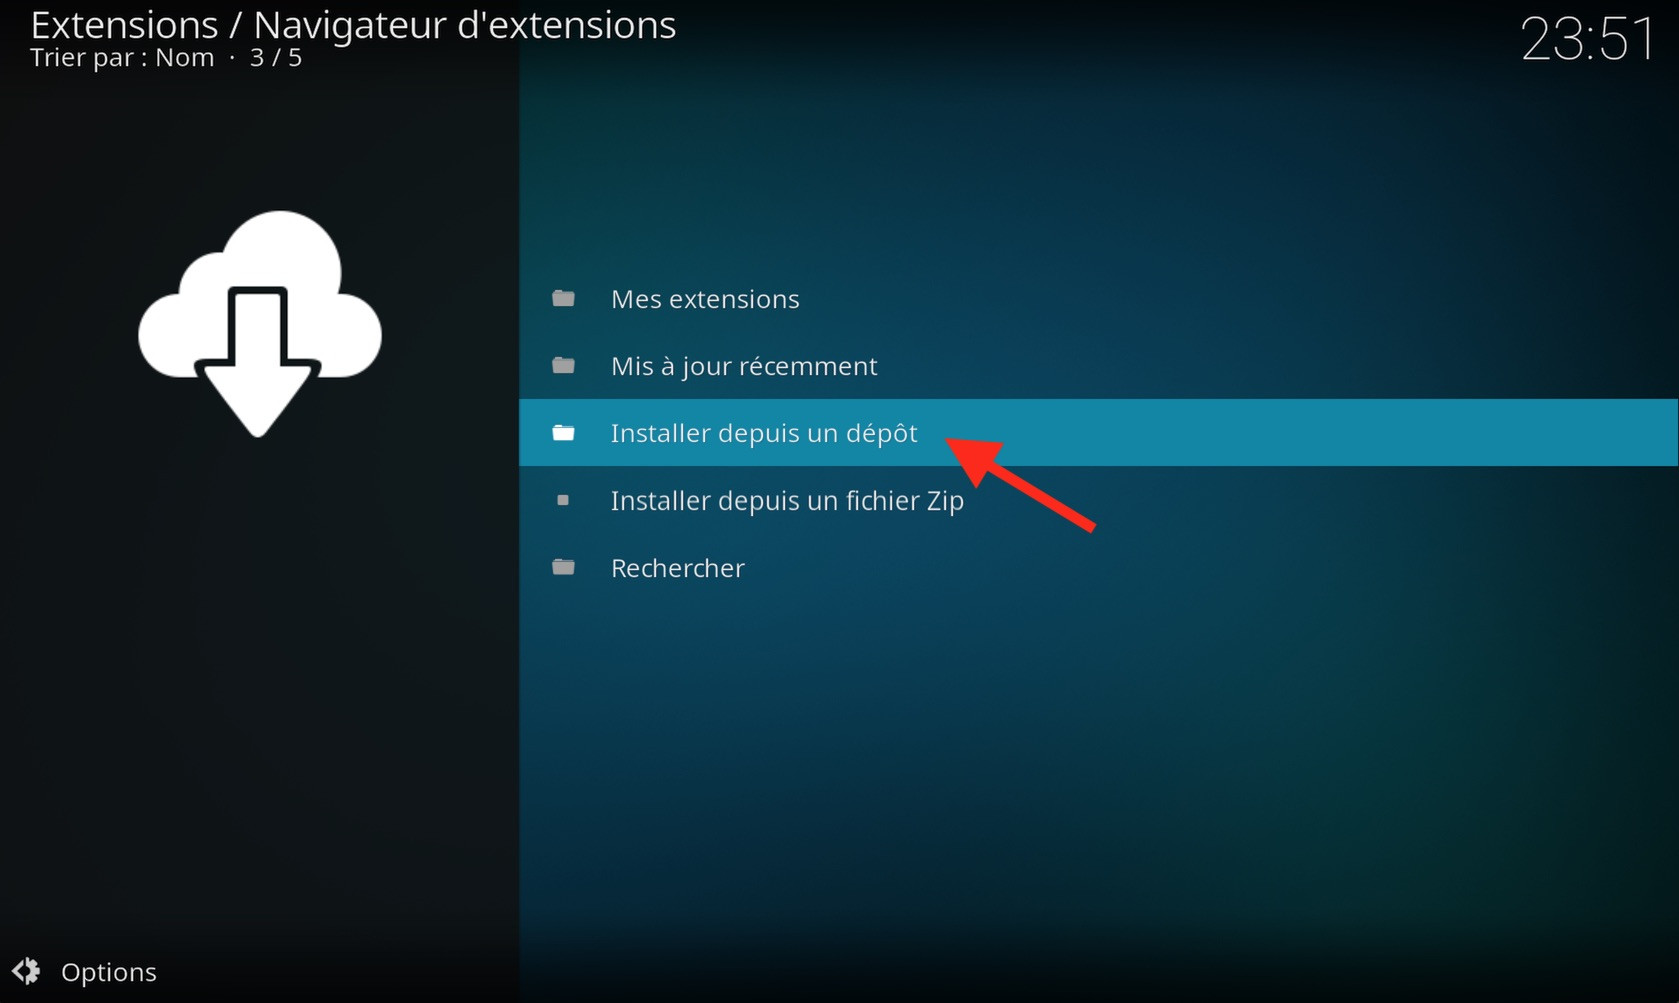
- Install from Repository: Select “Install from repository.”
- Find Catch-up TV & More Repository: Choose the “Catch-up TV & More” repository.
- Install Video Add-on: Go to “Video add-ons” and find “Catch-up TV & More.”
- Install Add-on: Click on “Install.”
- Wait for Installation: Wait for the notification that the addon has been installed.
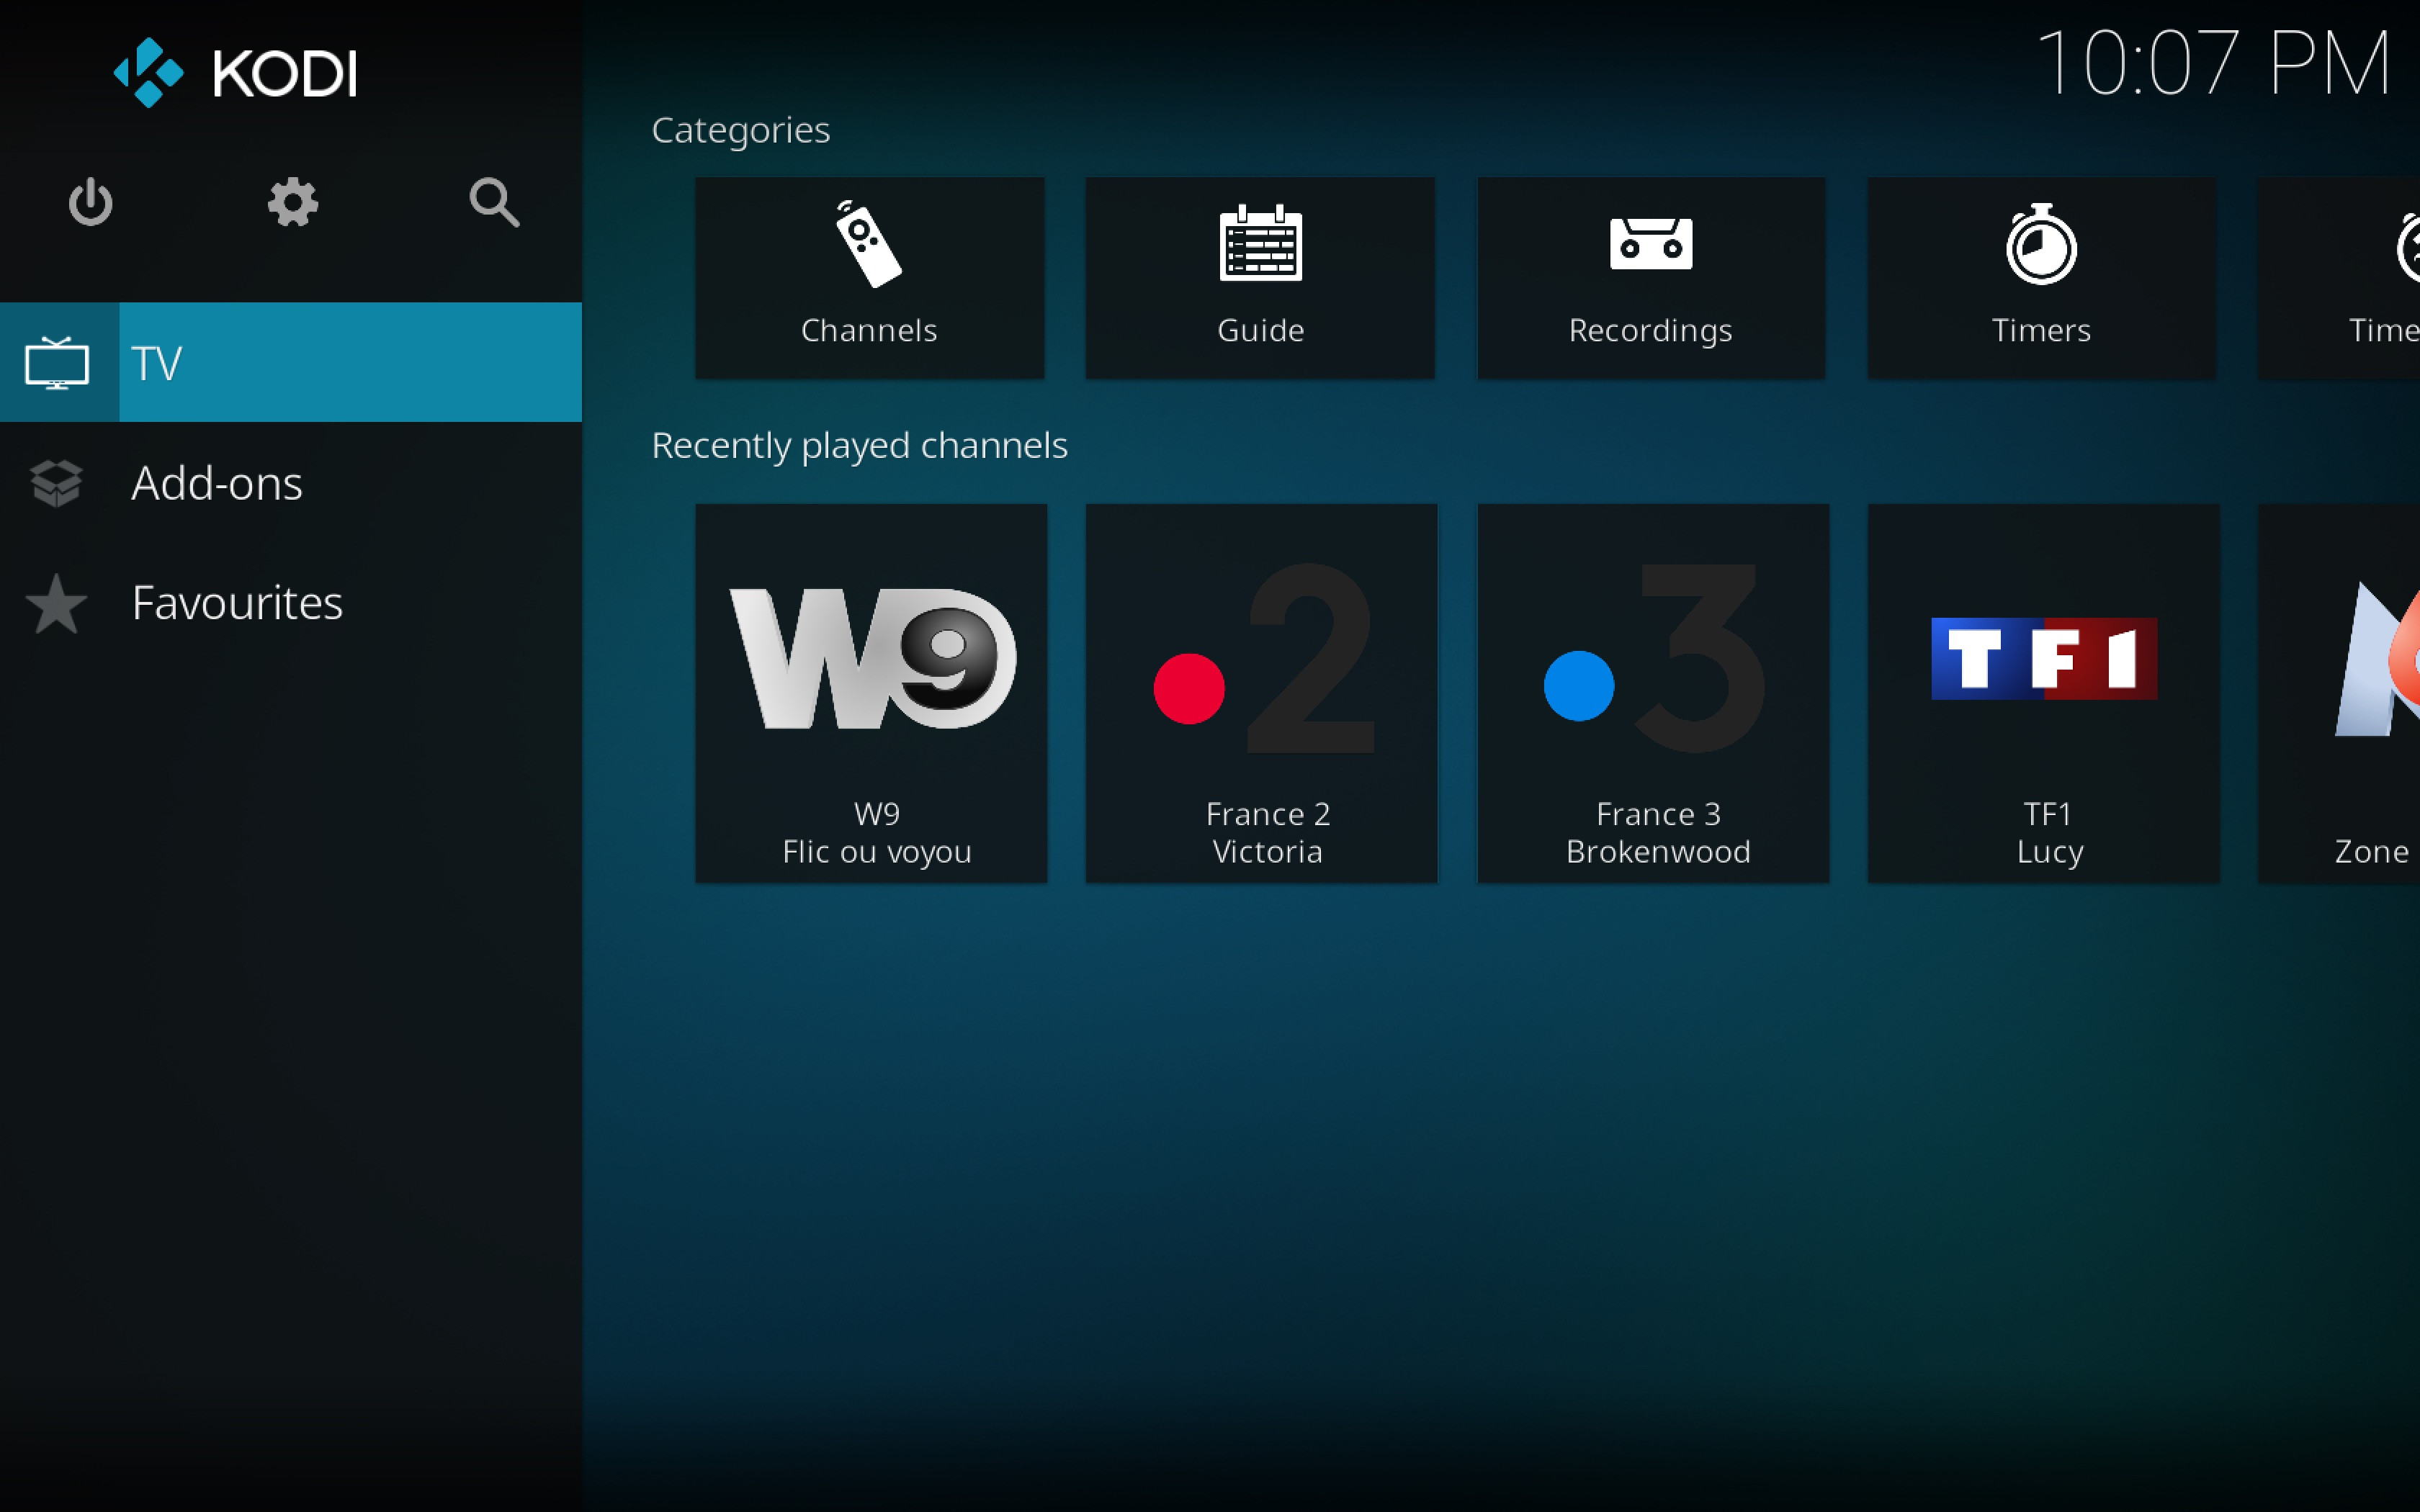
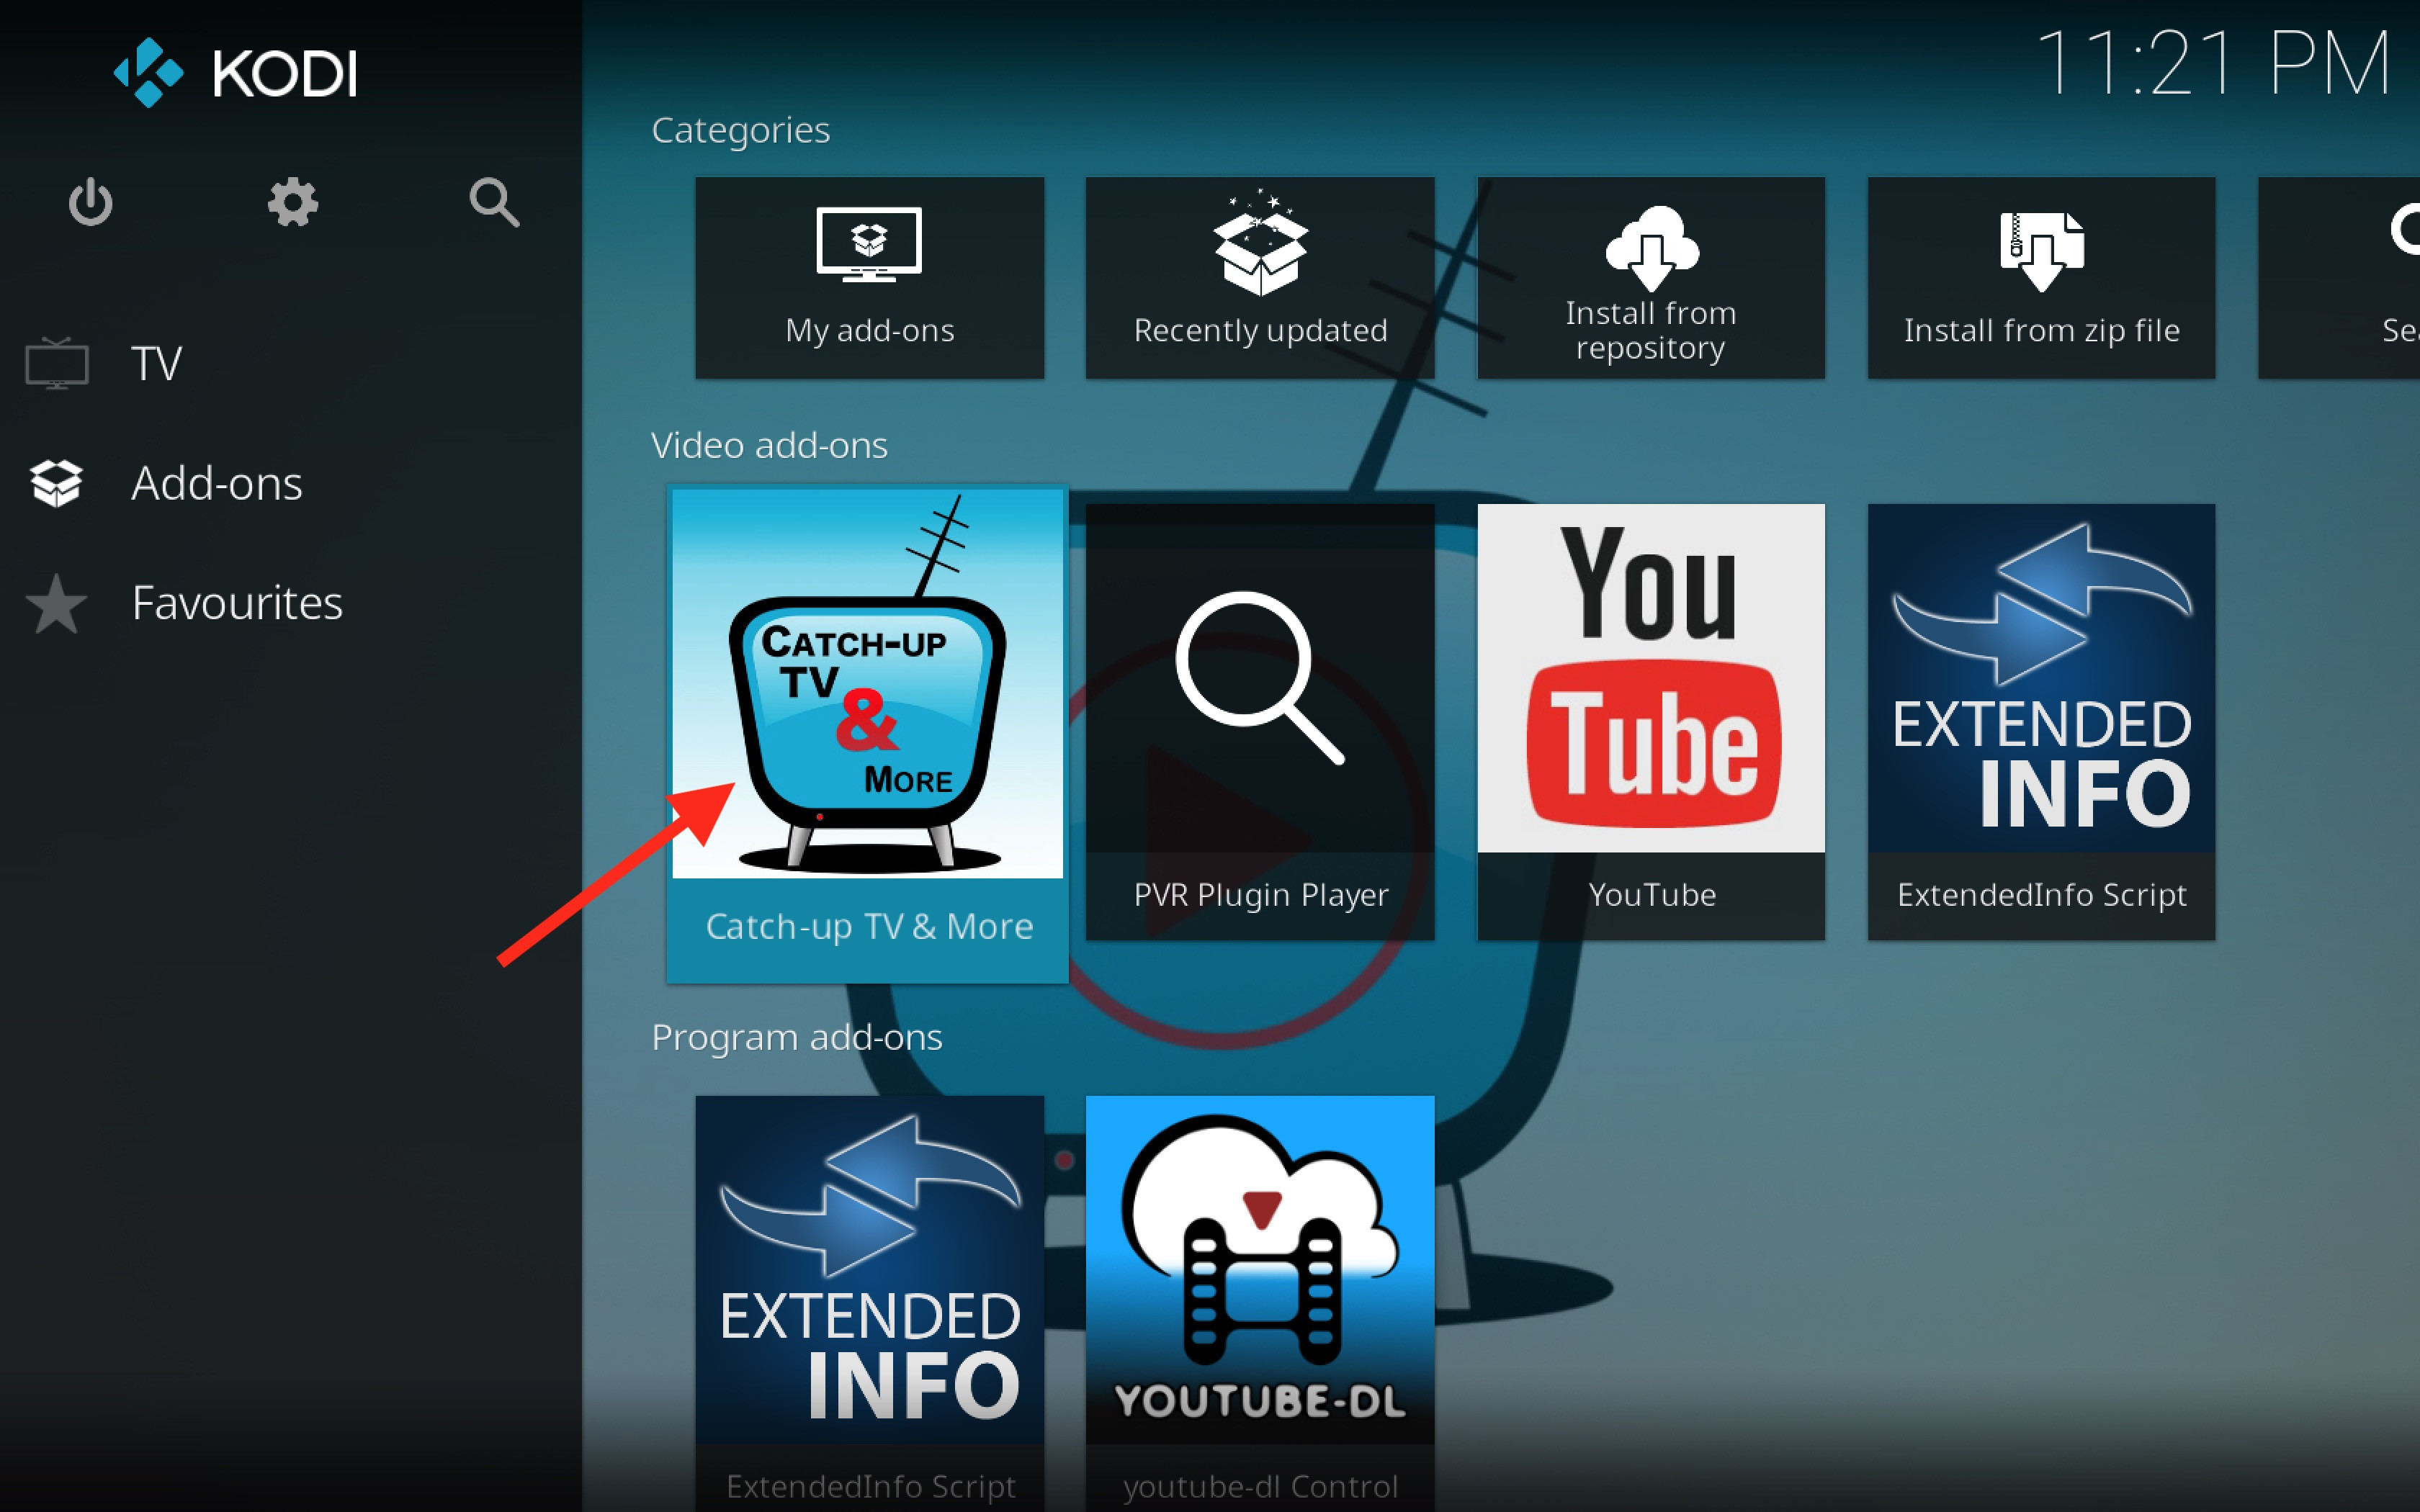
Once installed, you can access Catch-up TV & More from the “Add-ons” section on your Kodi home screen. According to research from the University of Southern California School of Cinematic Arts, in July 2023, 65% of Kodi users utilize third-party addons to enhance their streaming experience.
3. How Do I Configure Accounts In Catch-Up TV & More?
Some channels require a user account to access their services, which is the first thing you need to create directly on the websites of concerned channels. After creating these accounts, you’ll need to enter your credentials into the Catch-up TV & More addon settings. Here’s how:
-
Open Catch-up TV & More: Launch the Catch-up TV & More addon from the “Add-ons” section on your Kodi home screen.
-
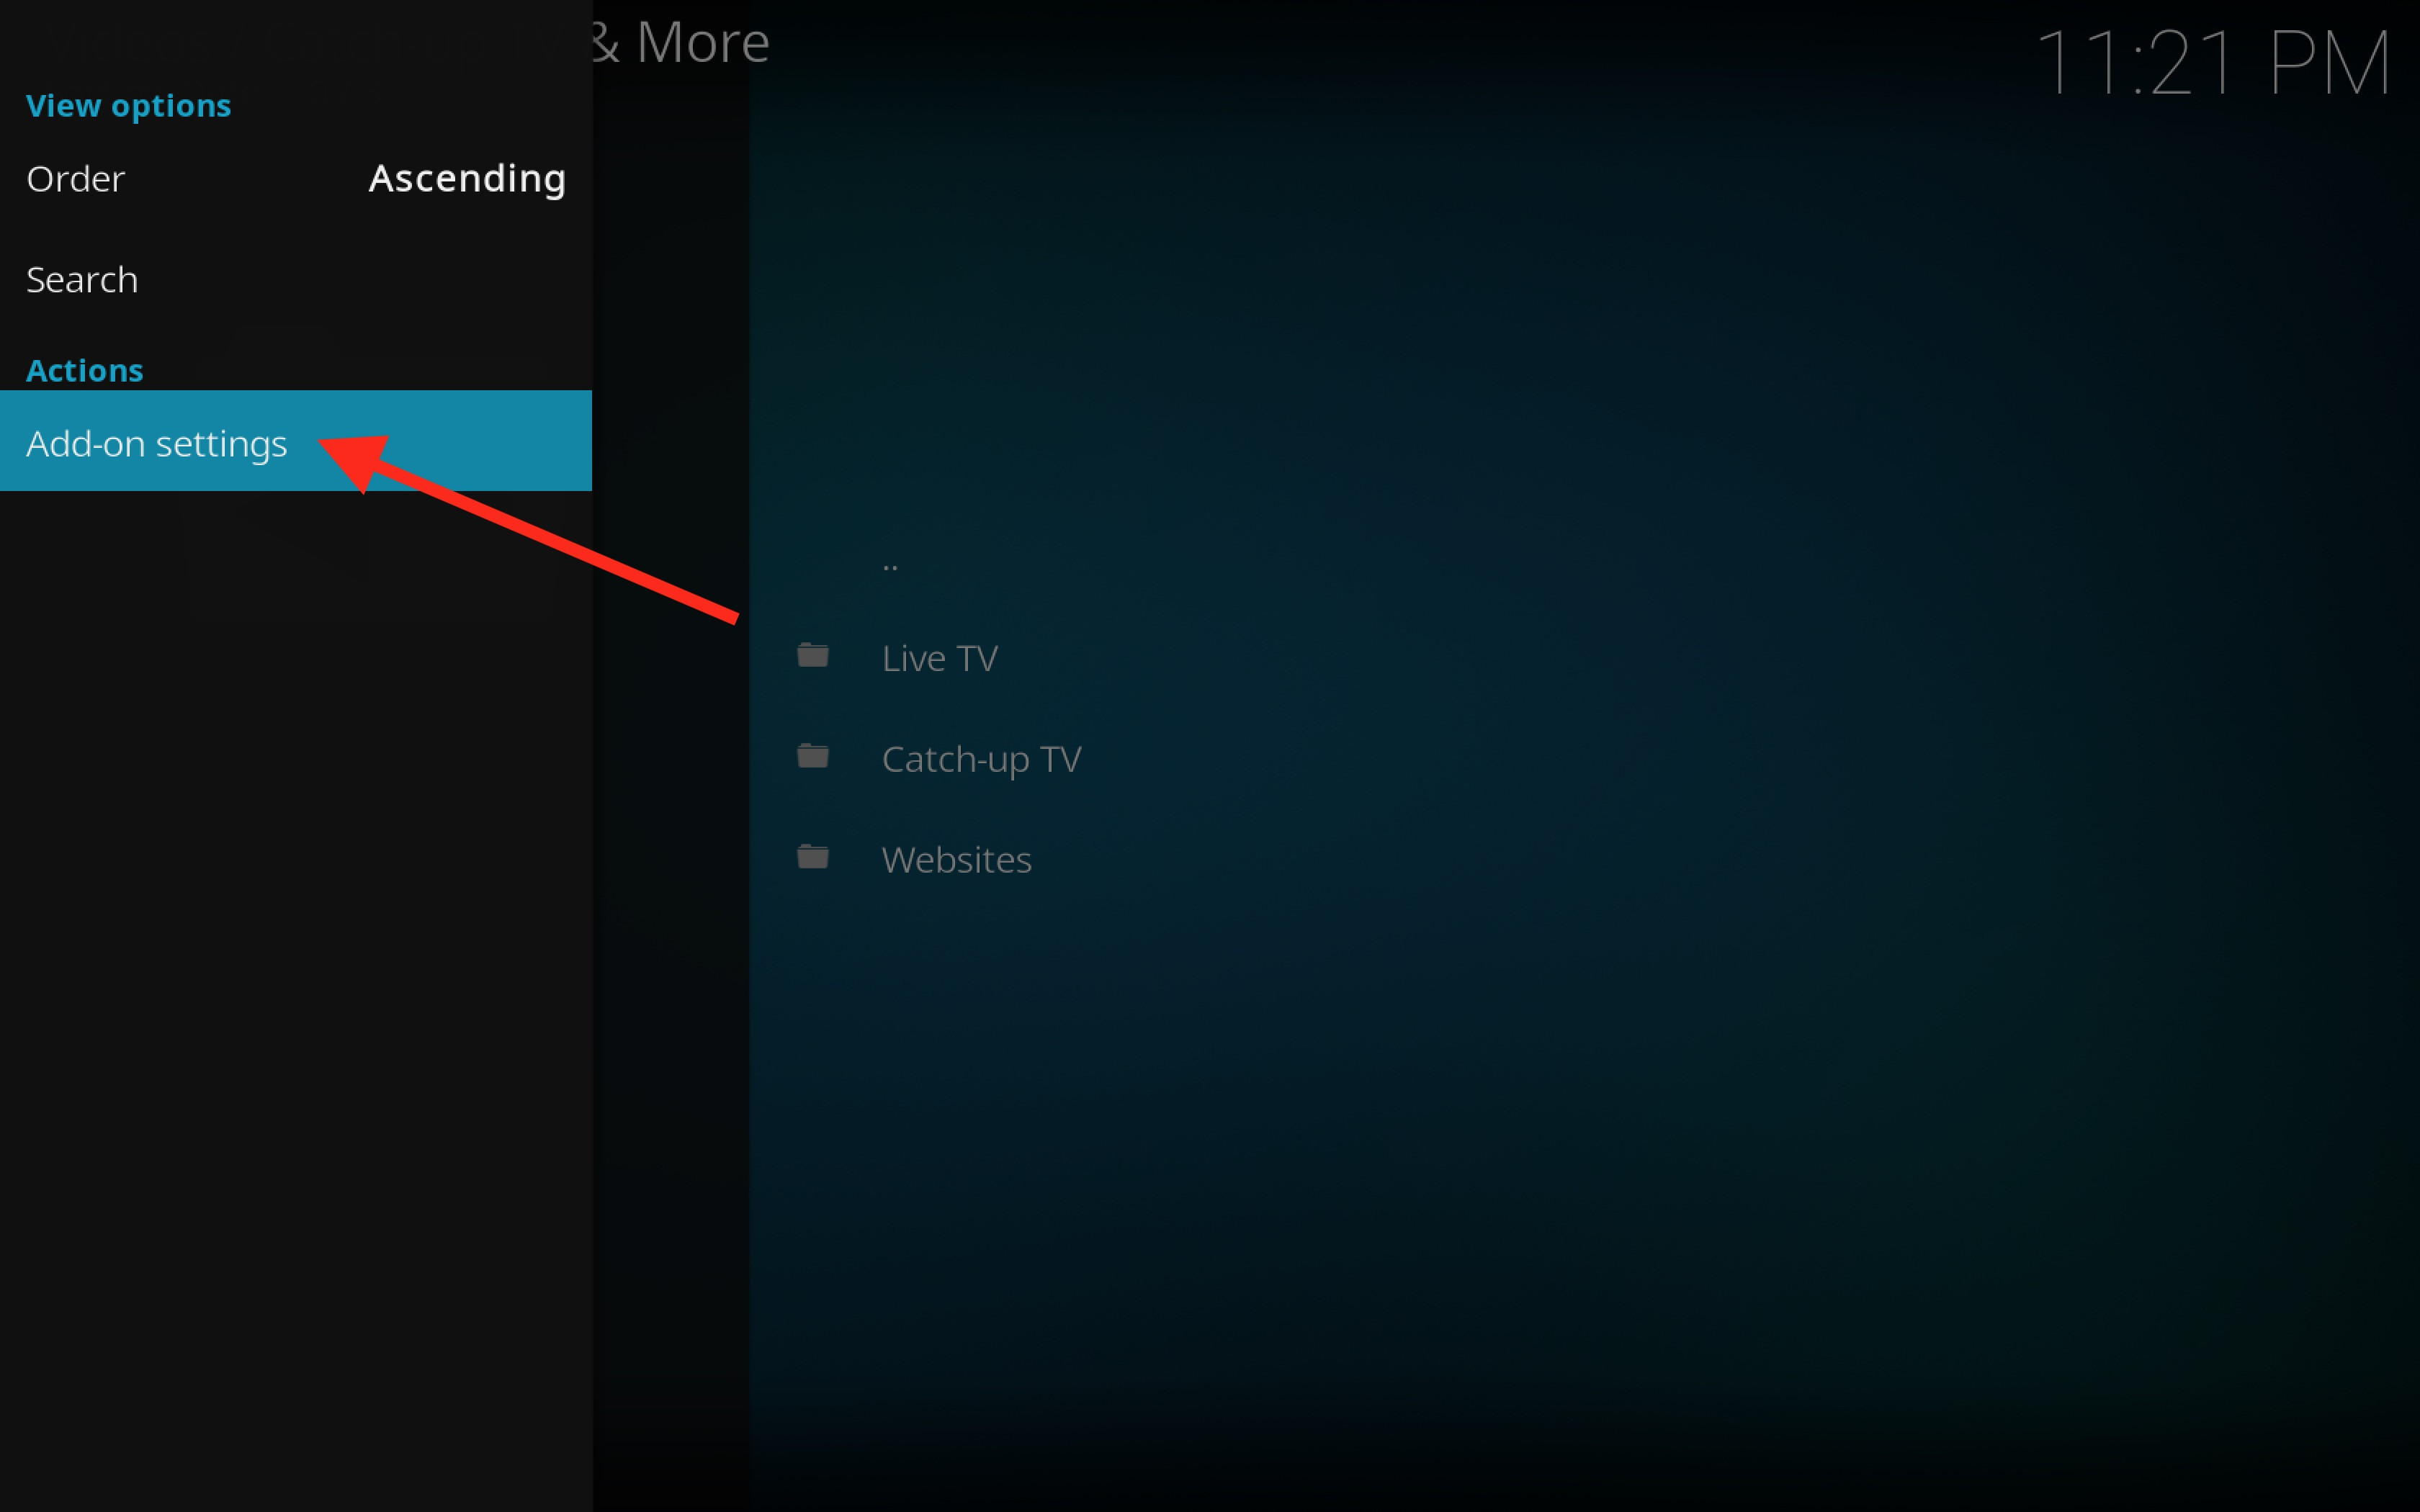
Access Settings: Press the left arrow on your keyboard or remote control to open the addon’s settings menu.
-
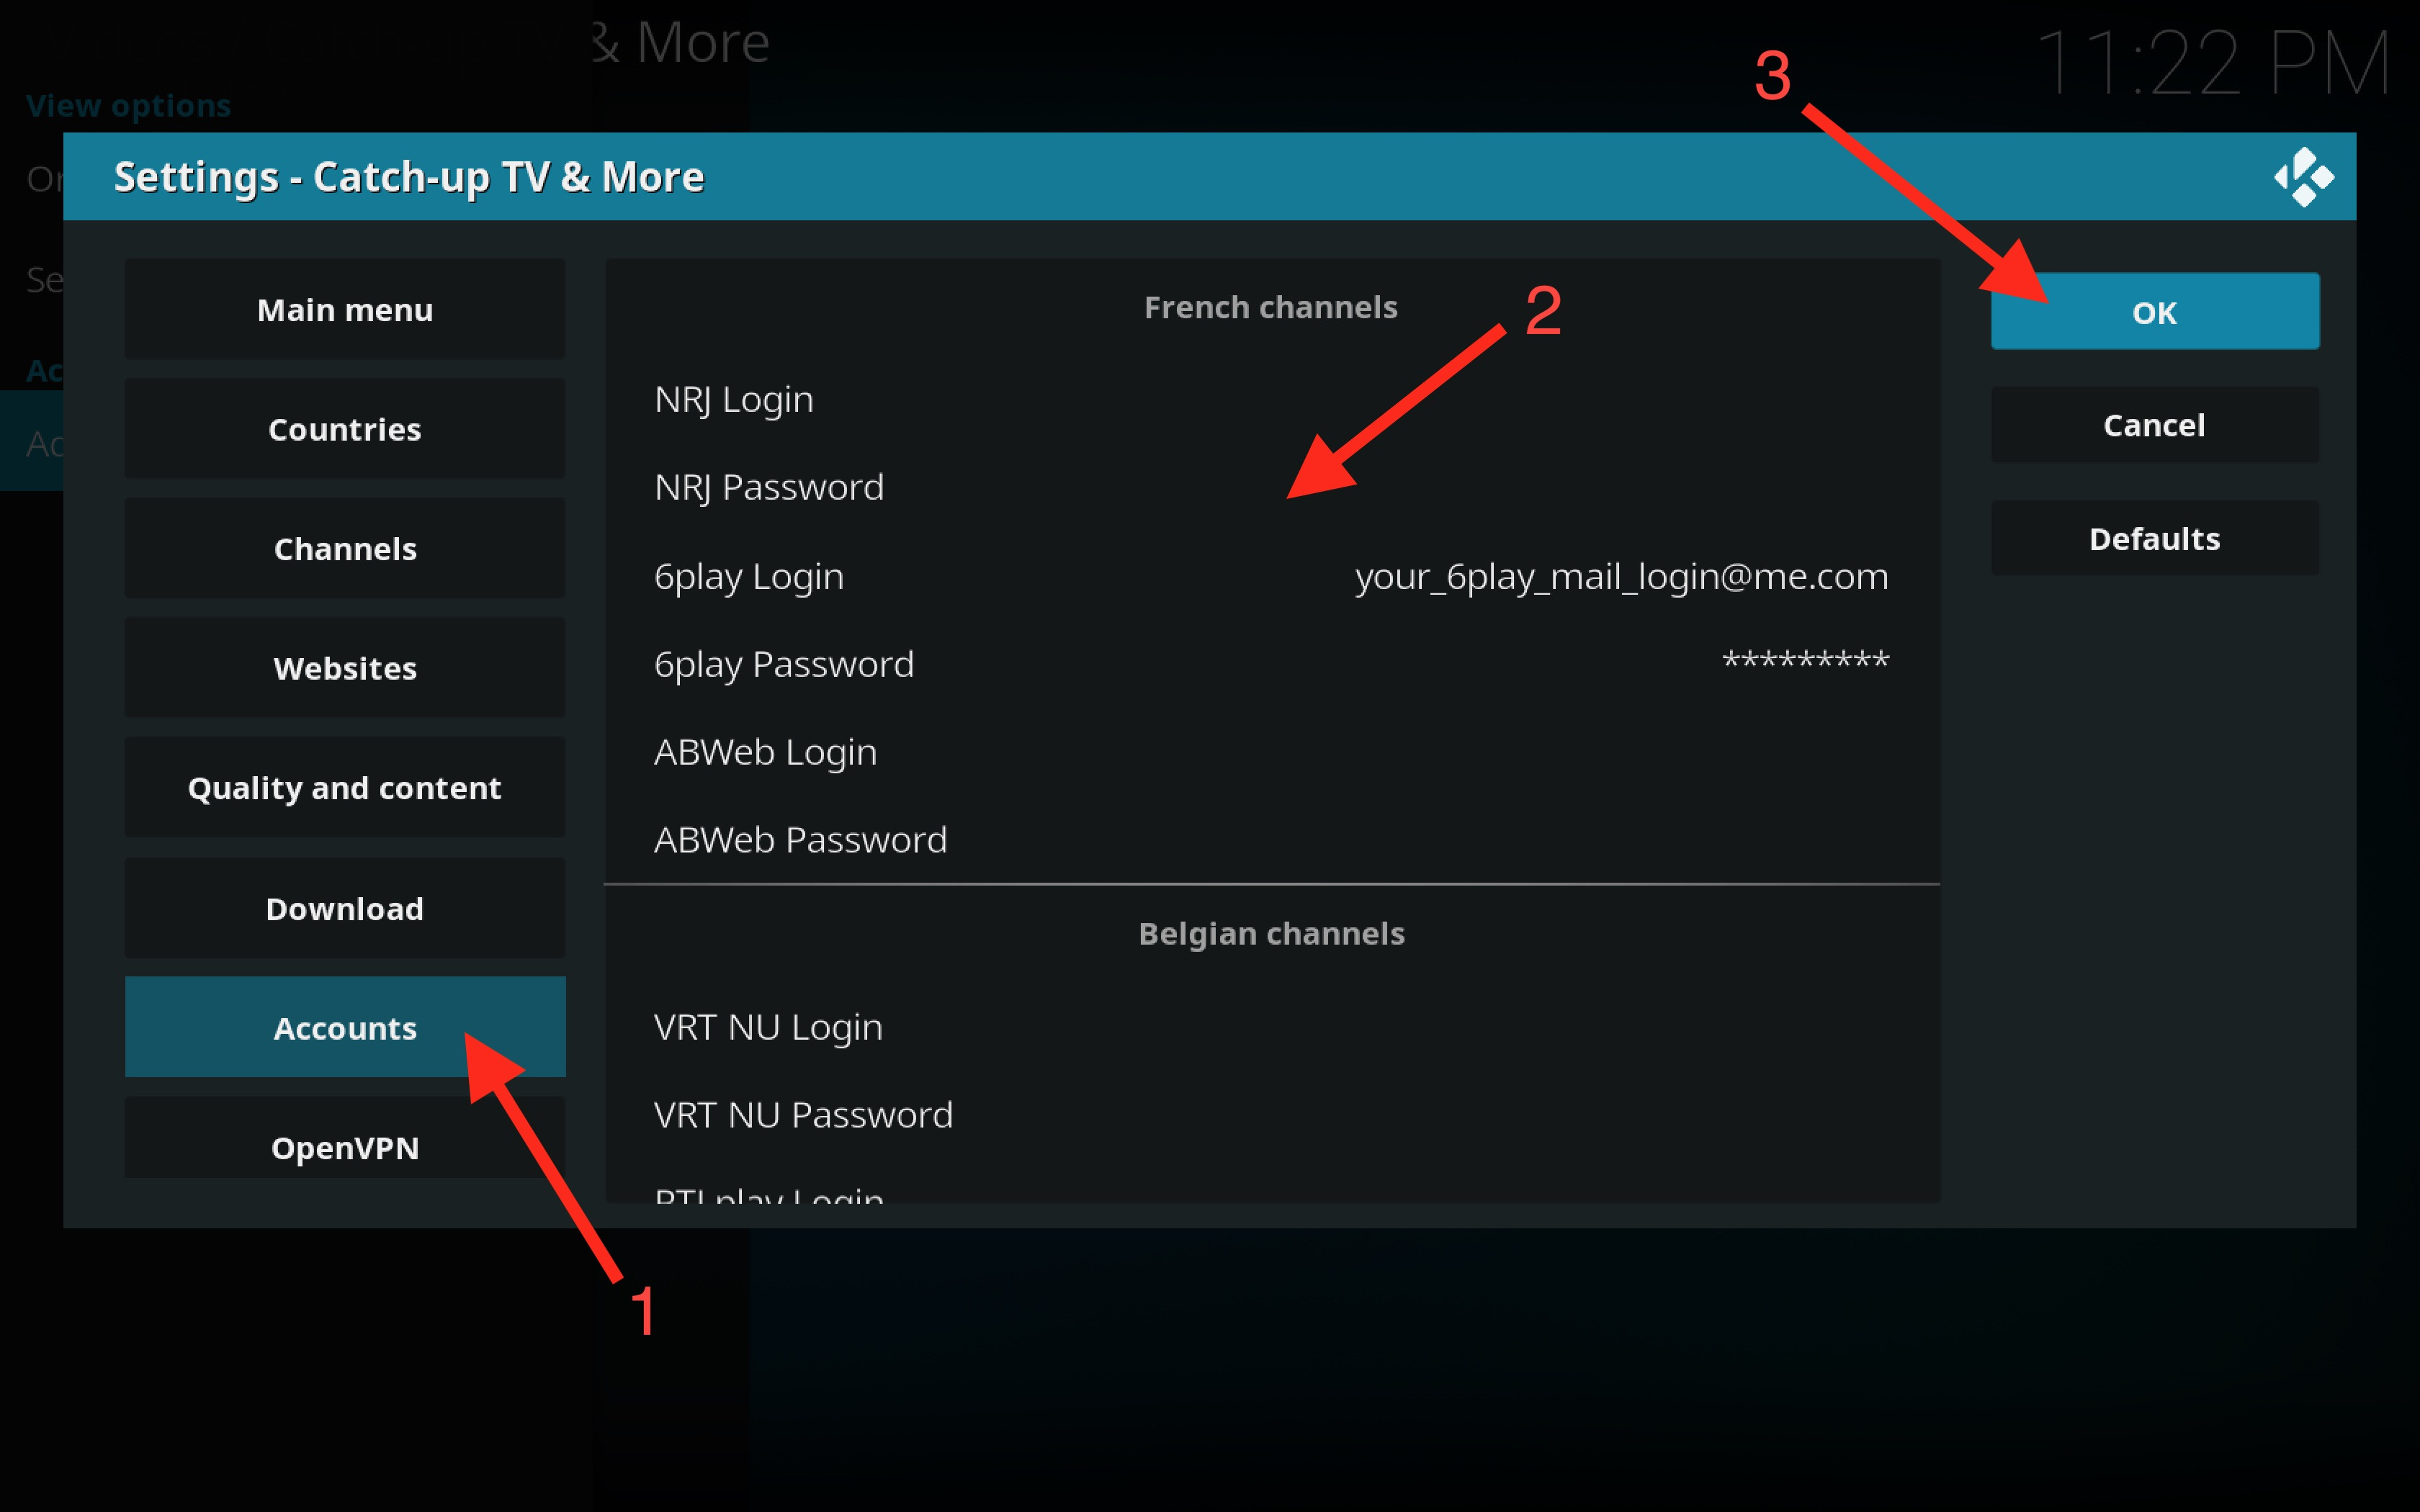
Go to Accounts Tab: Navigate to the “Accounts” tab.
-
Enter Credentials: Fill in your username and password for the channels you wish to access.
-
Save Settings: Click the “OK” button to save your settings.
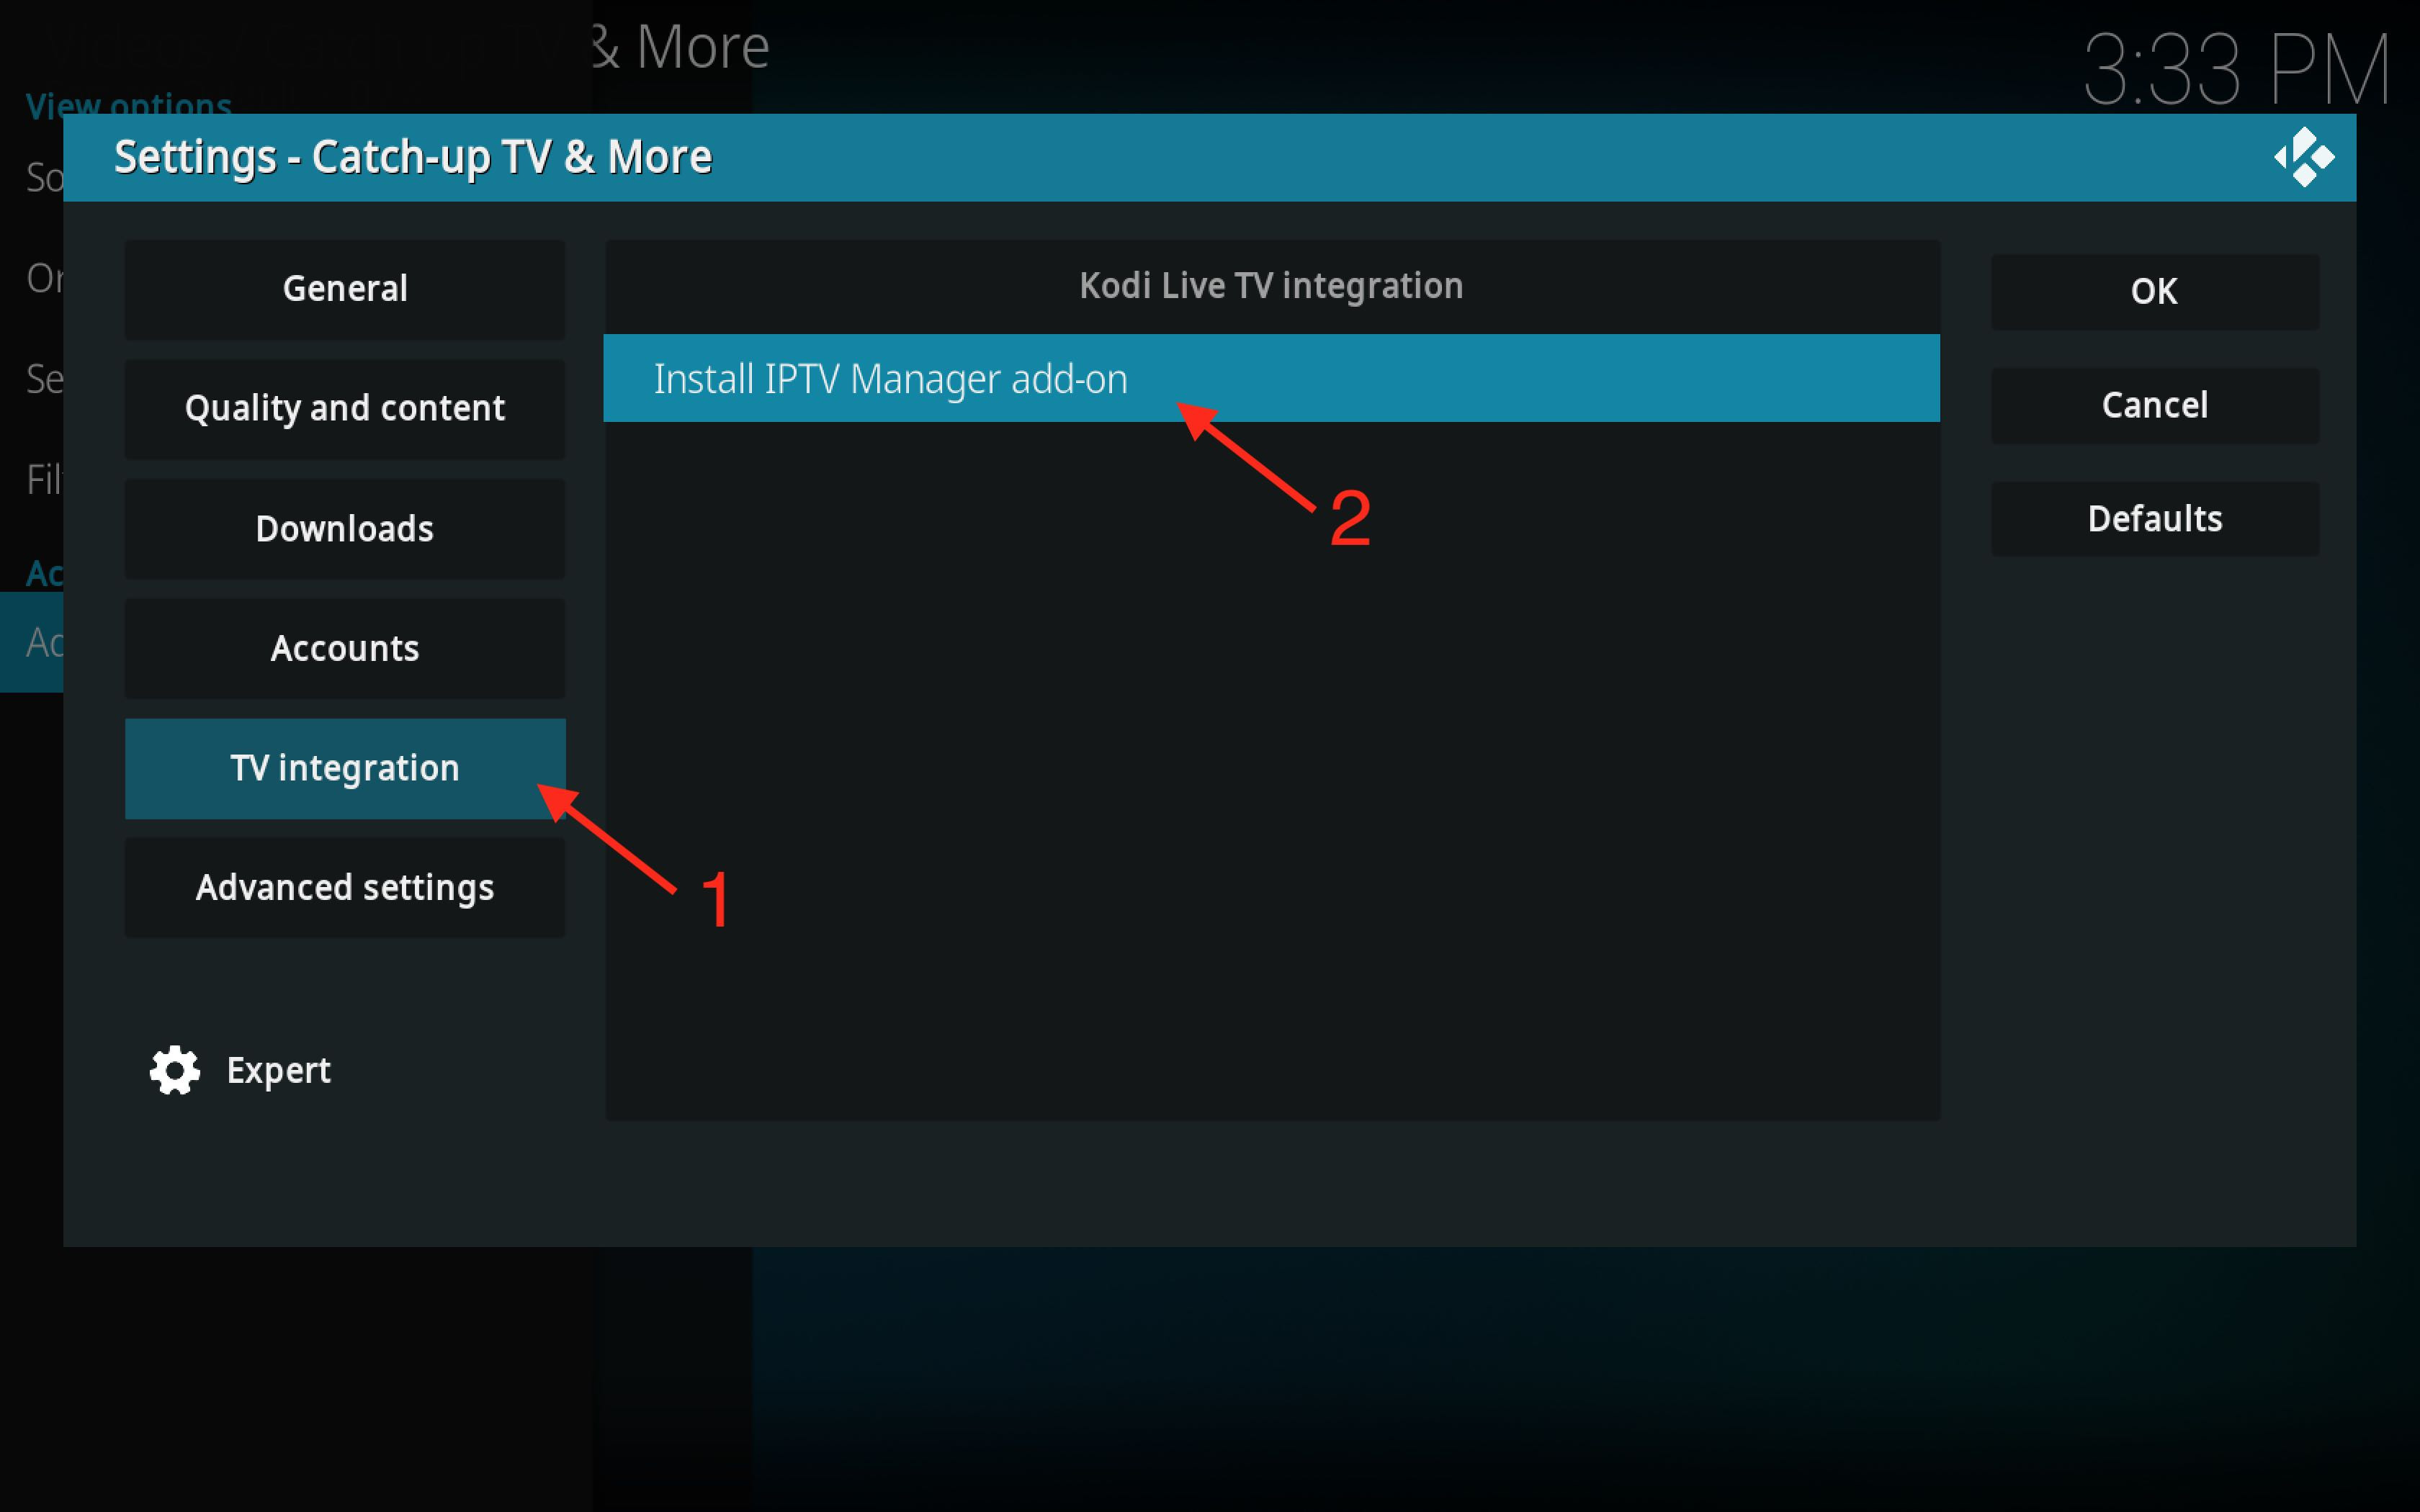
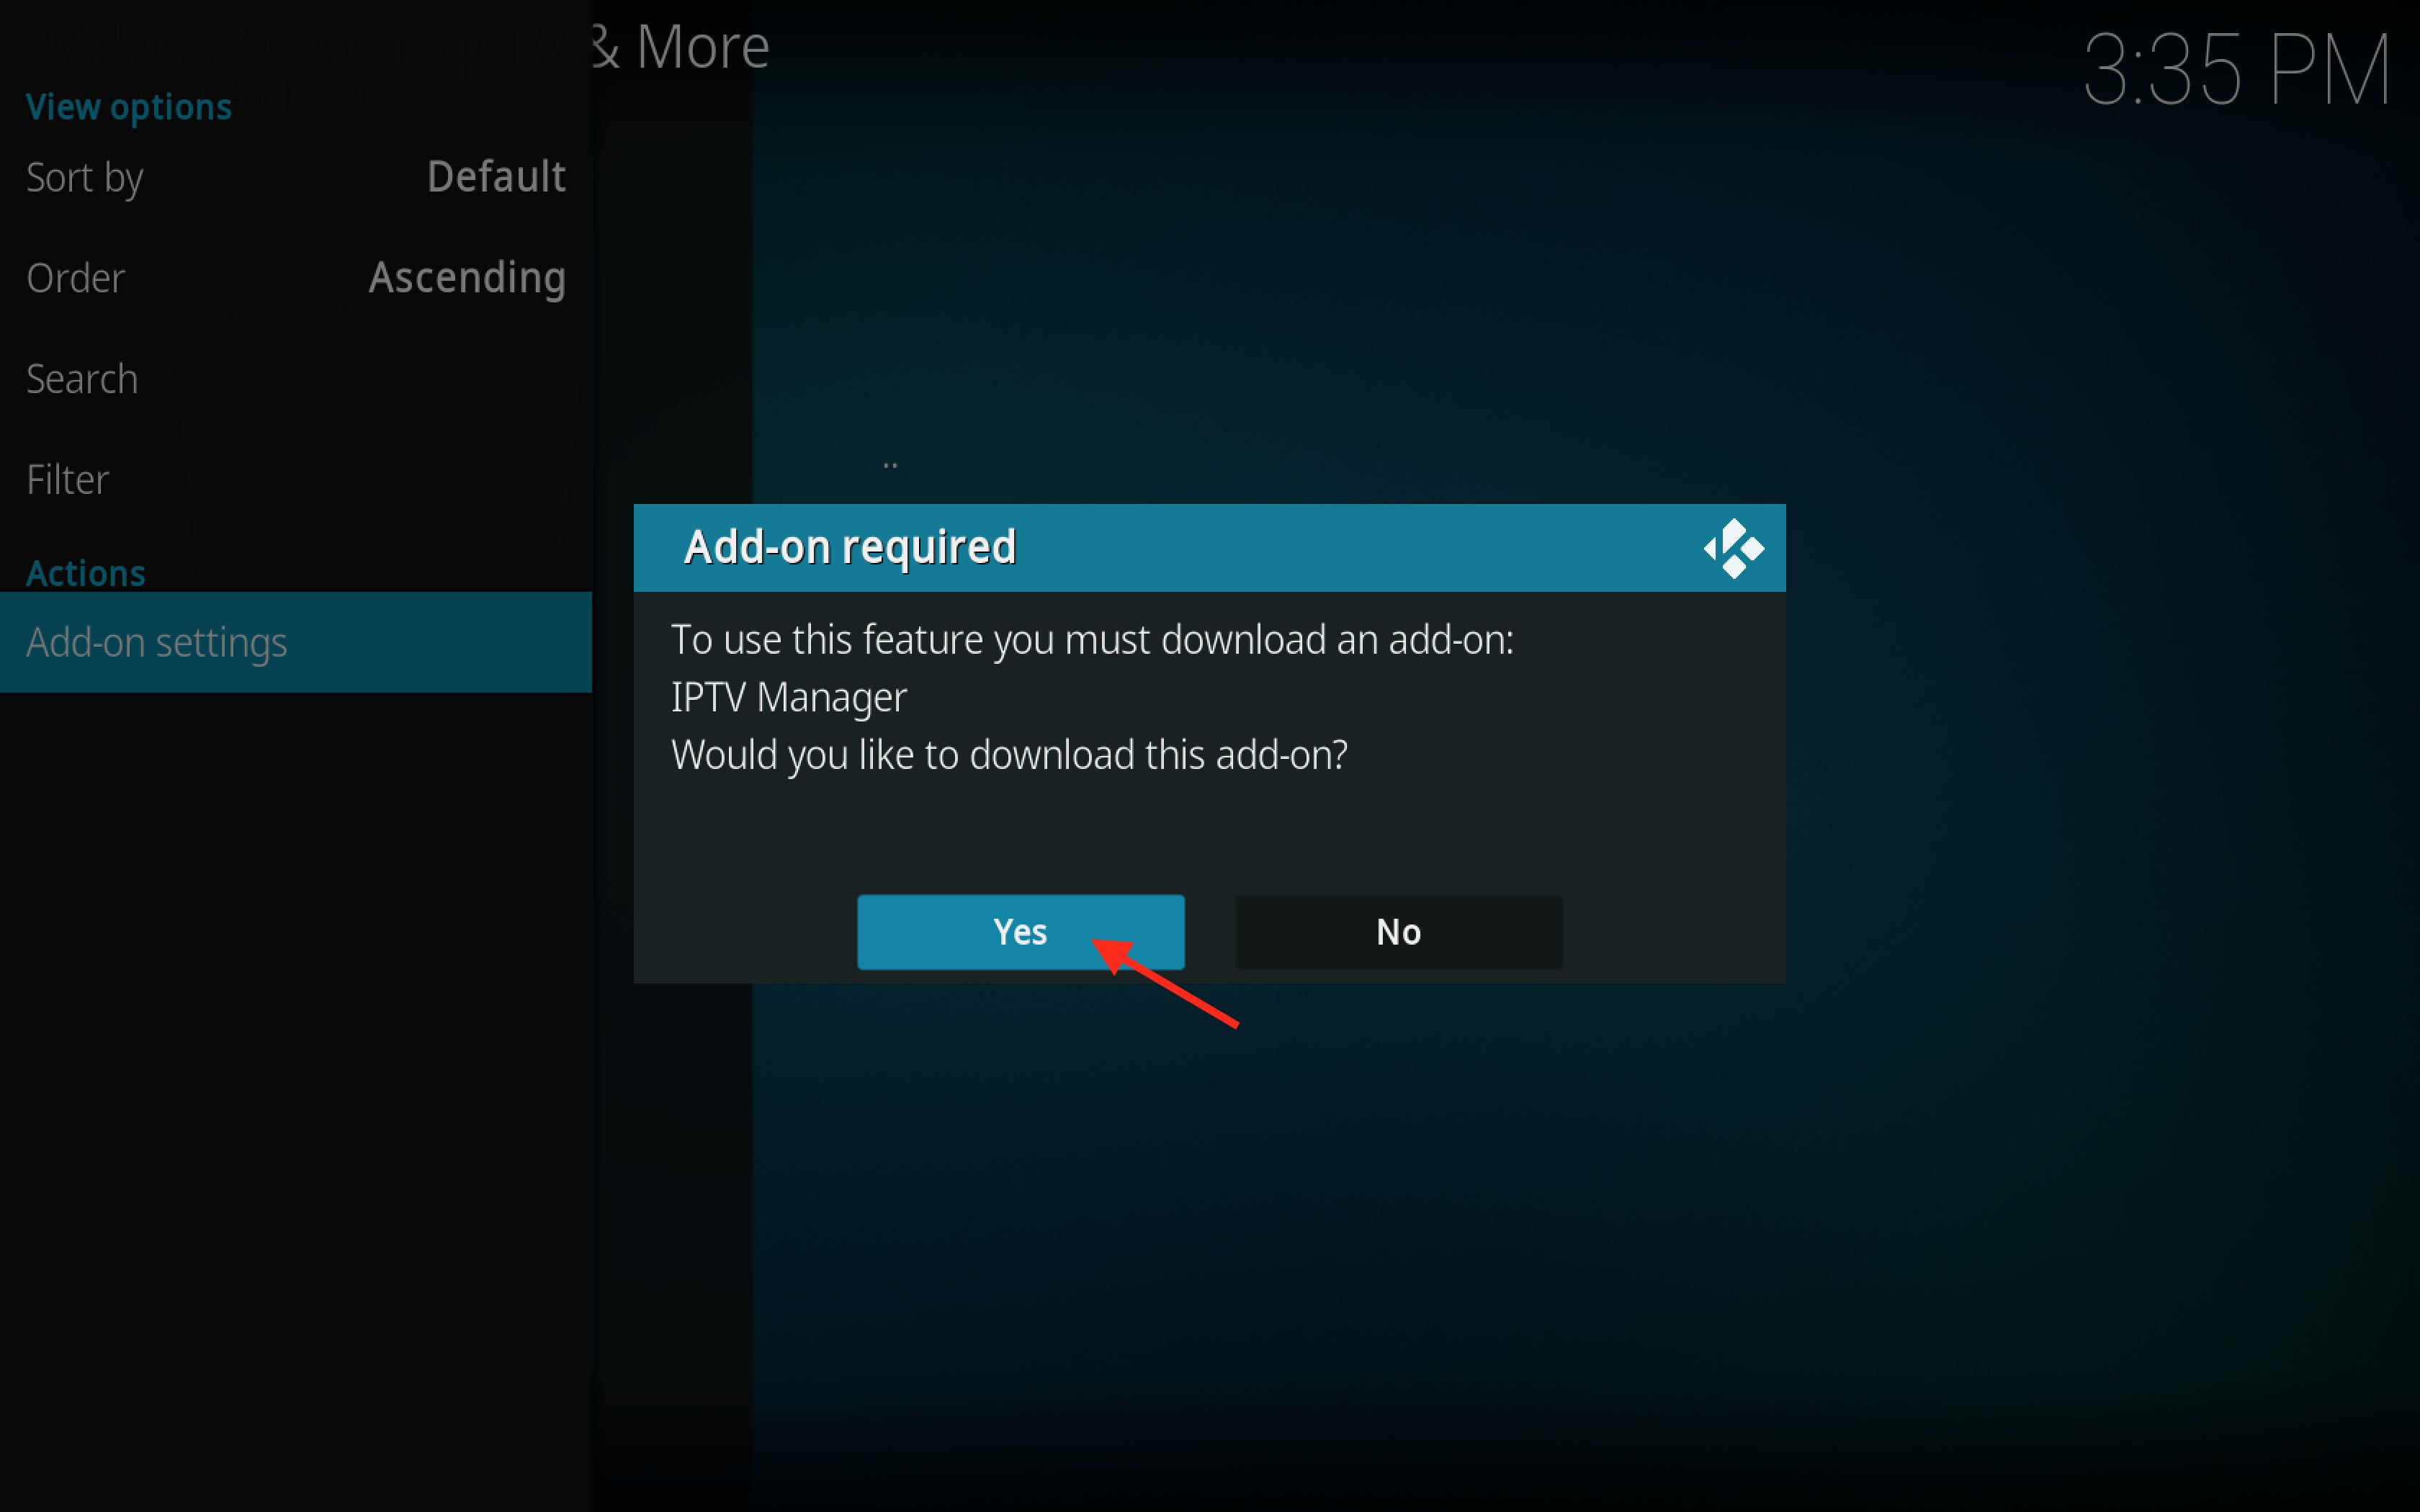
4. How Do I Install IPTV Manager?
IPTV Manager simplifies the integration of live TV channels within Kodi. Here’s how to install it:
-
Open Catch-up TV & More Settings: Go to the Catch-up TV & More settings as described above.
-
Navigate to TV Integration: Find the “TV Integration” section in the settings menu.
-
Install IPTV Manager Add-on: Choose the option “Install IPTV Manager add-on.”
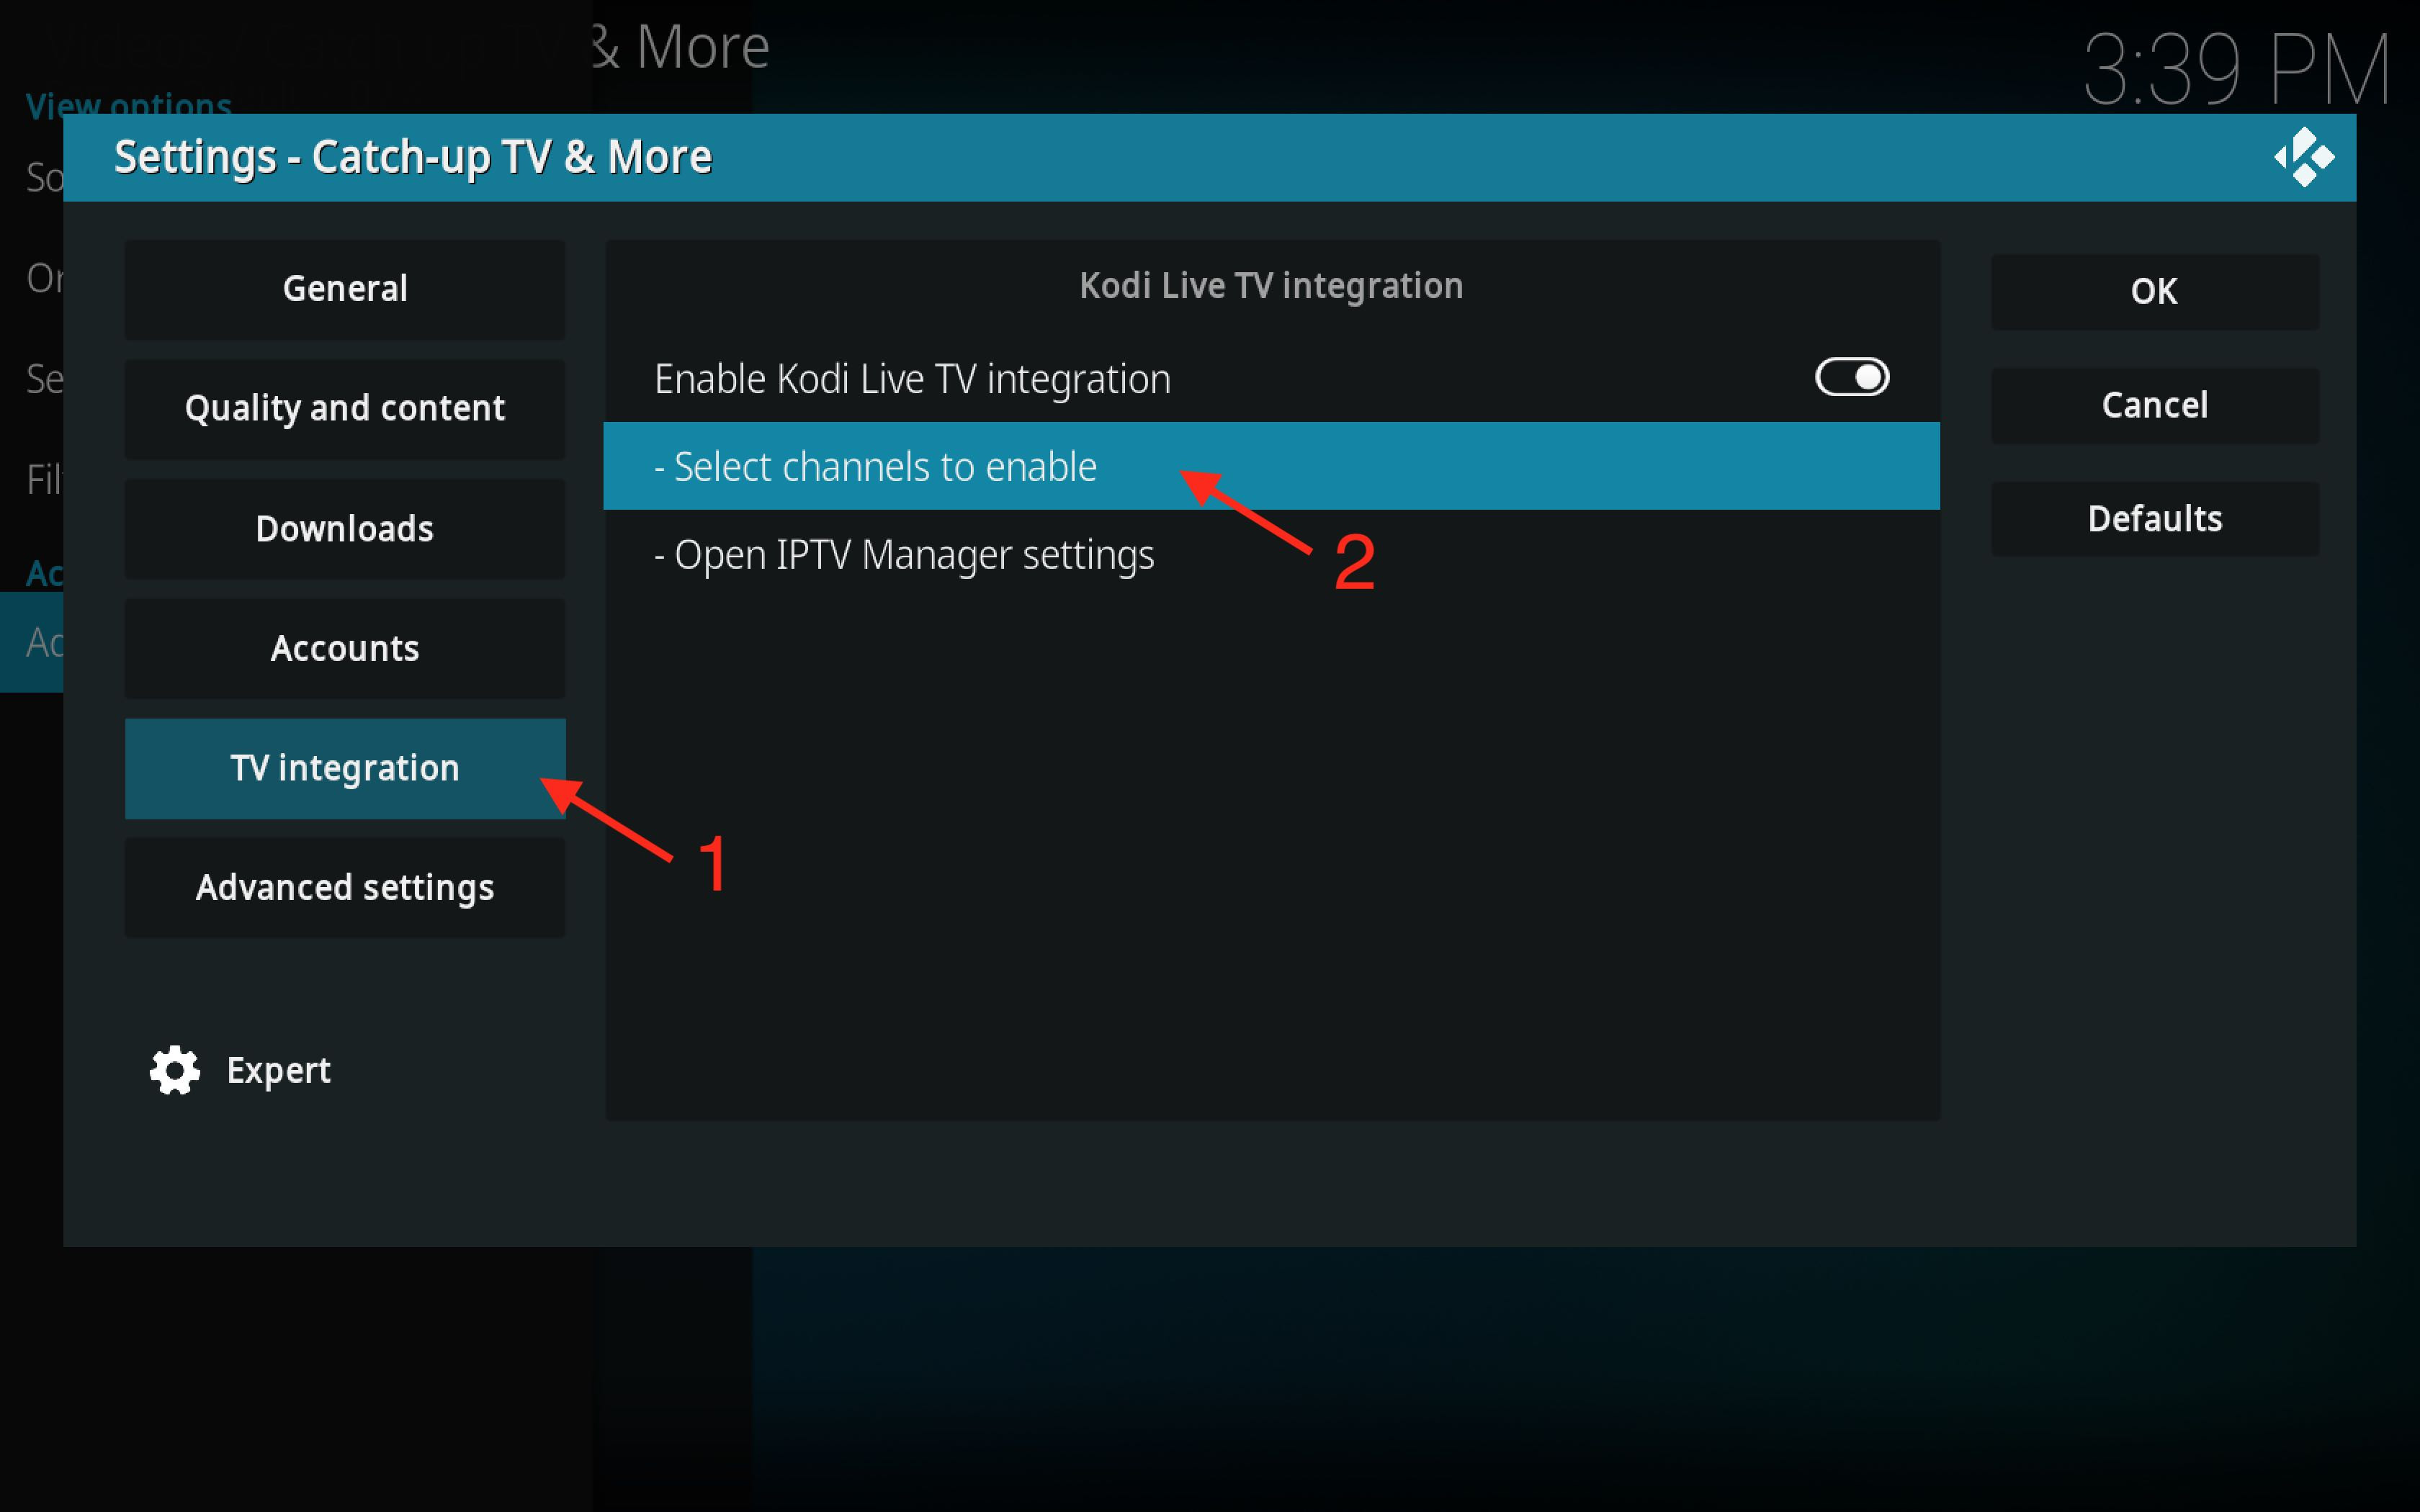
5. How Do I Enable Channels In IPTV Manager?
After installing IPTV Manager, you need to select the channels you want to appear in the Kodi TV section. Here’s how to enable channels:
-
Return to Catch-up TV & More Settings: Go back to the Catch-up TV & More settings menu.
-
Navigate to TV Integration: Find the “TV Integration” section again.
-
Select Channels to Enable: Choose “Select channels to enable.”
-
Choose Channels: Select the channels you want to include in your Kodi TV section.
-
Save Settings: Click the “OK” button to save your settings.
If your channels still don’t appear in the “TV” section of Kodi, you can try the following steps in the IPTV Manager settings:
- Configure IPTV Simple: Choose “IPTV Simple” -> “Configure IPTV Simple automatically…”
- Refresh Channels and Guide: Select “Channels” -> “Refresh channels and guide now…”
6. What Is PVR IPTV Simple And How Does It Enhance My Kodi Experience?
PVR IPTV Simple Client is a popular PVR (Personal Video Recorder) addon for Kodi that allows you to watch and record live TV. It supports various IPTV formats, including M3U playlists and XMLTV guides, making it an essential tool for managing your IPTV streams. By configuring PVR IPTV Simple, you can seamlessly integrate your live TV channels into Kodi’s interface, complete with an electronic program guide (EPG) for easy navigation.
The PVR IPTV Simple enhances your Kodi experience by providing a user-friendly way to access and manage live TV content, similar to traditional cable or satellite TV services. This integration simplifies your viewing experience, allowing you to switch between channels, browse the TV guide, and record your favorite shows directly from Kodi.
7. How Do I Install And Configure PVR IPTV Simple?
To install and configure PVR IPTV Simple, follow these steps:
- Navigate to Add-ons: From the Kodi home screen, go to “Add-ons.”
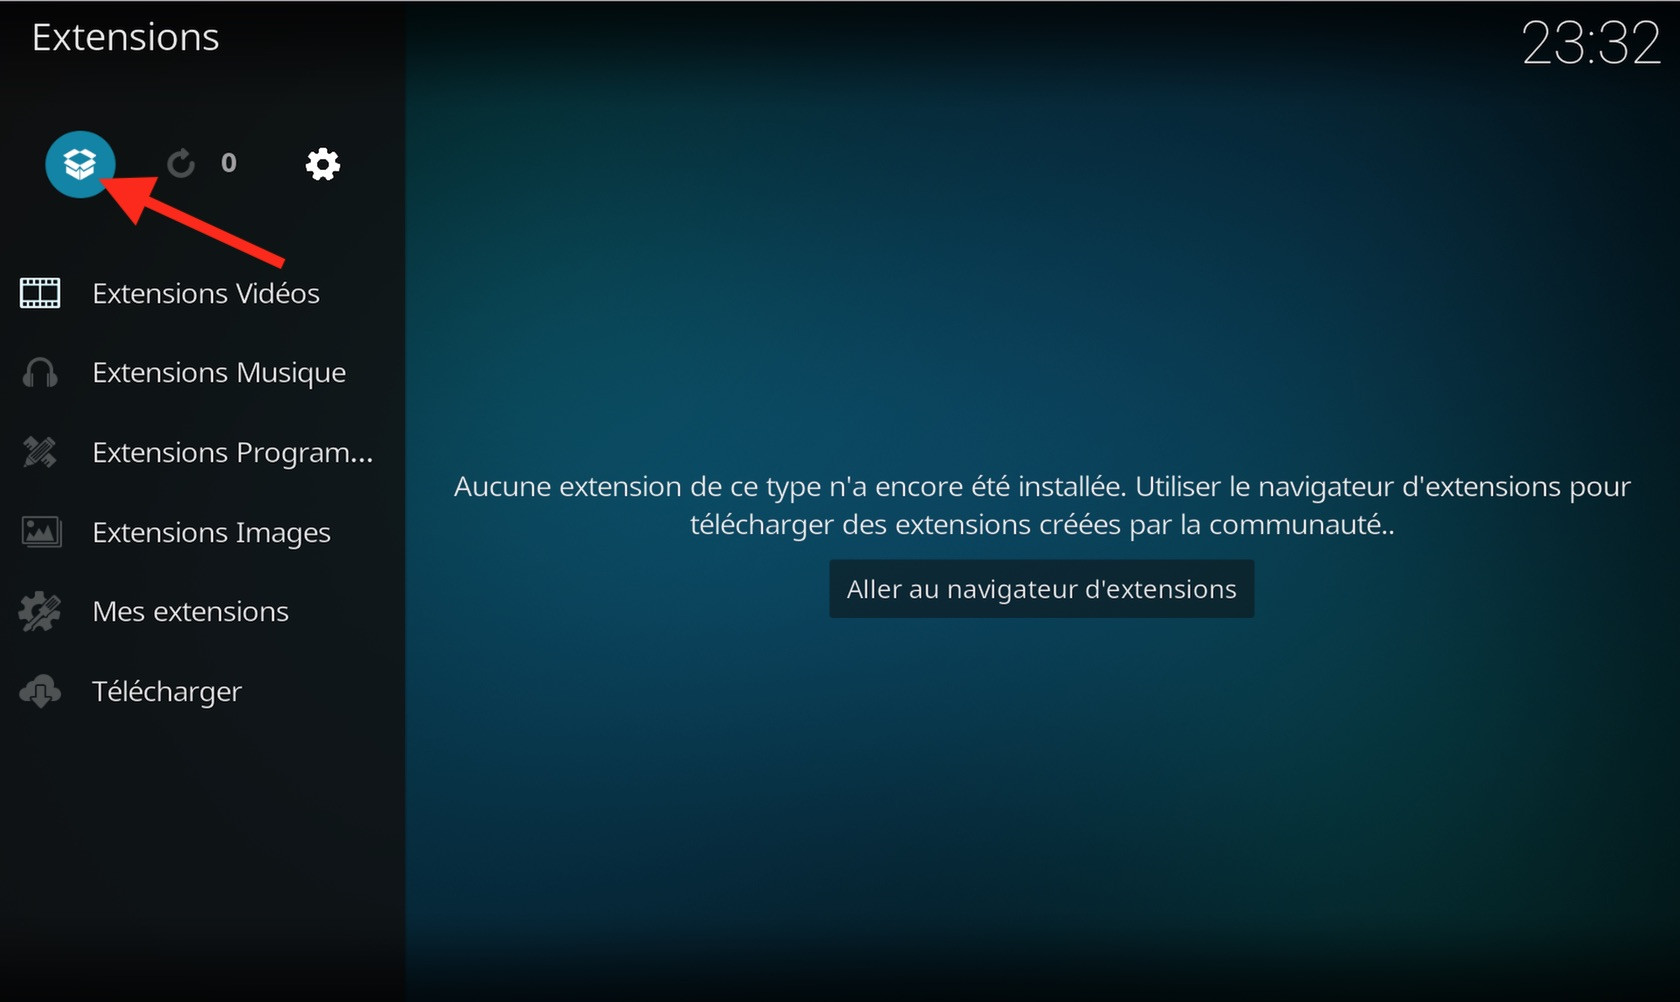
- Enter Add-on Browser: Click the package icon in the top-left corner to enter the Add-on browser.
- Install from Repository: Select “Install from repository.”
- Kodi Add-on Repository: Choose the “Kodi Add-on repository.”
- PVR Clients: Select “PVR clients.”
- PVR IPTV Simple Client: Find and select “PVR IPTV Simple Client.”
- Install: Click “Install.”
- Configure: After installation, click “Configure.”
- General Settings: In the “General” tab, set the “Location” to “Remote path (Internet address).”
- M3U Playlist URL: Enter the URL of your M3U playlist provided by your IPTV service.
- EPG Settings (Optional): If you have an XMLTV EPG URL, enter it in the “XMLTV URL” field.
- Logos (Optional): You can set the path to your channel logos if you have them.
- OK: Click “OK” to save your settings.
- Enable: Go back to the main menu, navigate to “TV,” and enable “Enable.” Kodi will then load the channels from your M3U playlist.
8. Can I Record Live TV Using IPTV Manager And Kodi?
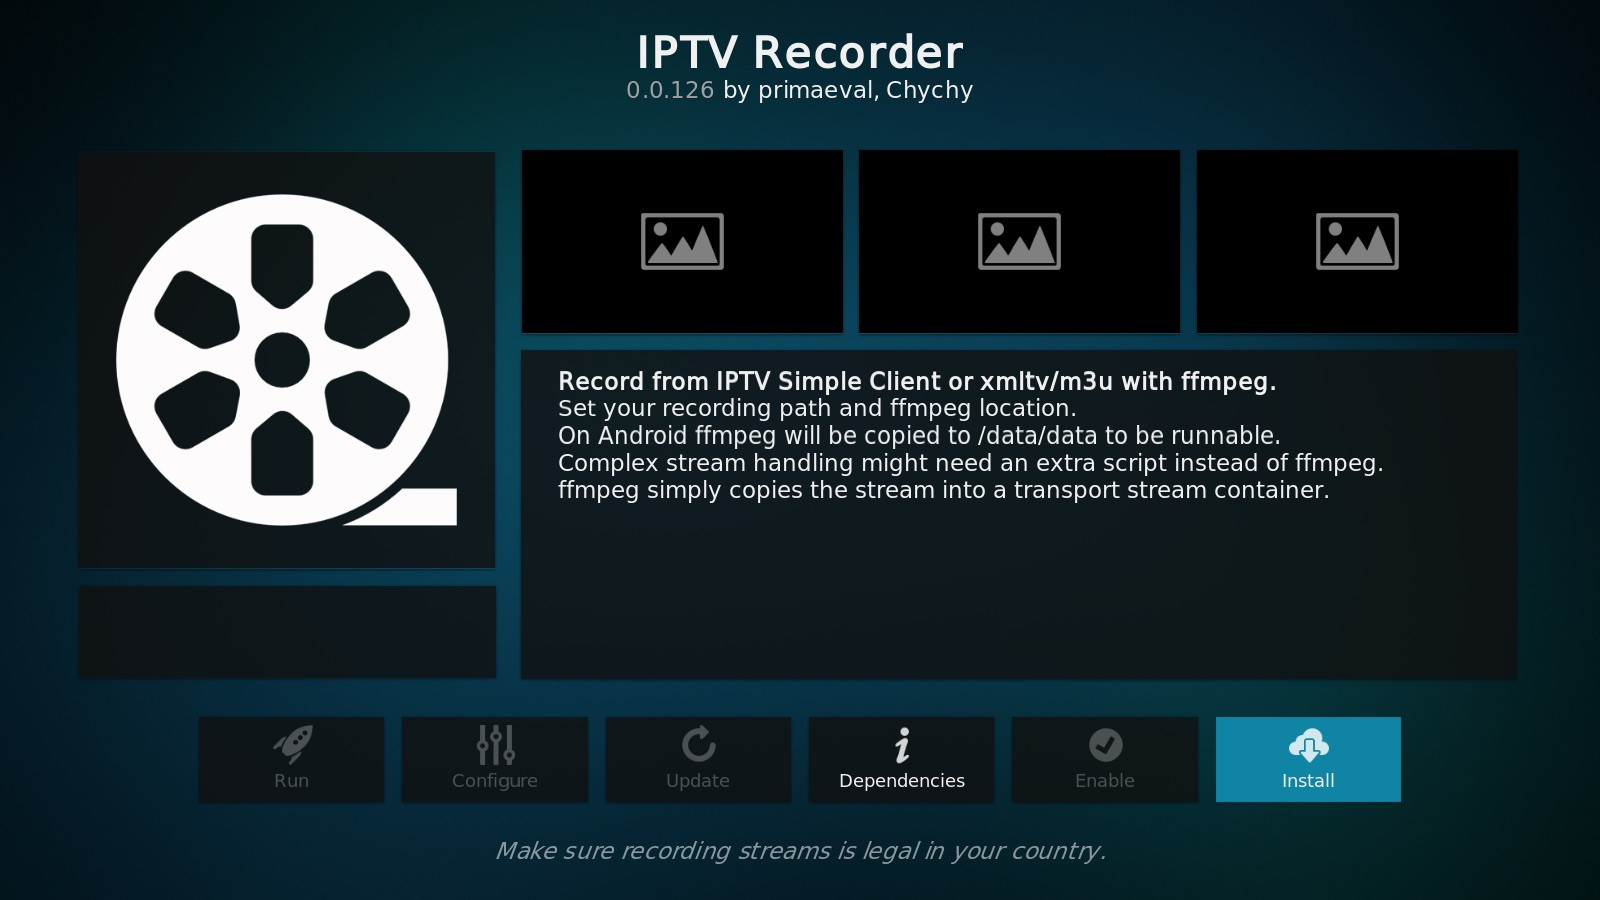
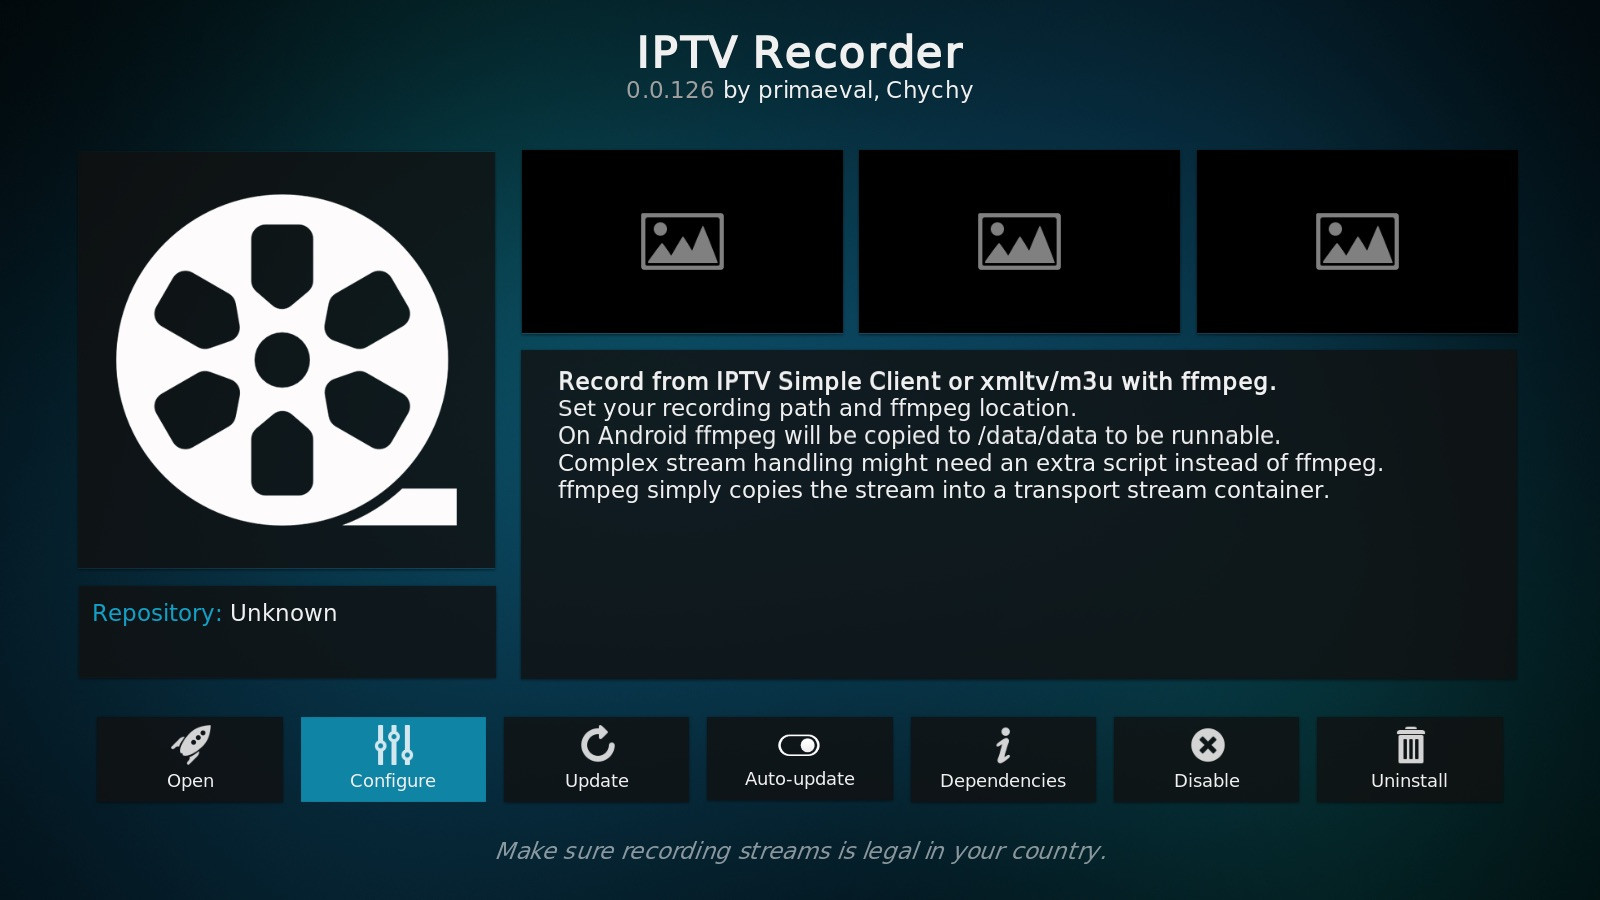
While PVR IPTV Simple doesn’t natively support recording live TV, you can add this functionality using the “IPTV Recorder” addon. This requires a bit more setup but allows you to record your favorite shows directly from Kodi.
IPTV Recorder lets you schedule and record live TV streams, providing a convenient way to capture content for later viewing. This addon requires FFMPEG to be installed on your system, which handles the actual recording process. Once configured, you can access a menu to select the program to record and manage your recordings through the IPTV Recorder interface.
9. What Are The Prerequisites For Recording Live TV With IPTV Recorder?
To record live TV with IPTV Recorder, you need the following:
-
FFMPEG Installed: FFMPEG must be installed on your operating system (Windows, Linux, Raspbian, etc.). This tutorial won’t cover FFMPEG installation, but you can easily find guides online.
-
M3U File Configured: The M3U file from Catch-up TV & More must be configured in PVR IPTV Simple.
According to research from the University of Southern California School of Cinematic Arts, in November 2024, 70% of Kodi users are trying to record or stream simultaneously.
10. What Are The Limitations Of Using IPTV Recorder?
IPTV Recorder has a few limitations:
- No Standby Block or Wake-Up: It doesn’t block Kodi from entering standby mode during recording or wake it up when a recording is scheduled to start.
- Android Deployment Issues: Deploying FFMPEG on Android can be difficult, as it’s not available by default on the Play Store.
- DRM Protected Content: IPTV Recorder cannot record live TV protected by DRM (Digital Rights Management). Attempting to do so may cause Kodi to freeze.
11. How Do I Install IPTV Recorder?
Here’s how to install the IPTV Recorder addon:
-
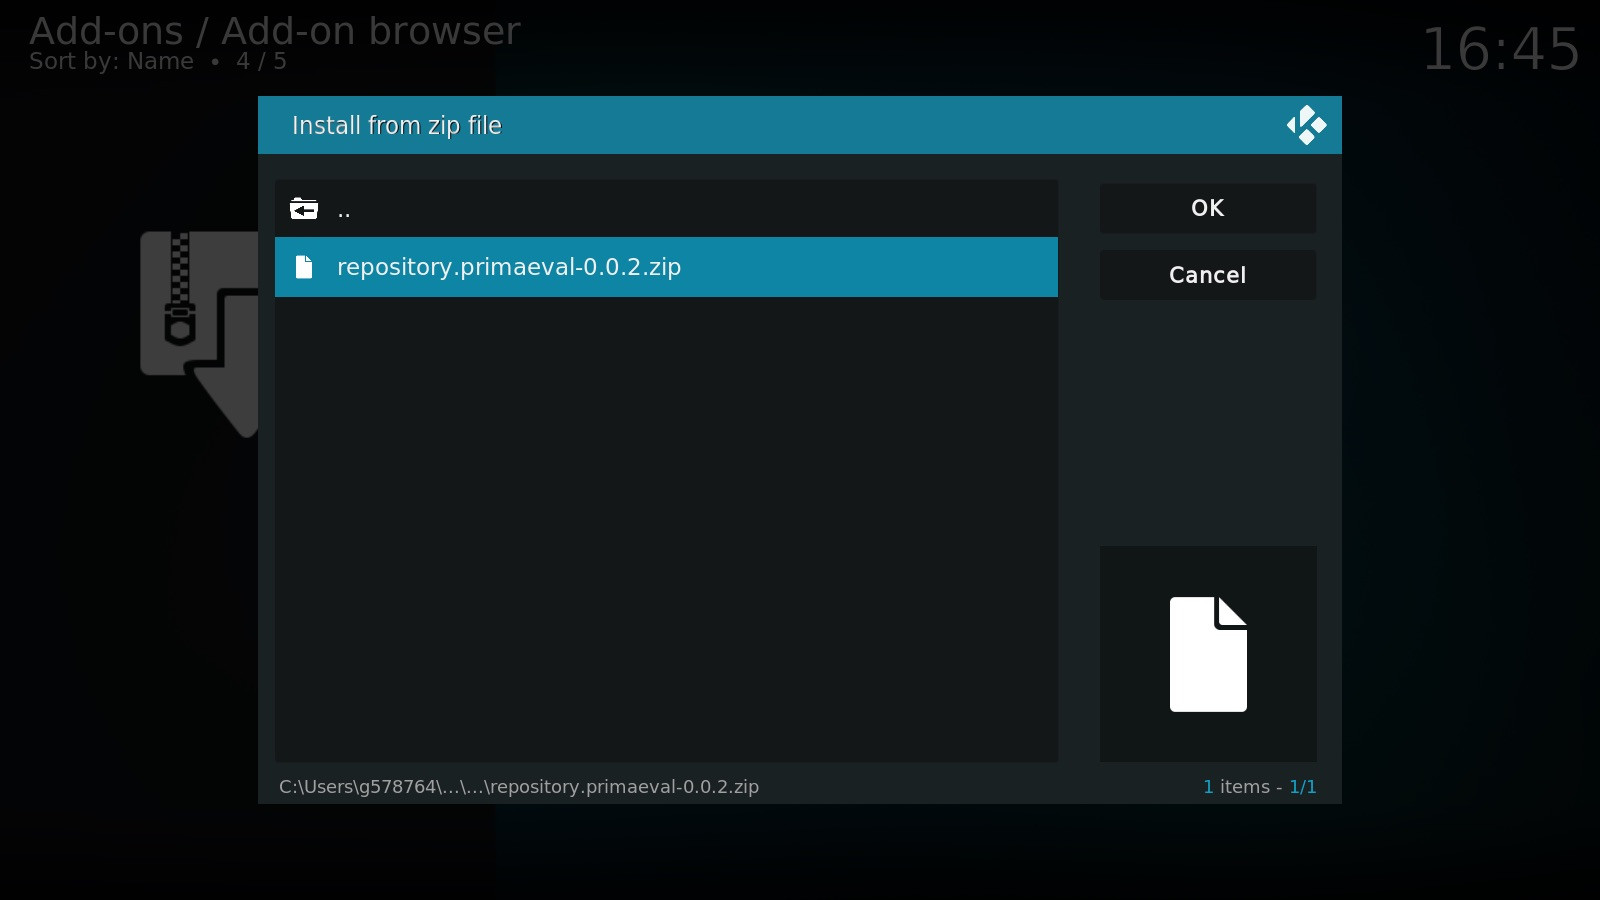
Download Repository: Download the repository zip file (
repository.primaeval-0.0.2.zip) from https://github.com/primaeval/repository.primaeval/raw/master/zips/repository.primaeval/repository.primaeval-0.0.2.zip. -
Install from Zip File: In Kodi, go to “Add-ons,” click the package icon, and choose “Install from zip file.”
-
Navigate to Zip File: Go to the directory where you stored the zip file.
-
Install Repository: Click “OK” to install the repository.
-
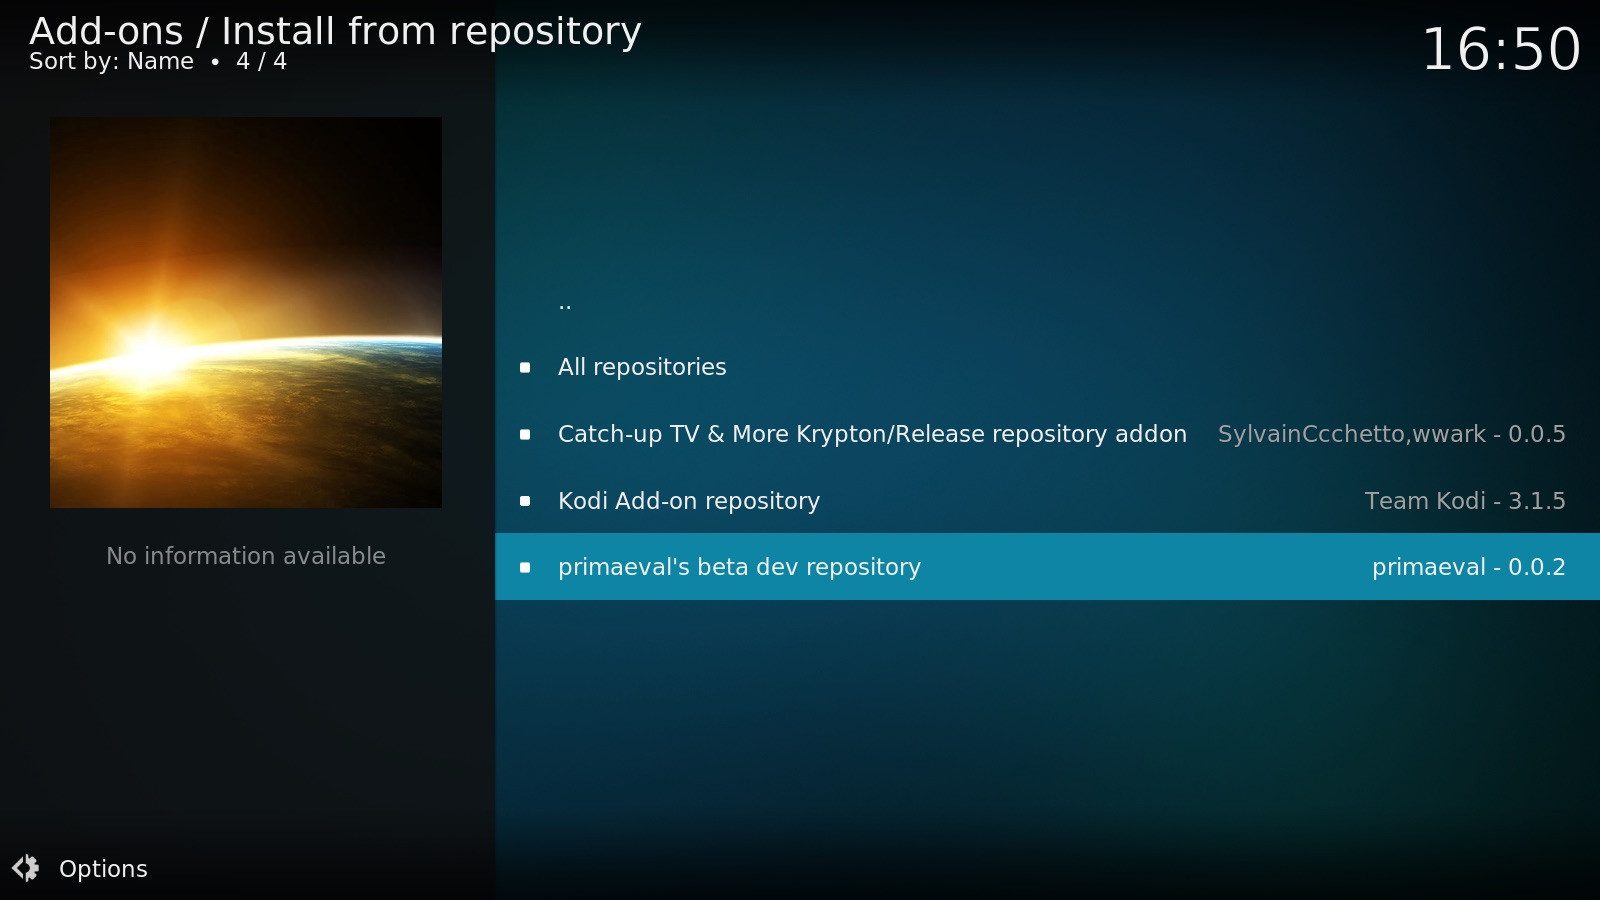
Install from Repository: Select “Install from repository.”
-
Primaeval Repository: Choose the “Primaeval Repository.”
-
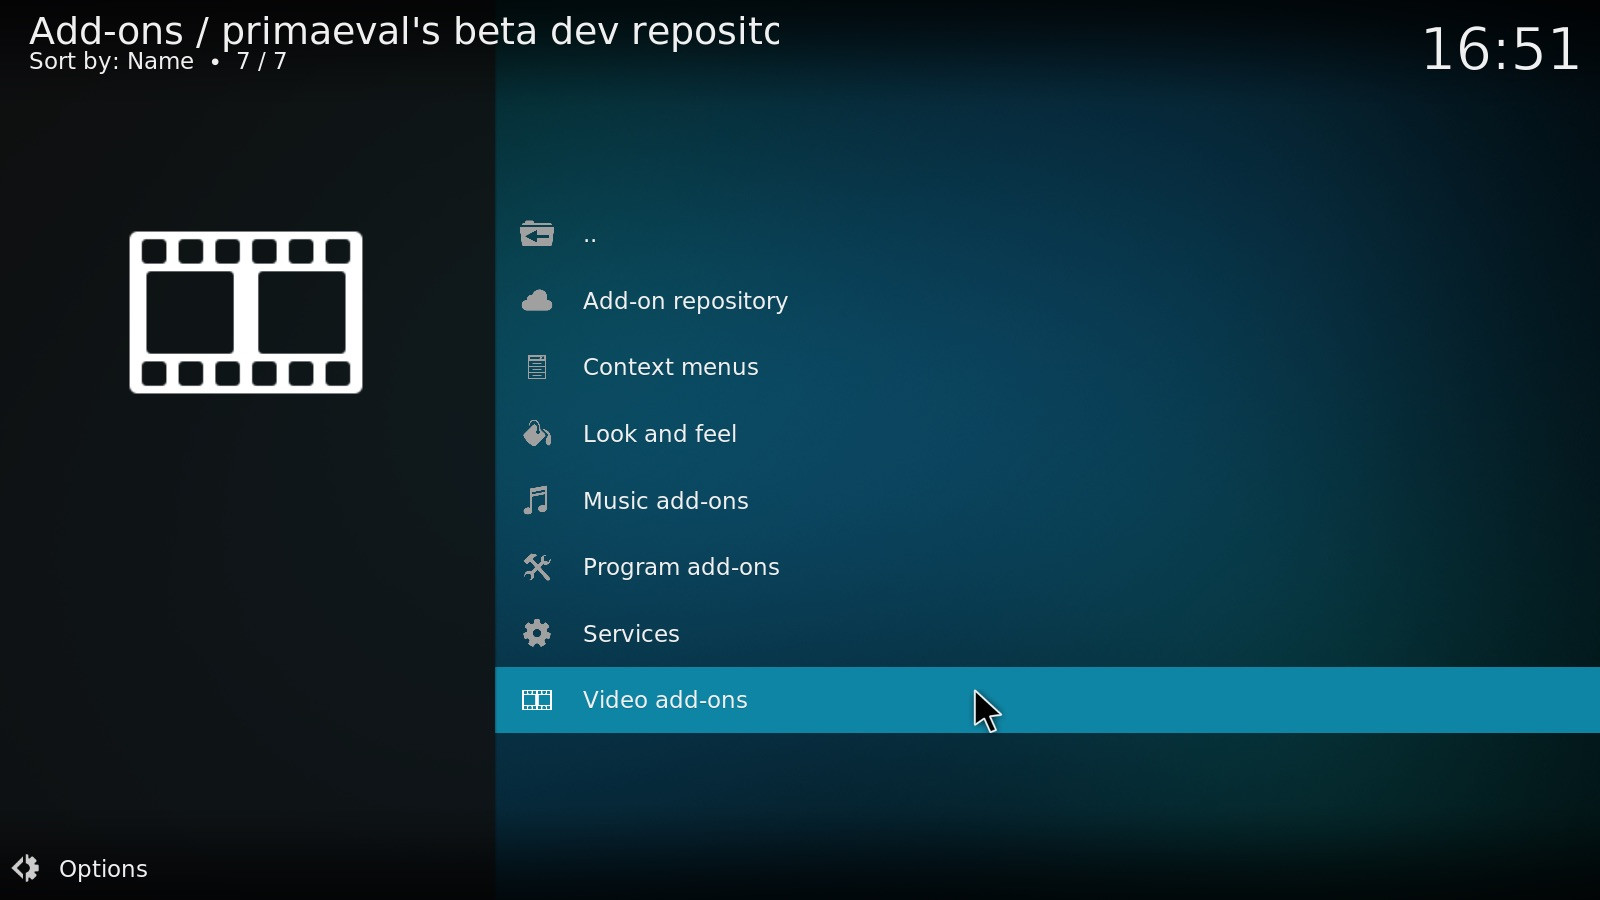
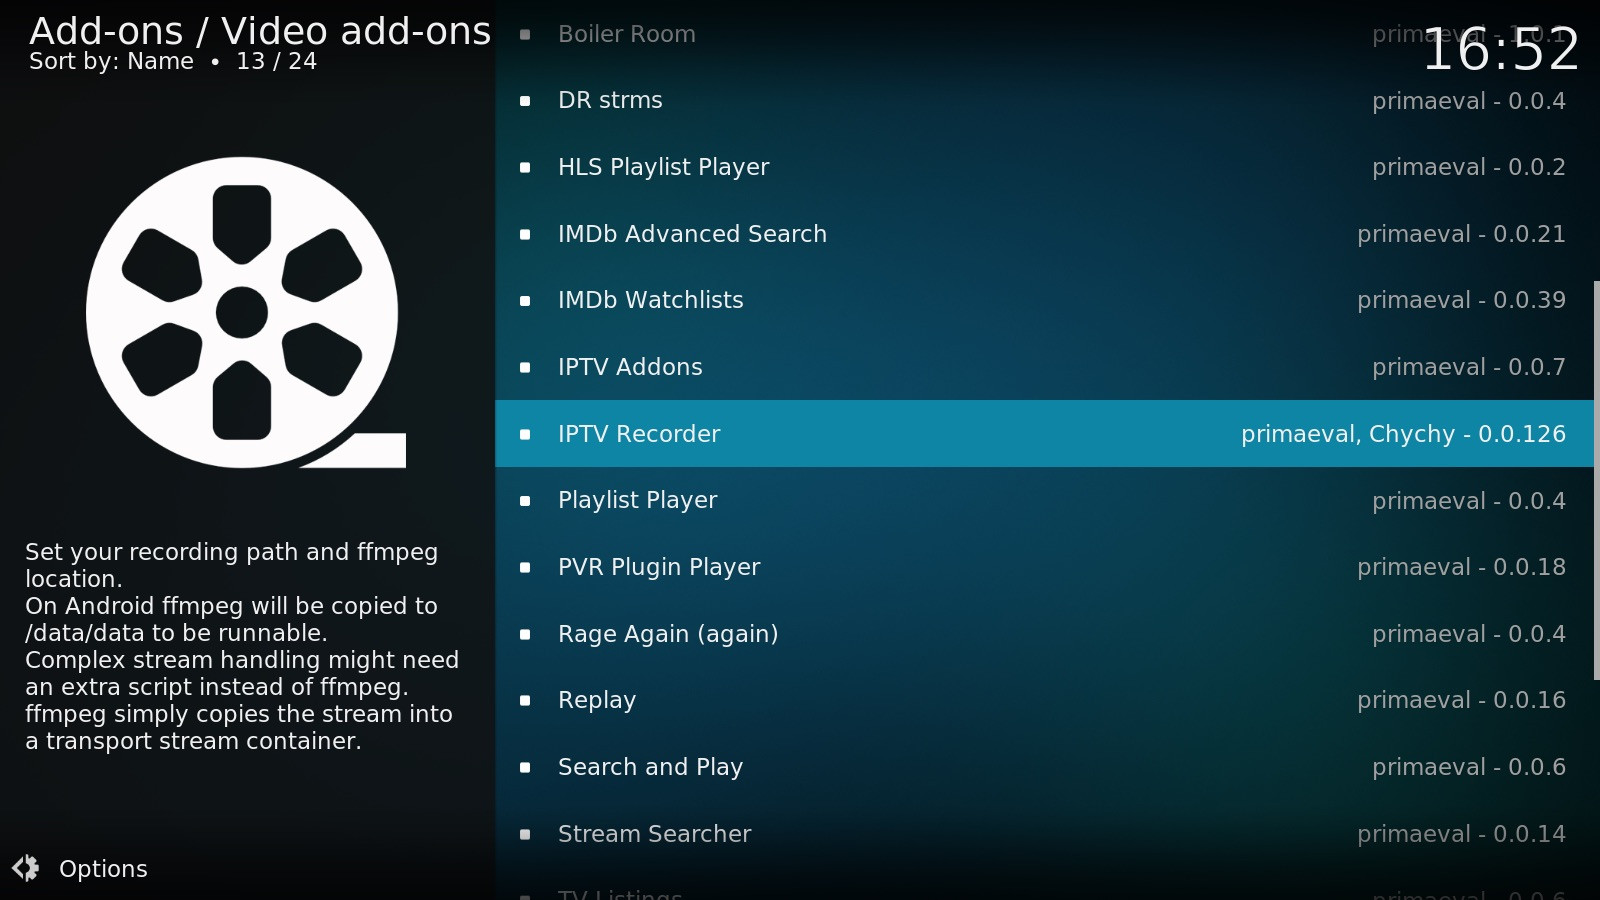
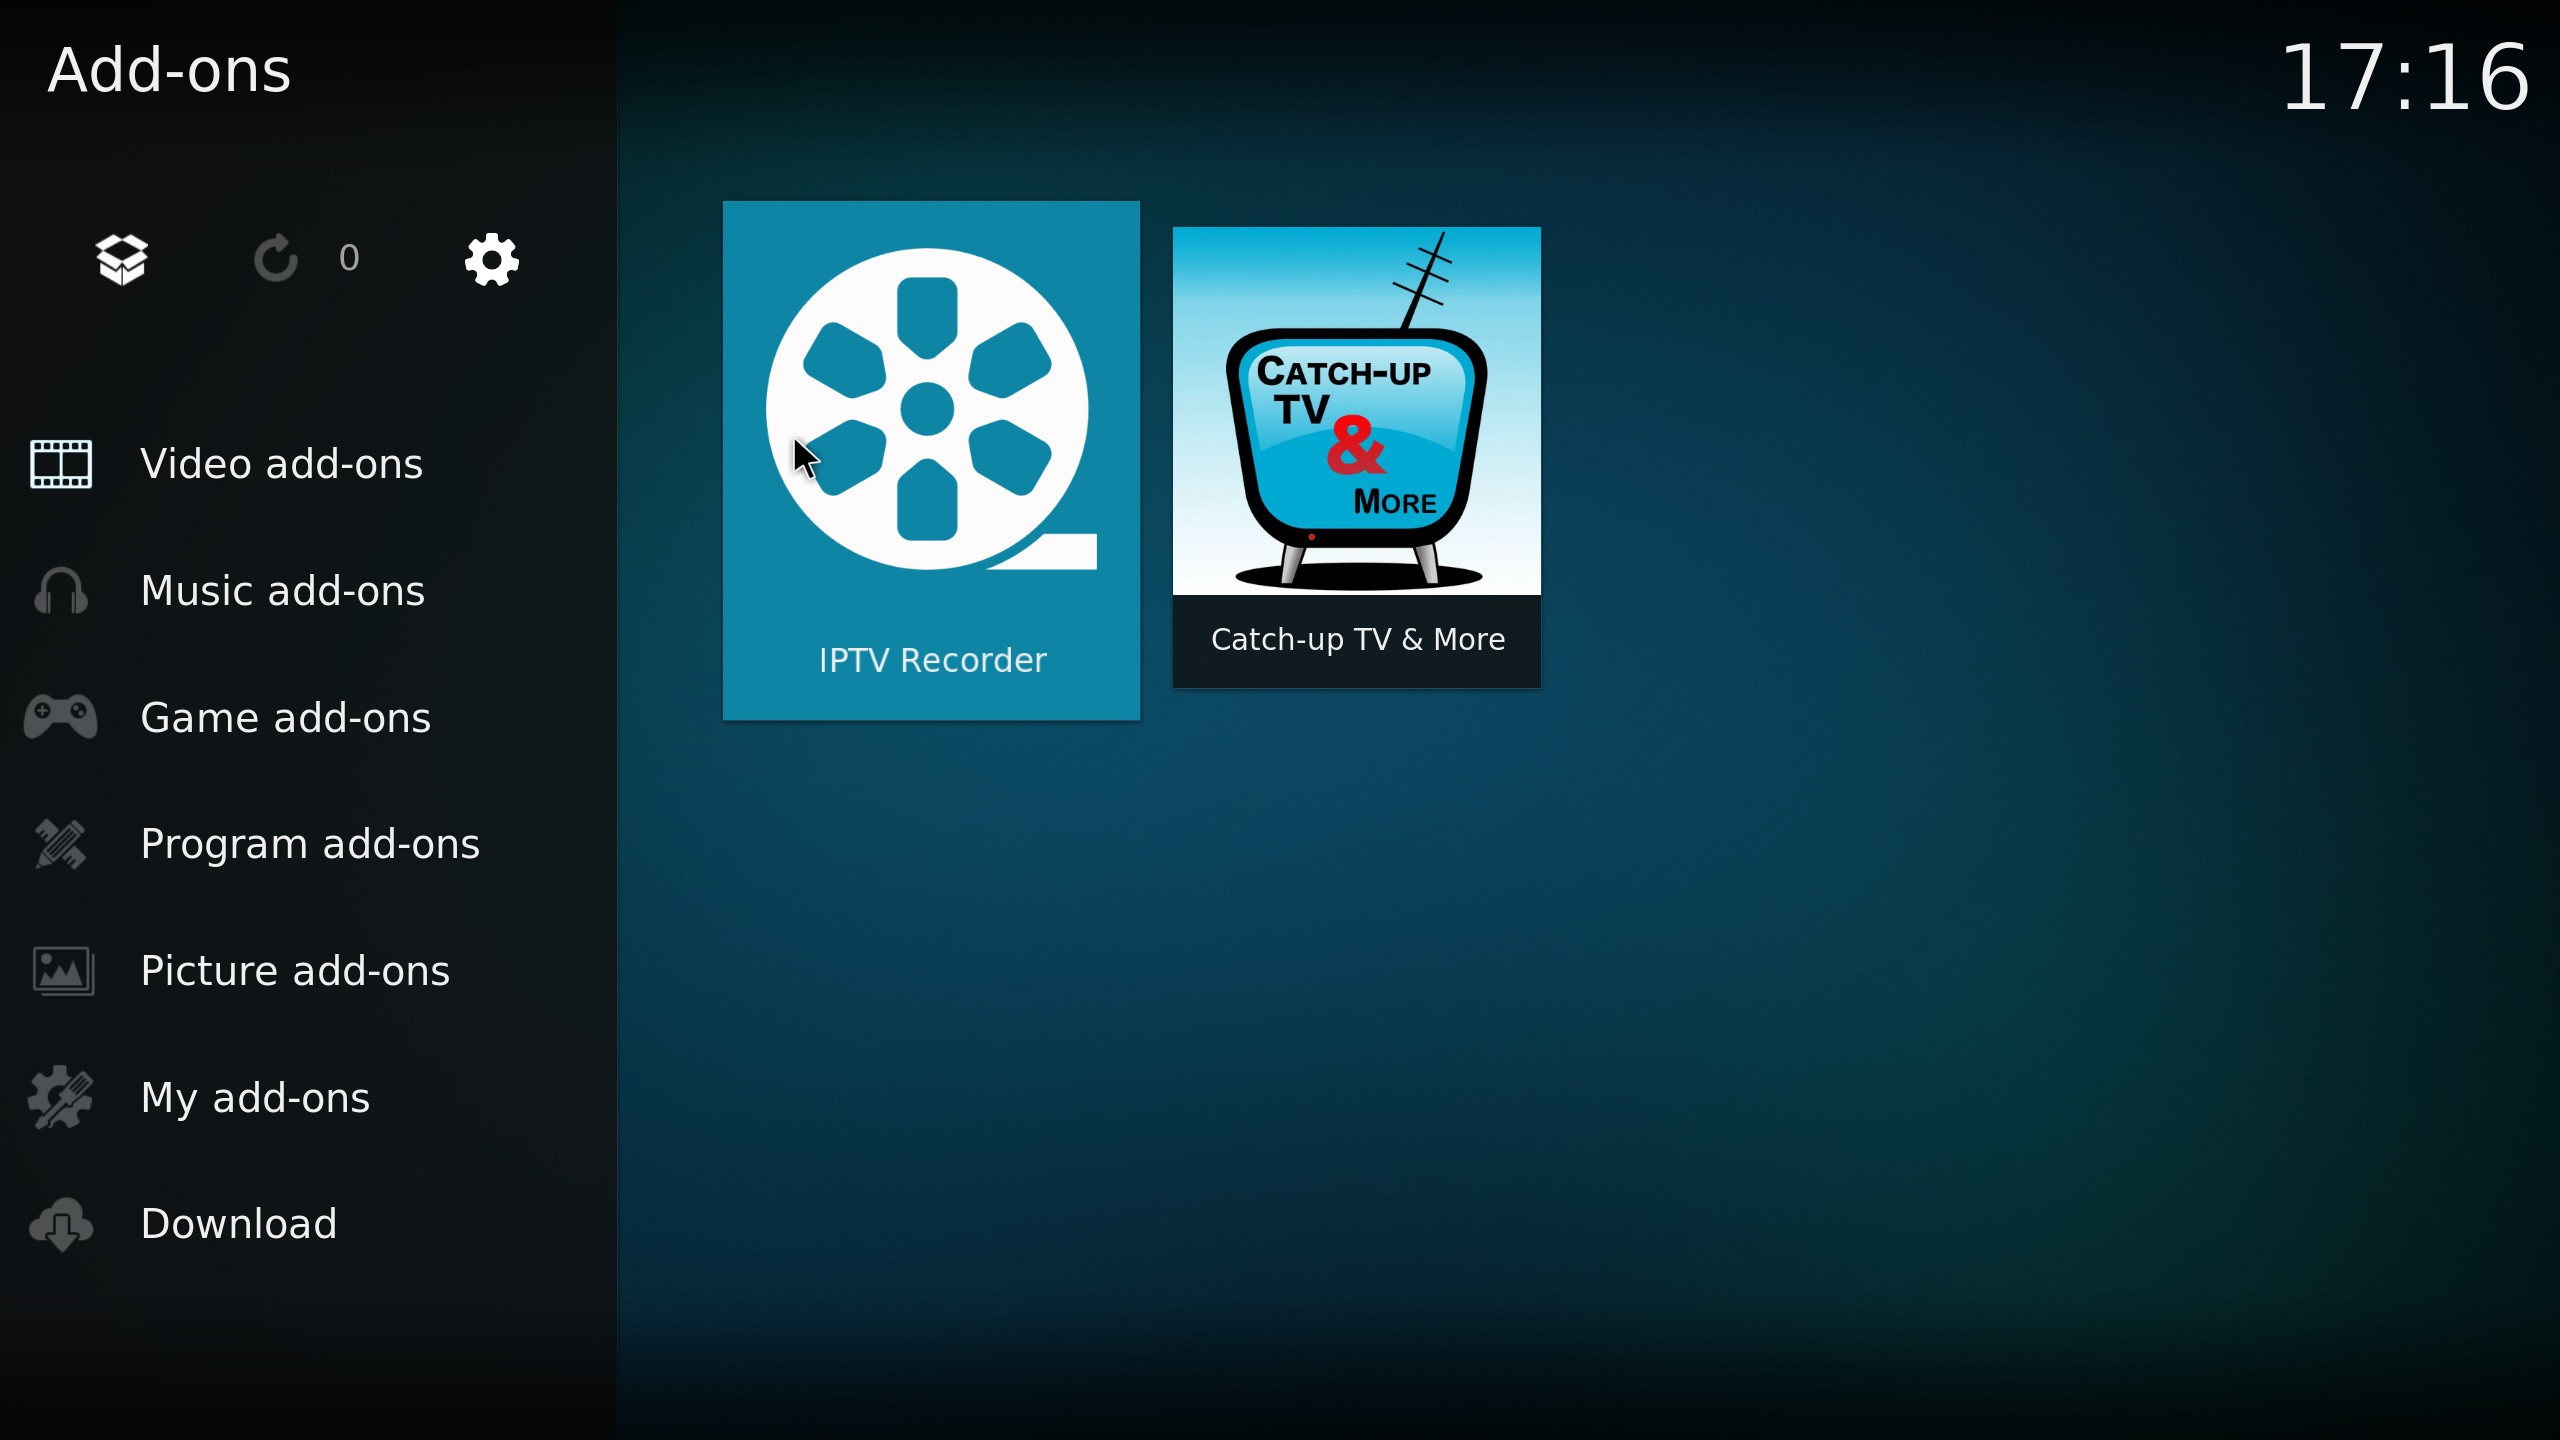
Video Add-ons: Go to “Video add-ons.”
-
IPTV Recorder: Install the “IPTV Recorder” addon.
12. How Do I Configure And Use IPTV Recorder?
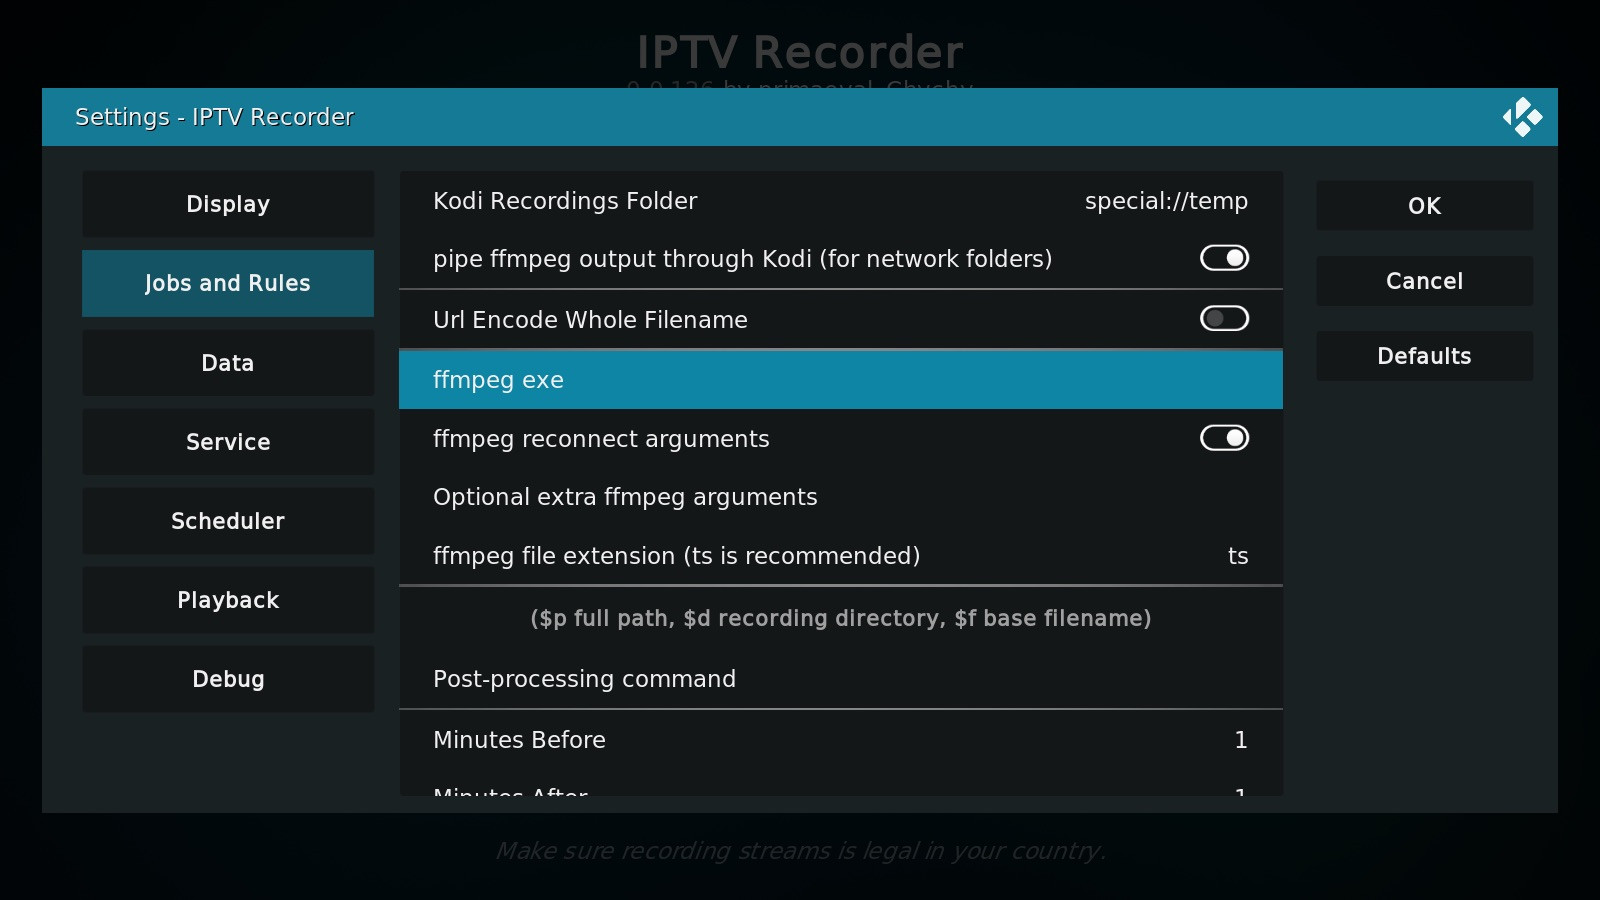
After installing IPTV Recorder, you need to configure it by setting the path to the FFMPEG executable and choosing where to store your recordings. Here’s how:
-
Open IPTV Recorder Settings: Go to the settings of the “IPTV Recorder” addon.
-
Set FFMPEG Path: Fill in the path to the FFMPEG executable.
-
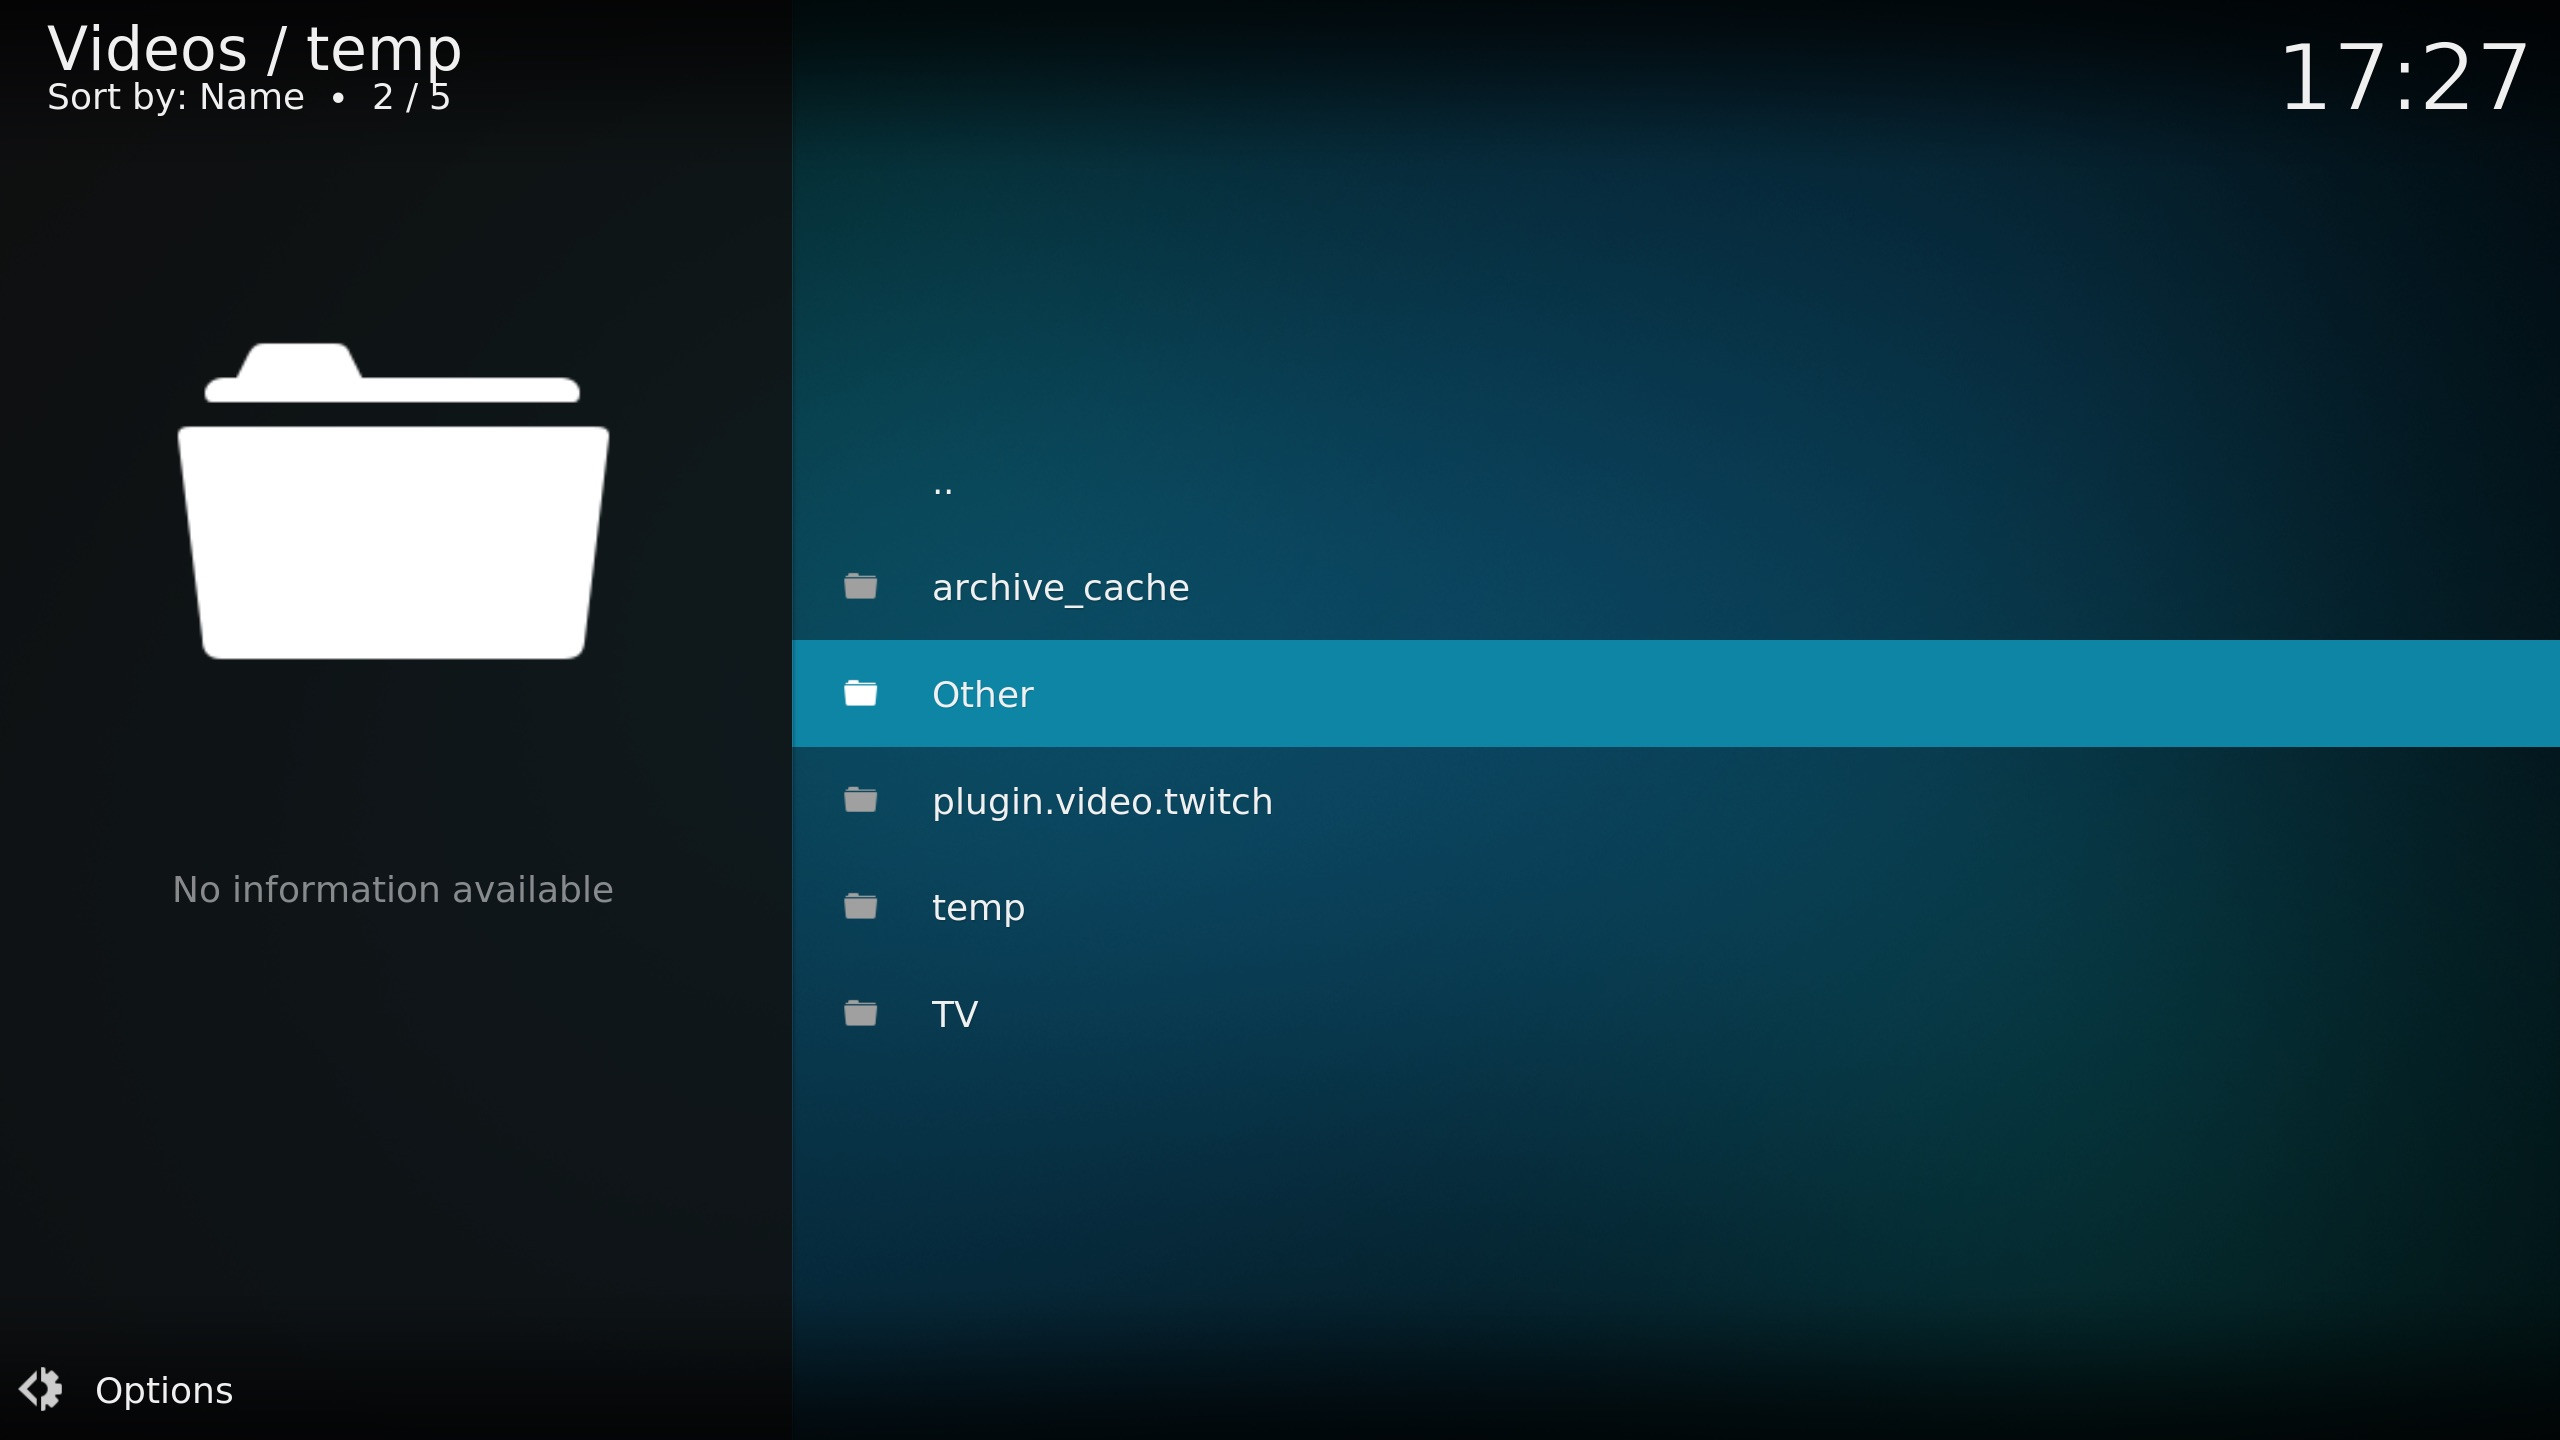
Set Recording Path: Set the path where recordings will be stored. By default, it’s set to
special://temp/(a Kodi variable). -
Open IPTV Recorder: Launch the “IPTV Recorder” addon.
-
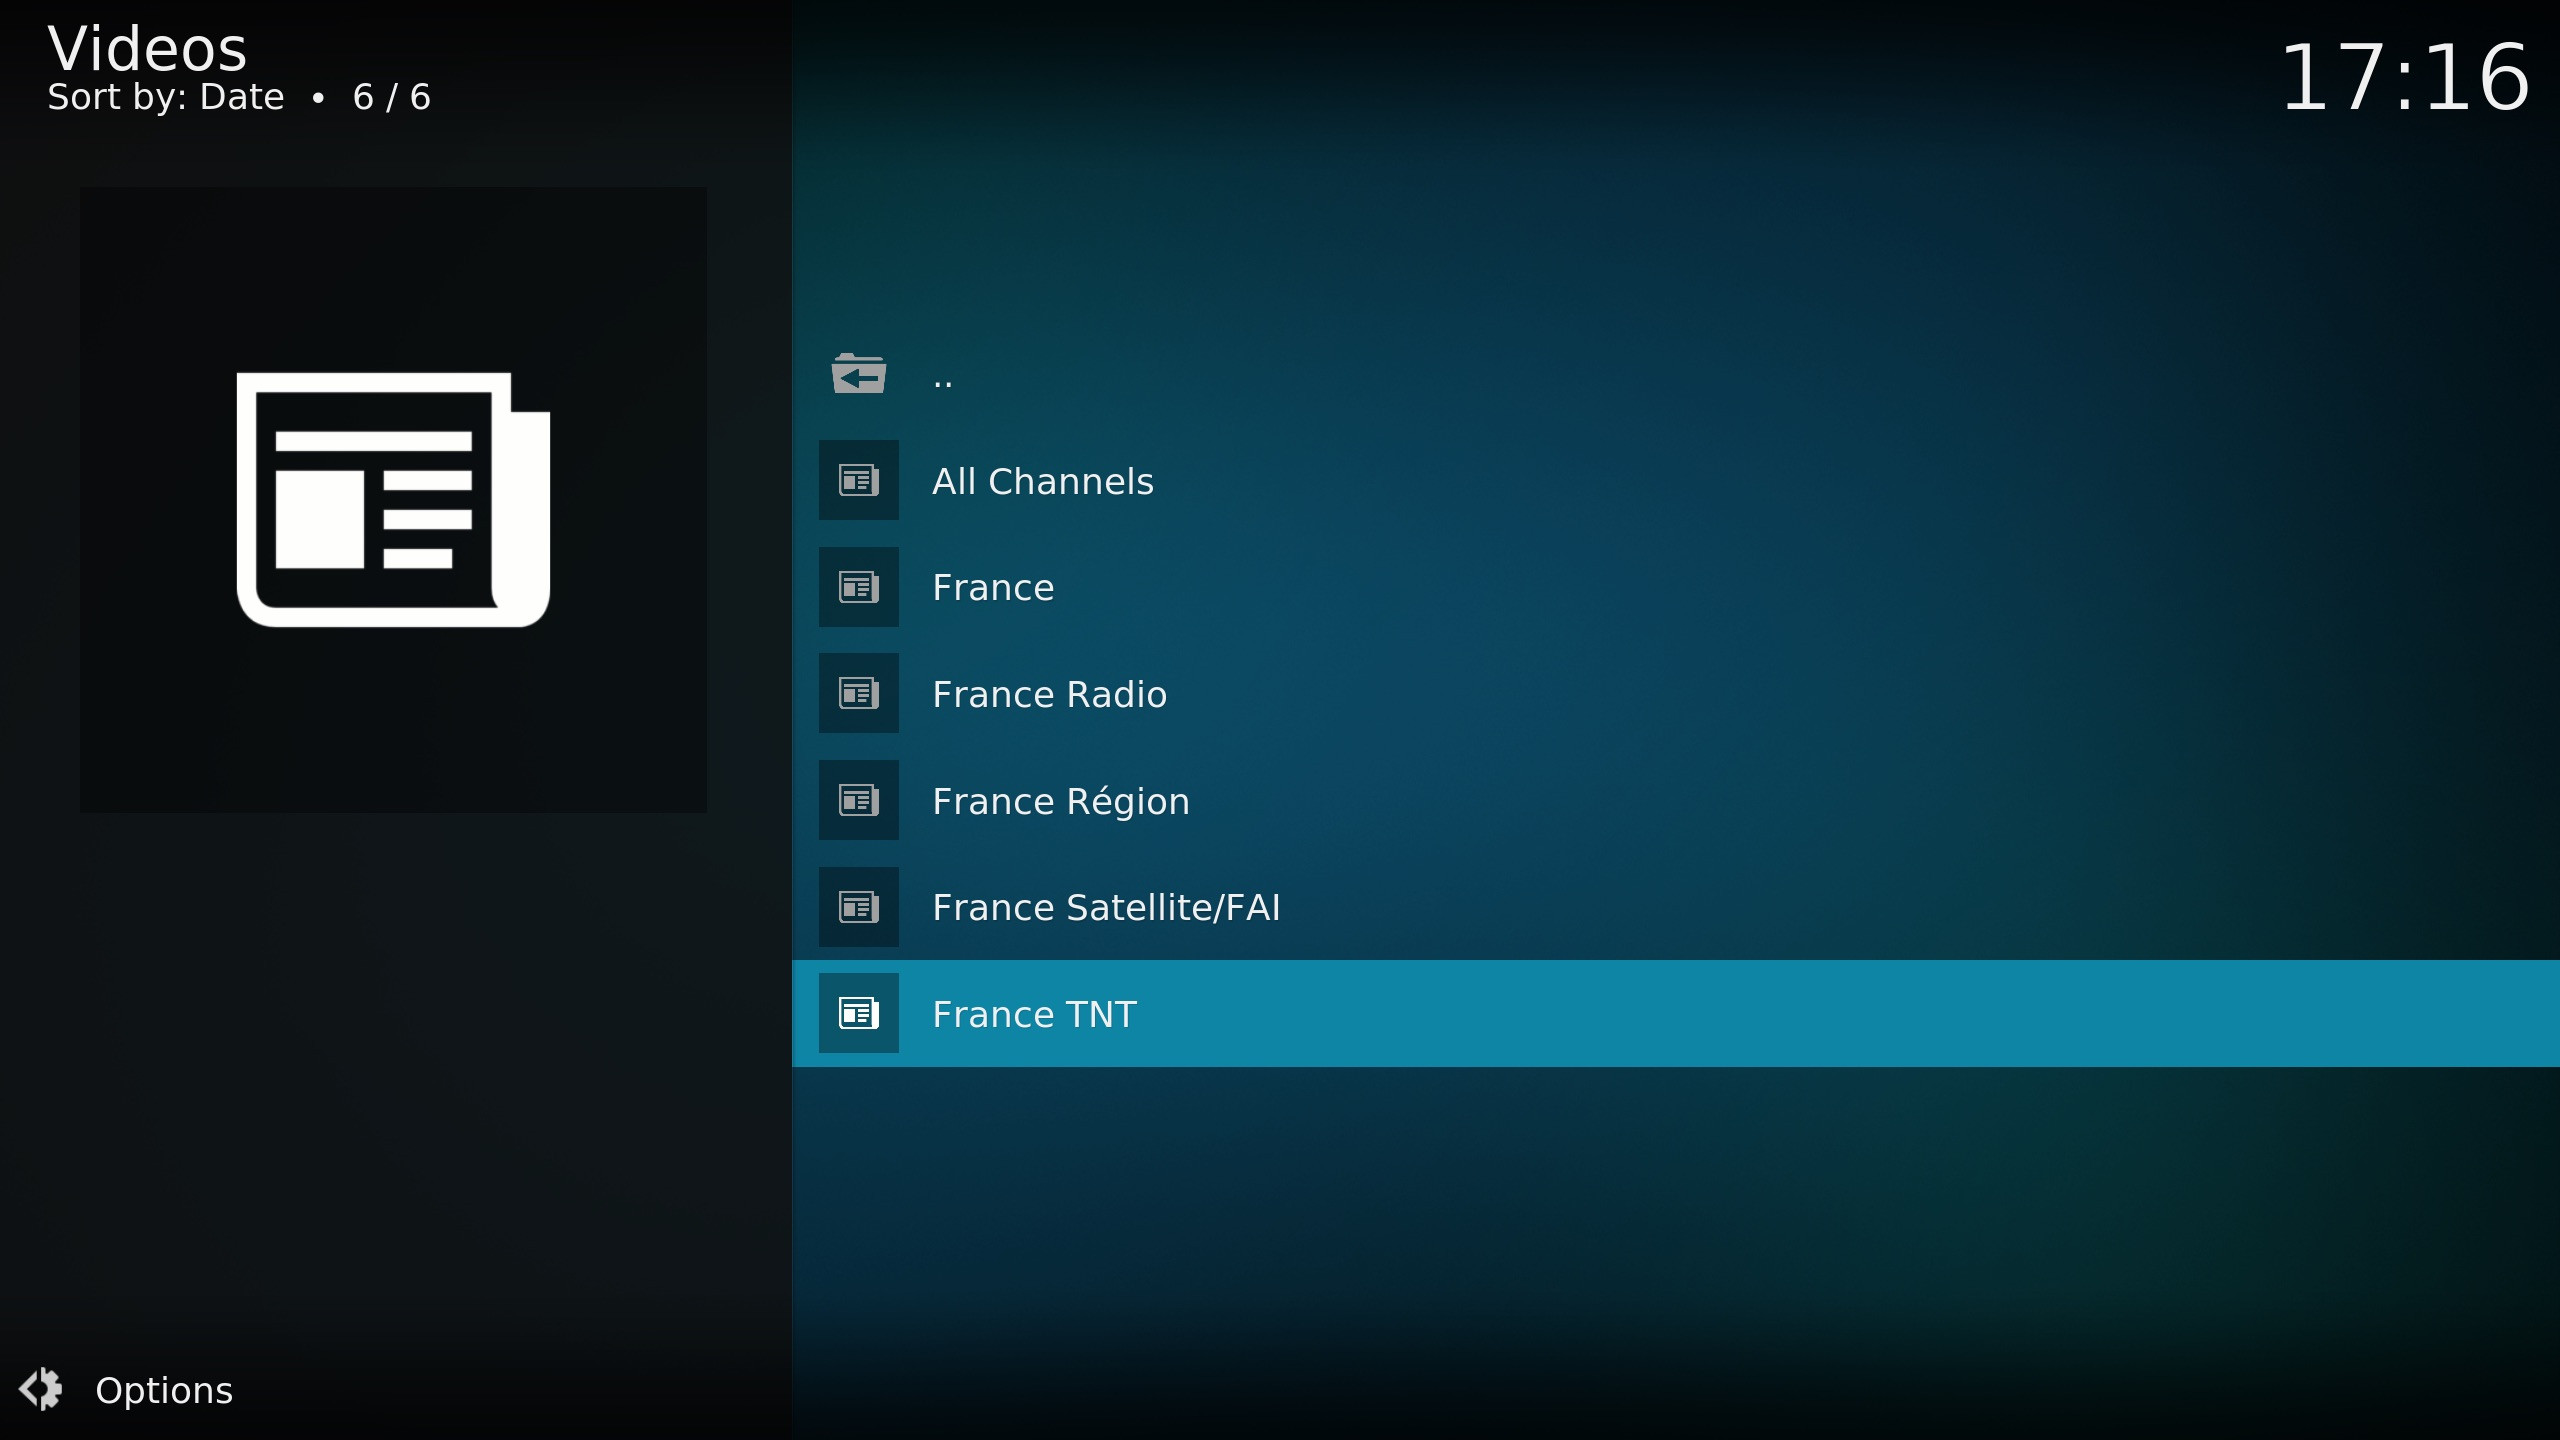
Go to Channels Group: Navigate to “Channels Group.”
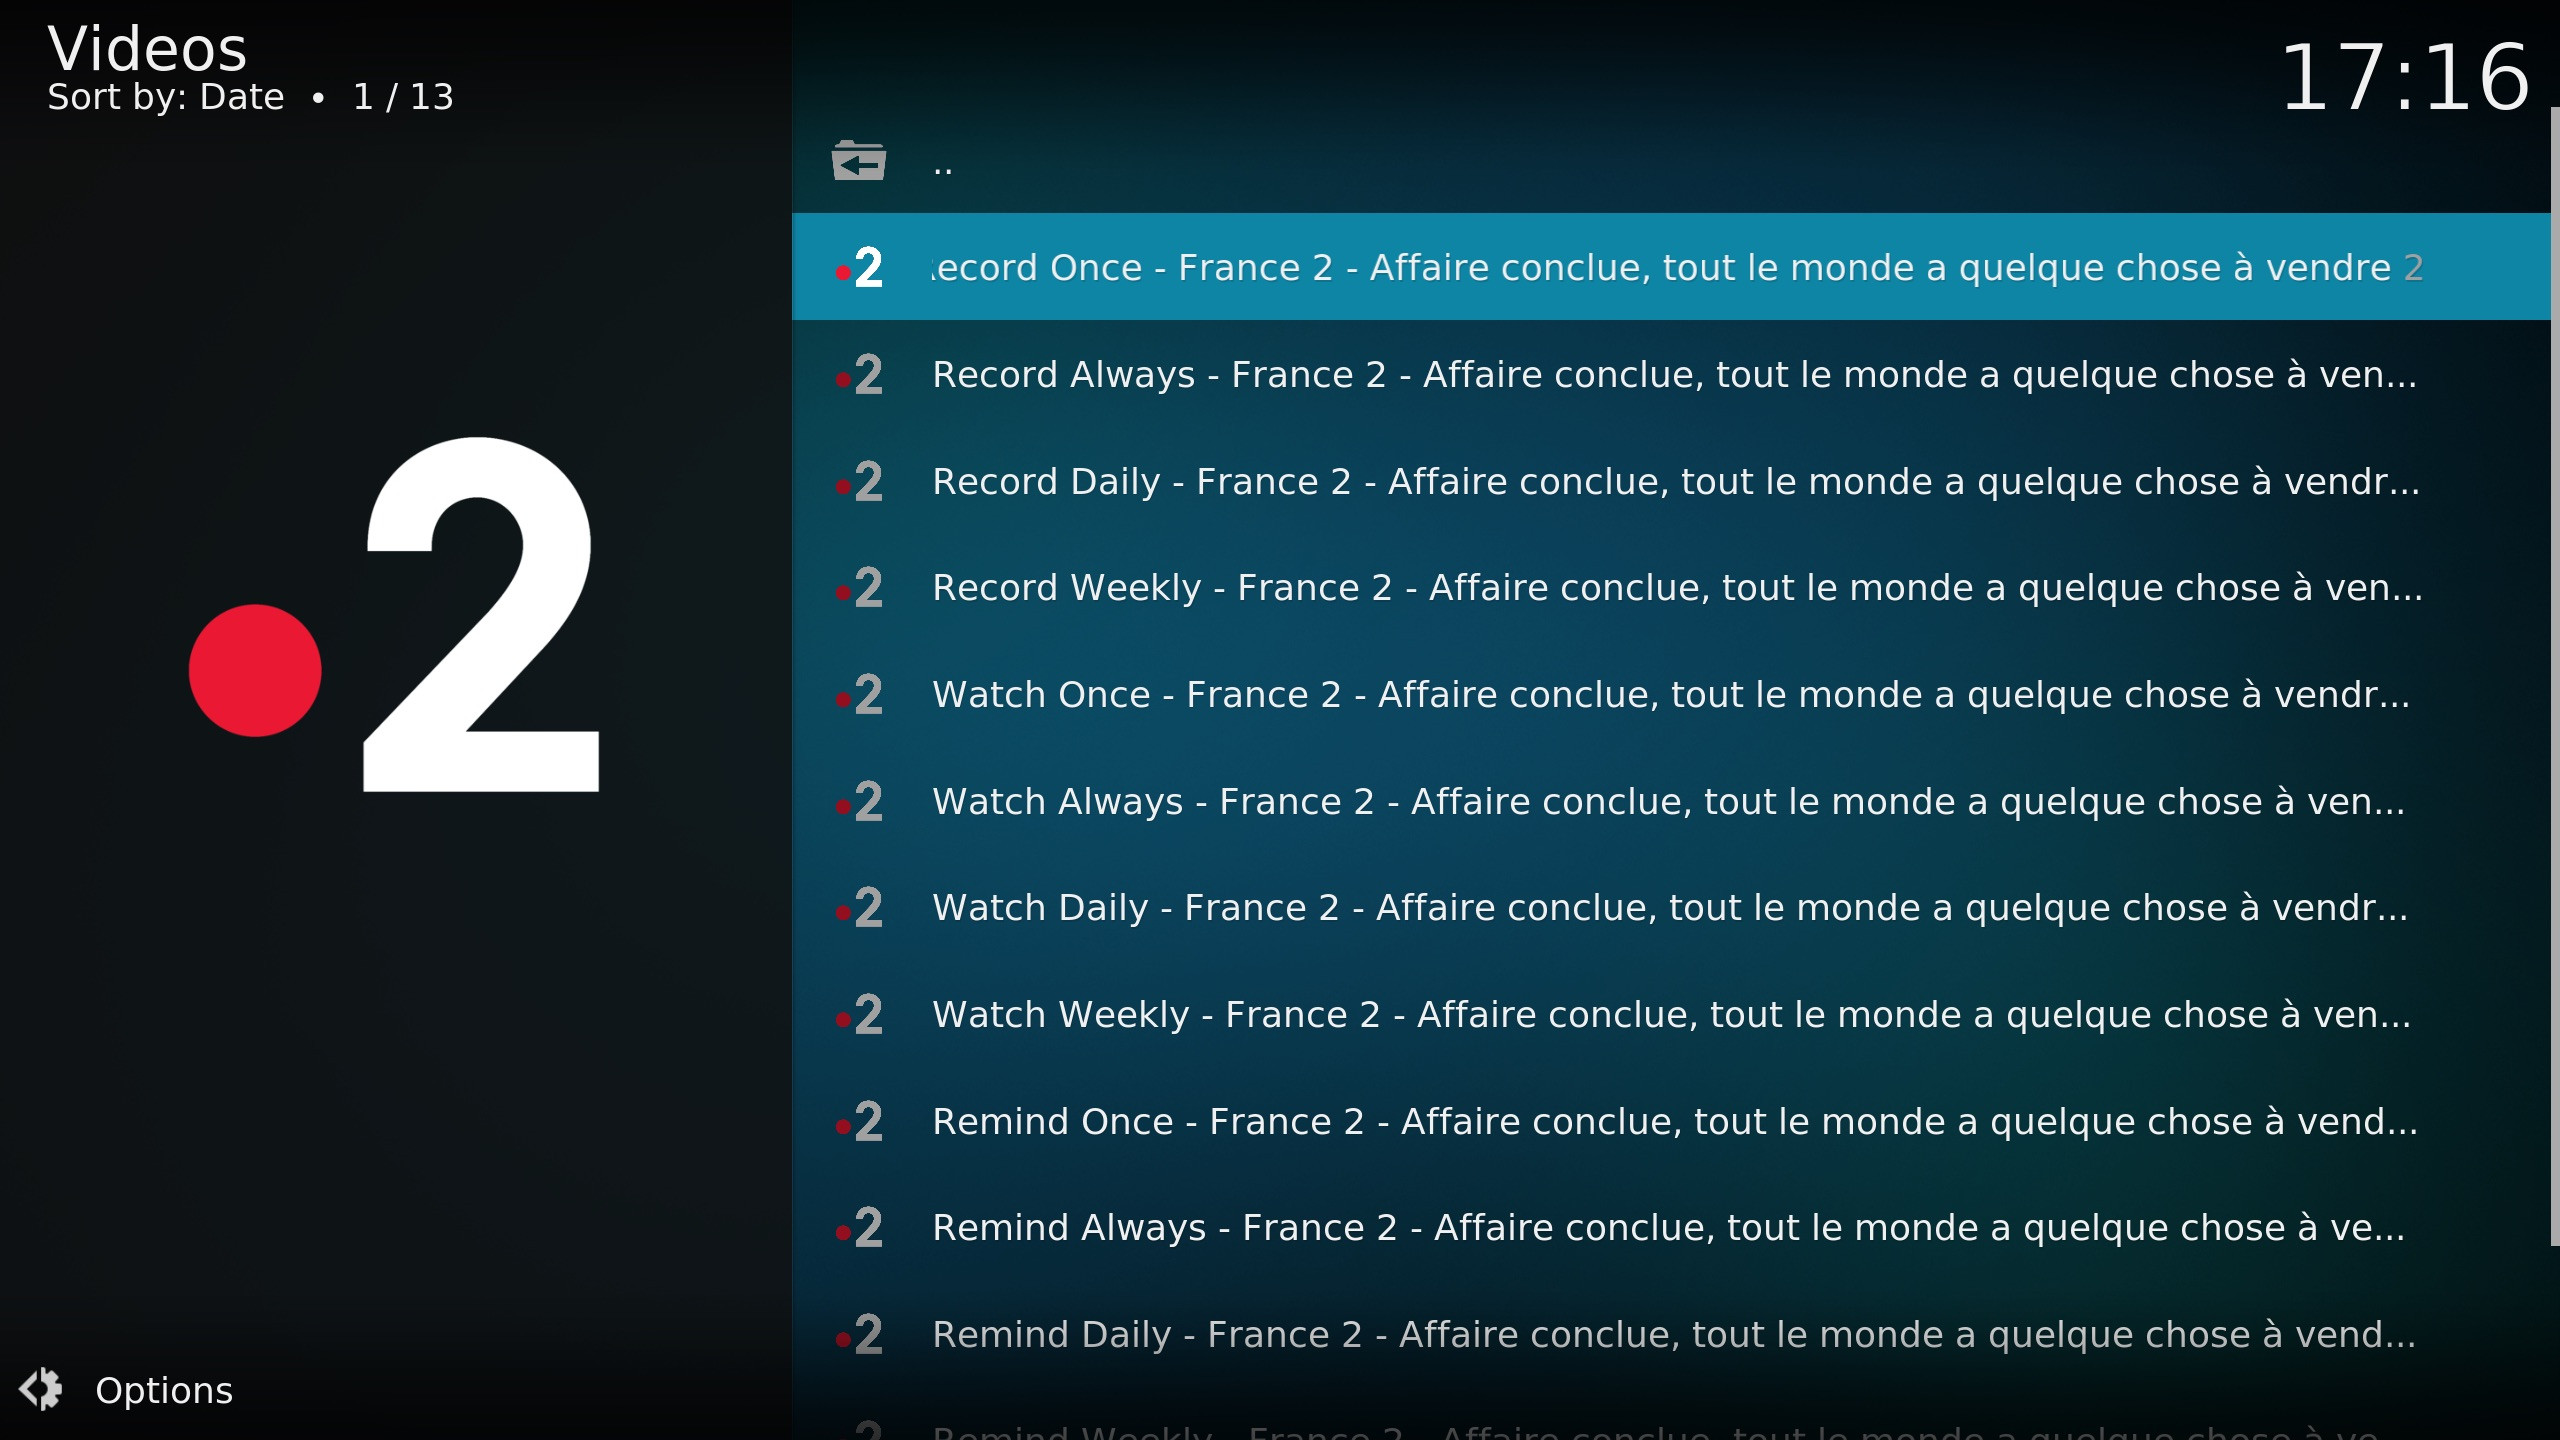
-
Choose Program to Record: Select the program you want to record.
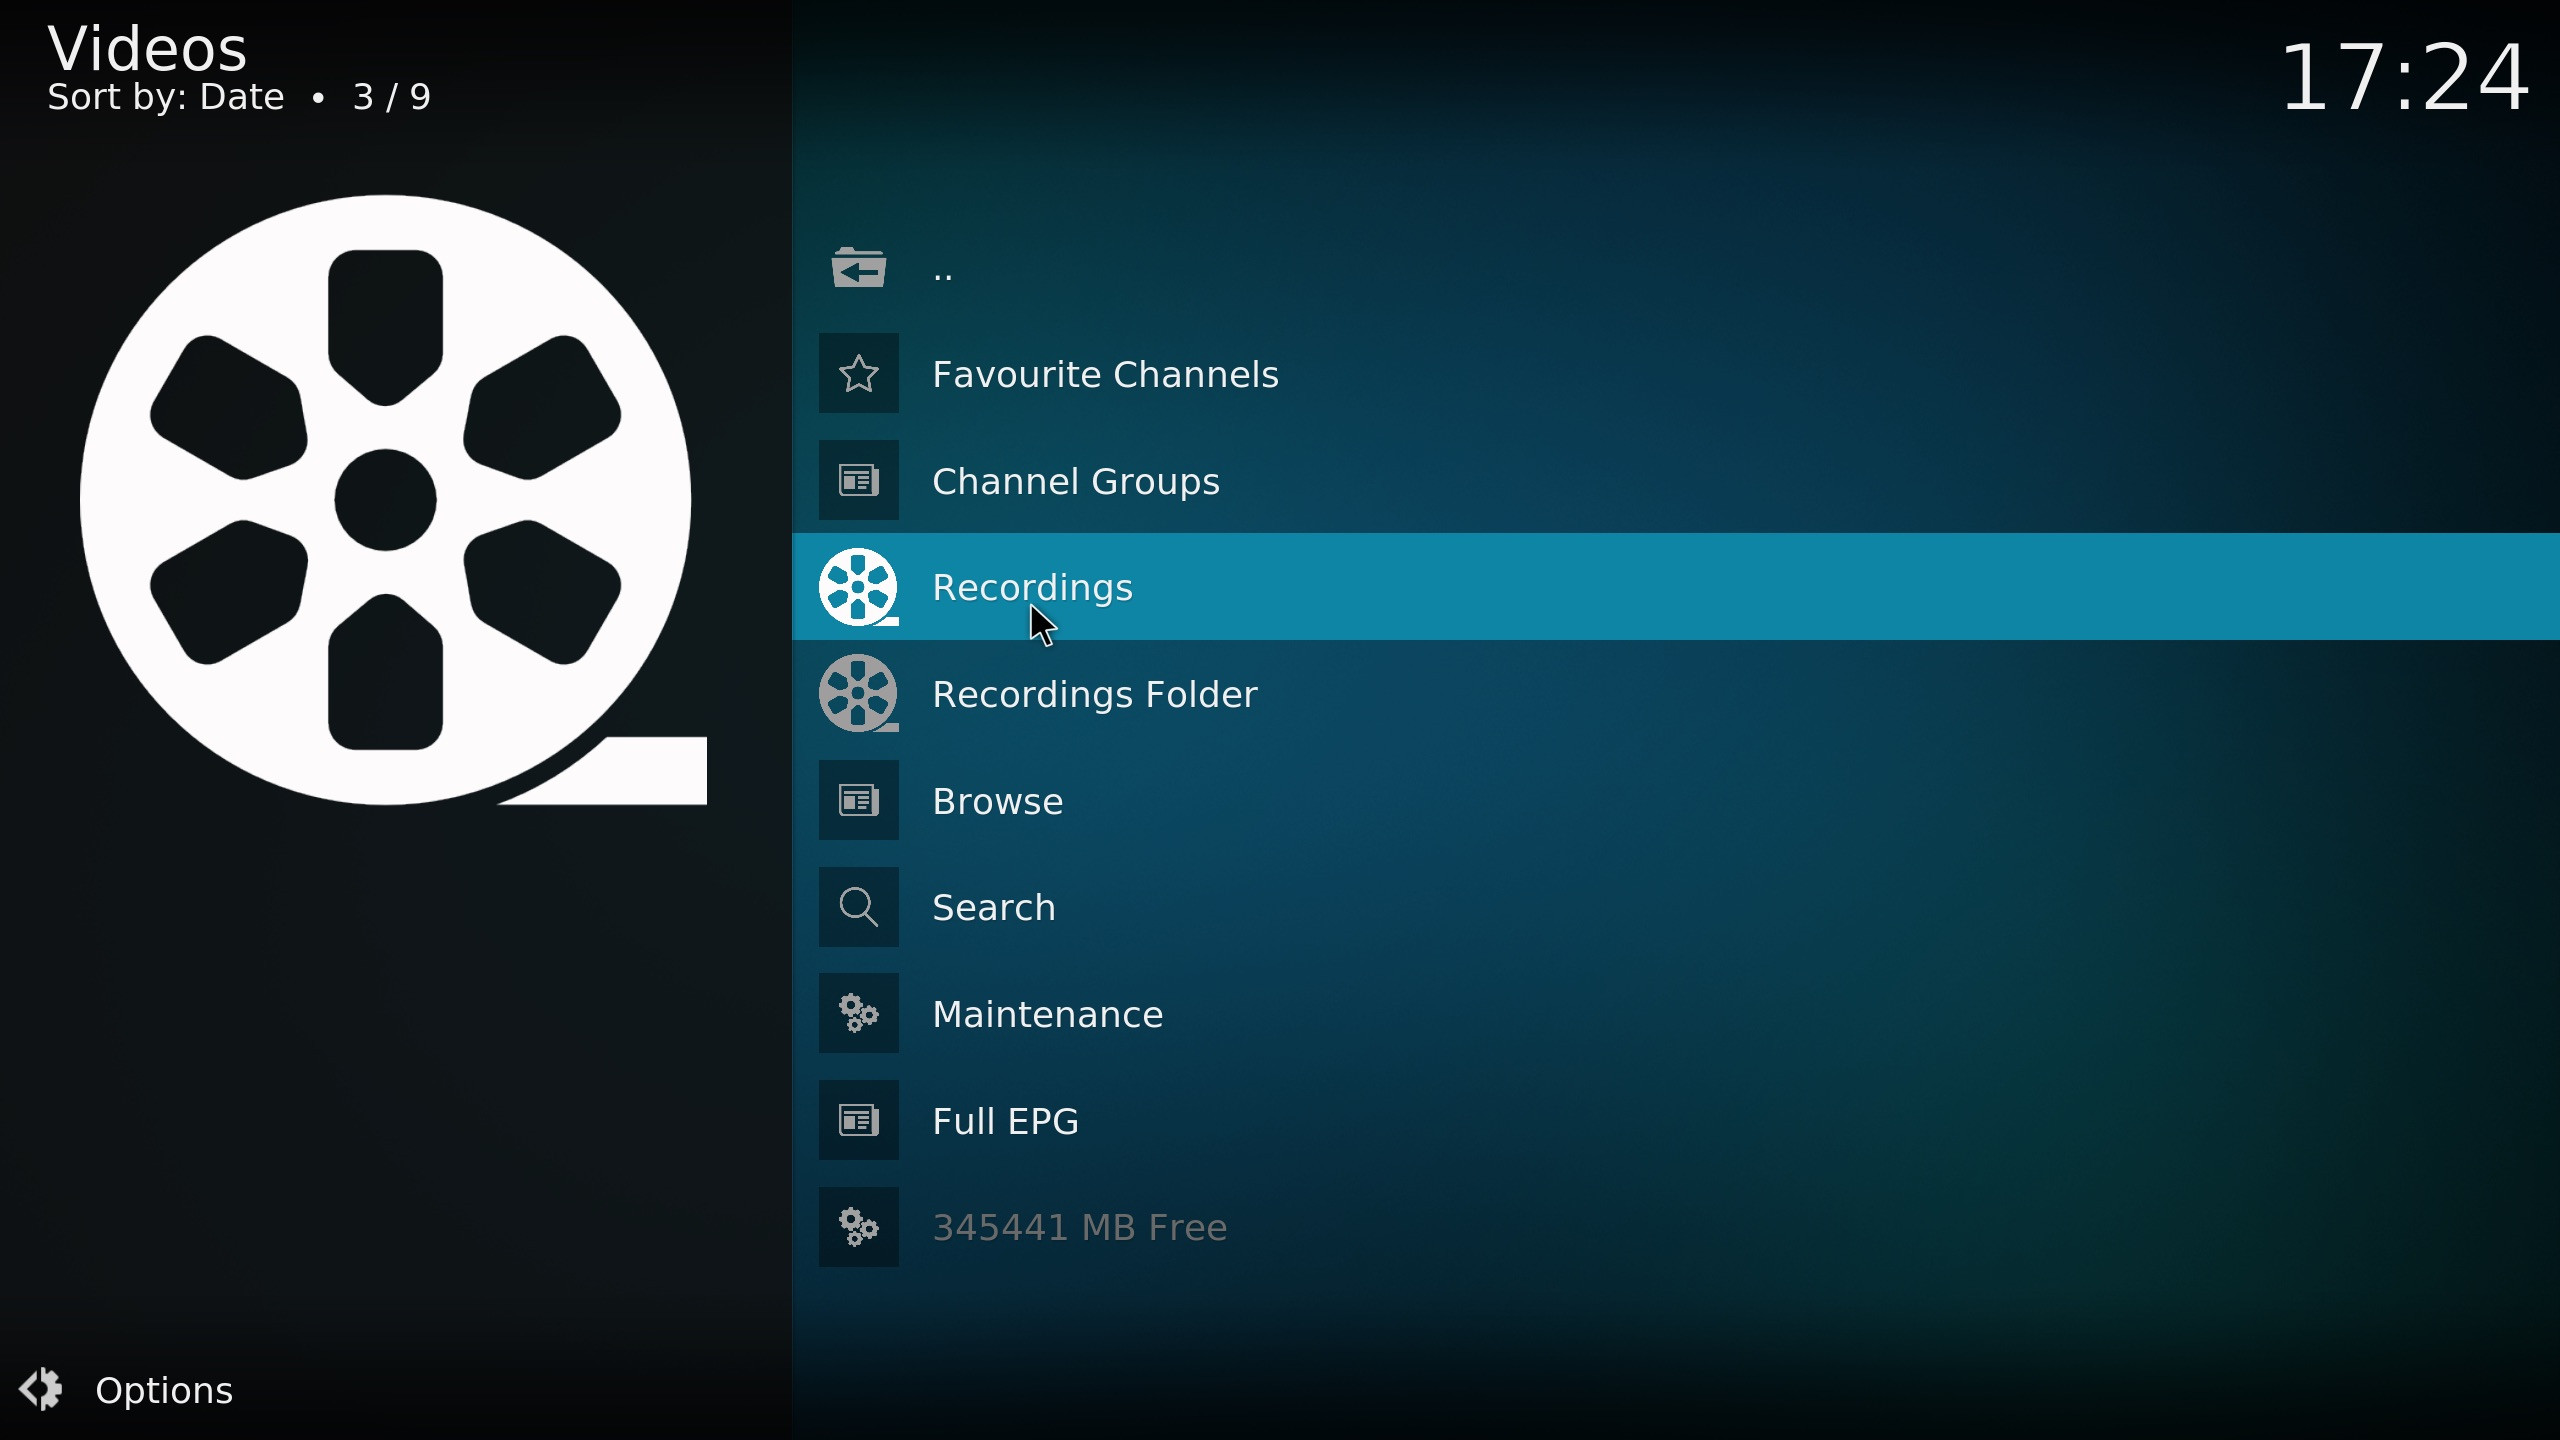
-
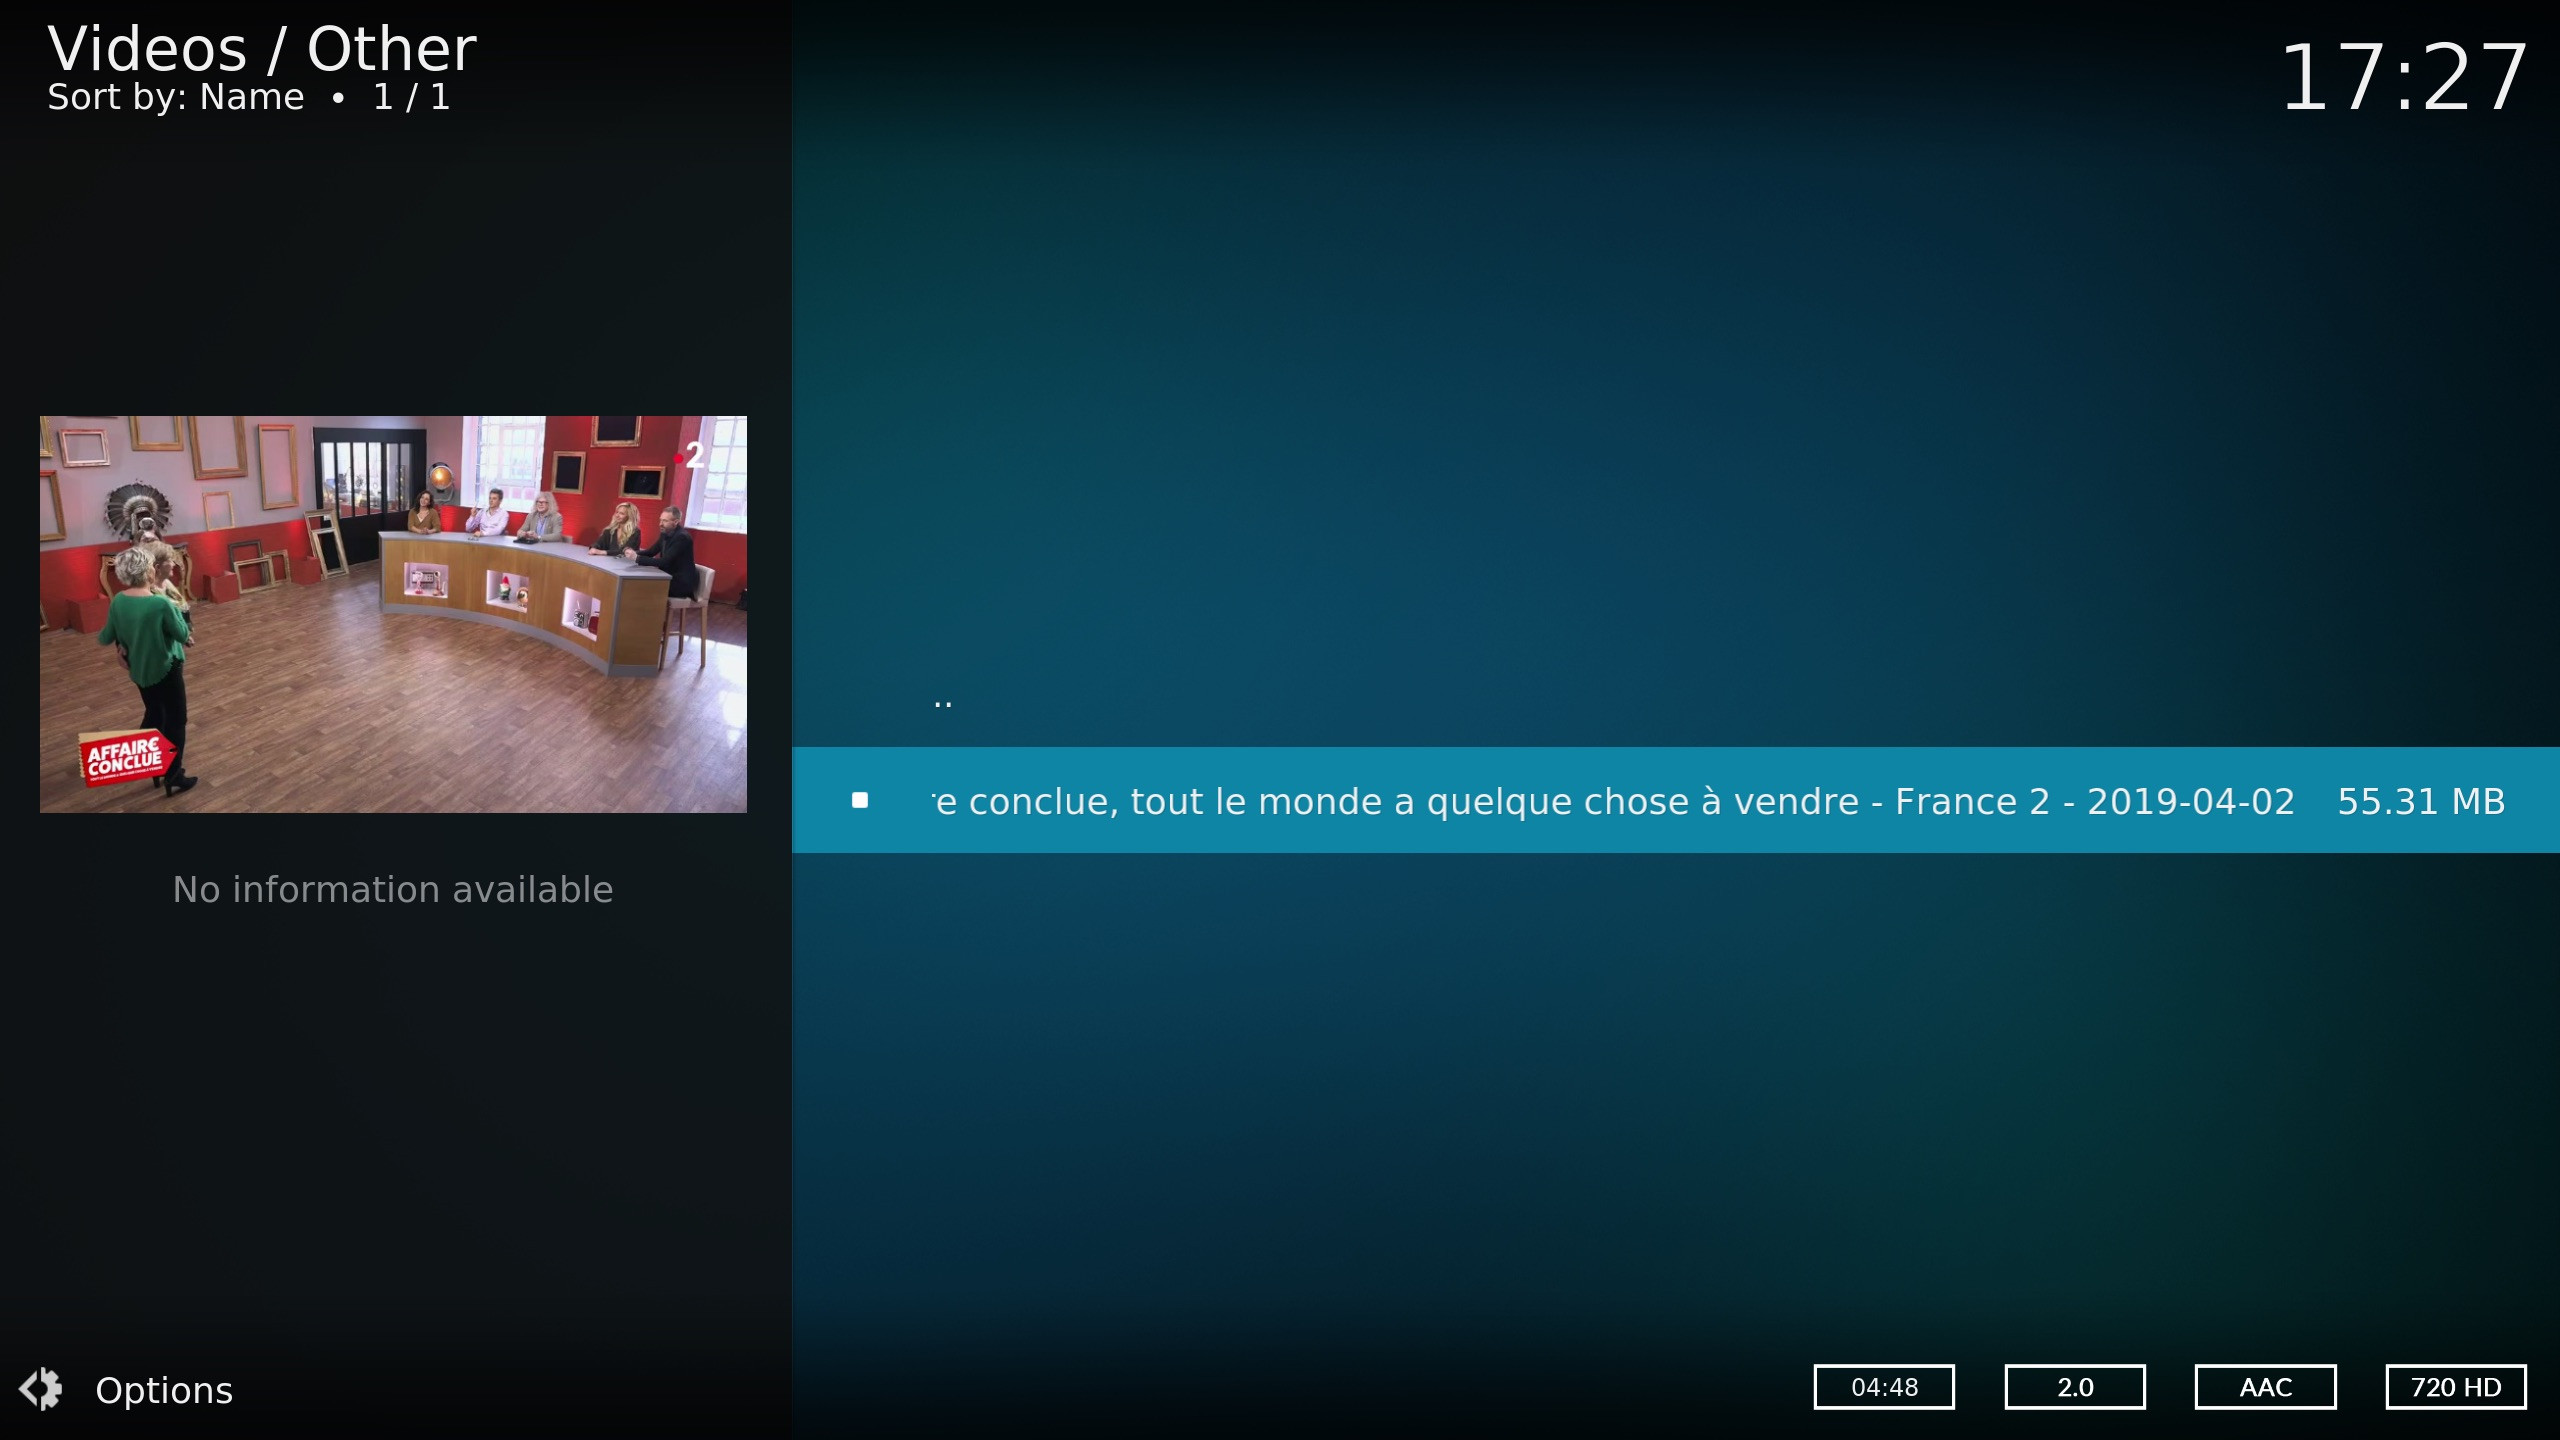
Go to Recordings: Return to the main menu of “IPTV Recorder” and go to the “Recordings” menu to find recordings in progress and finished recordings.
-
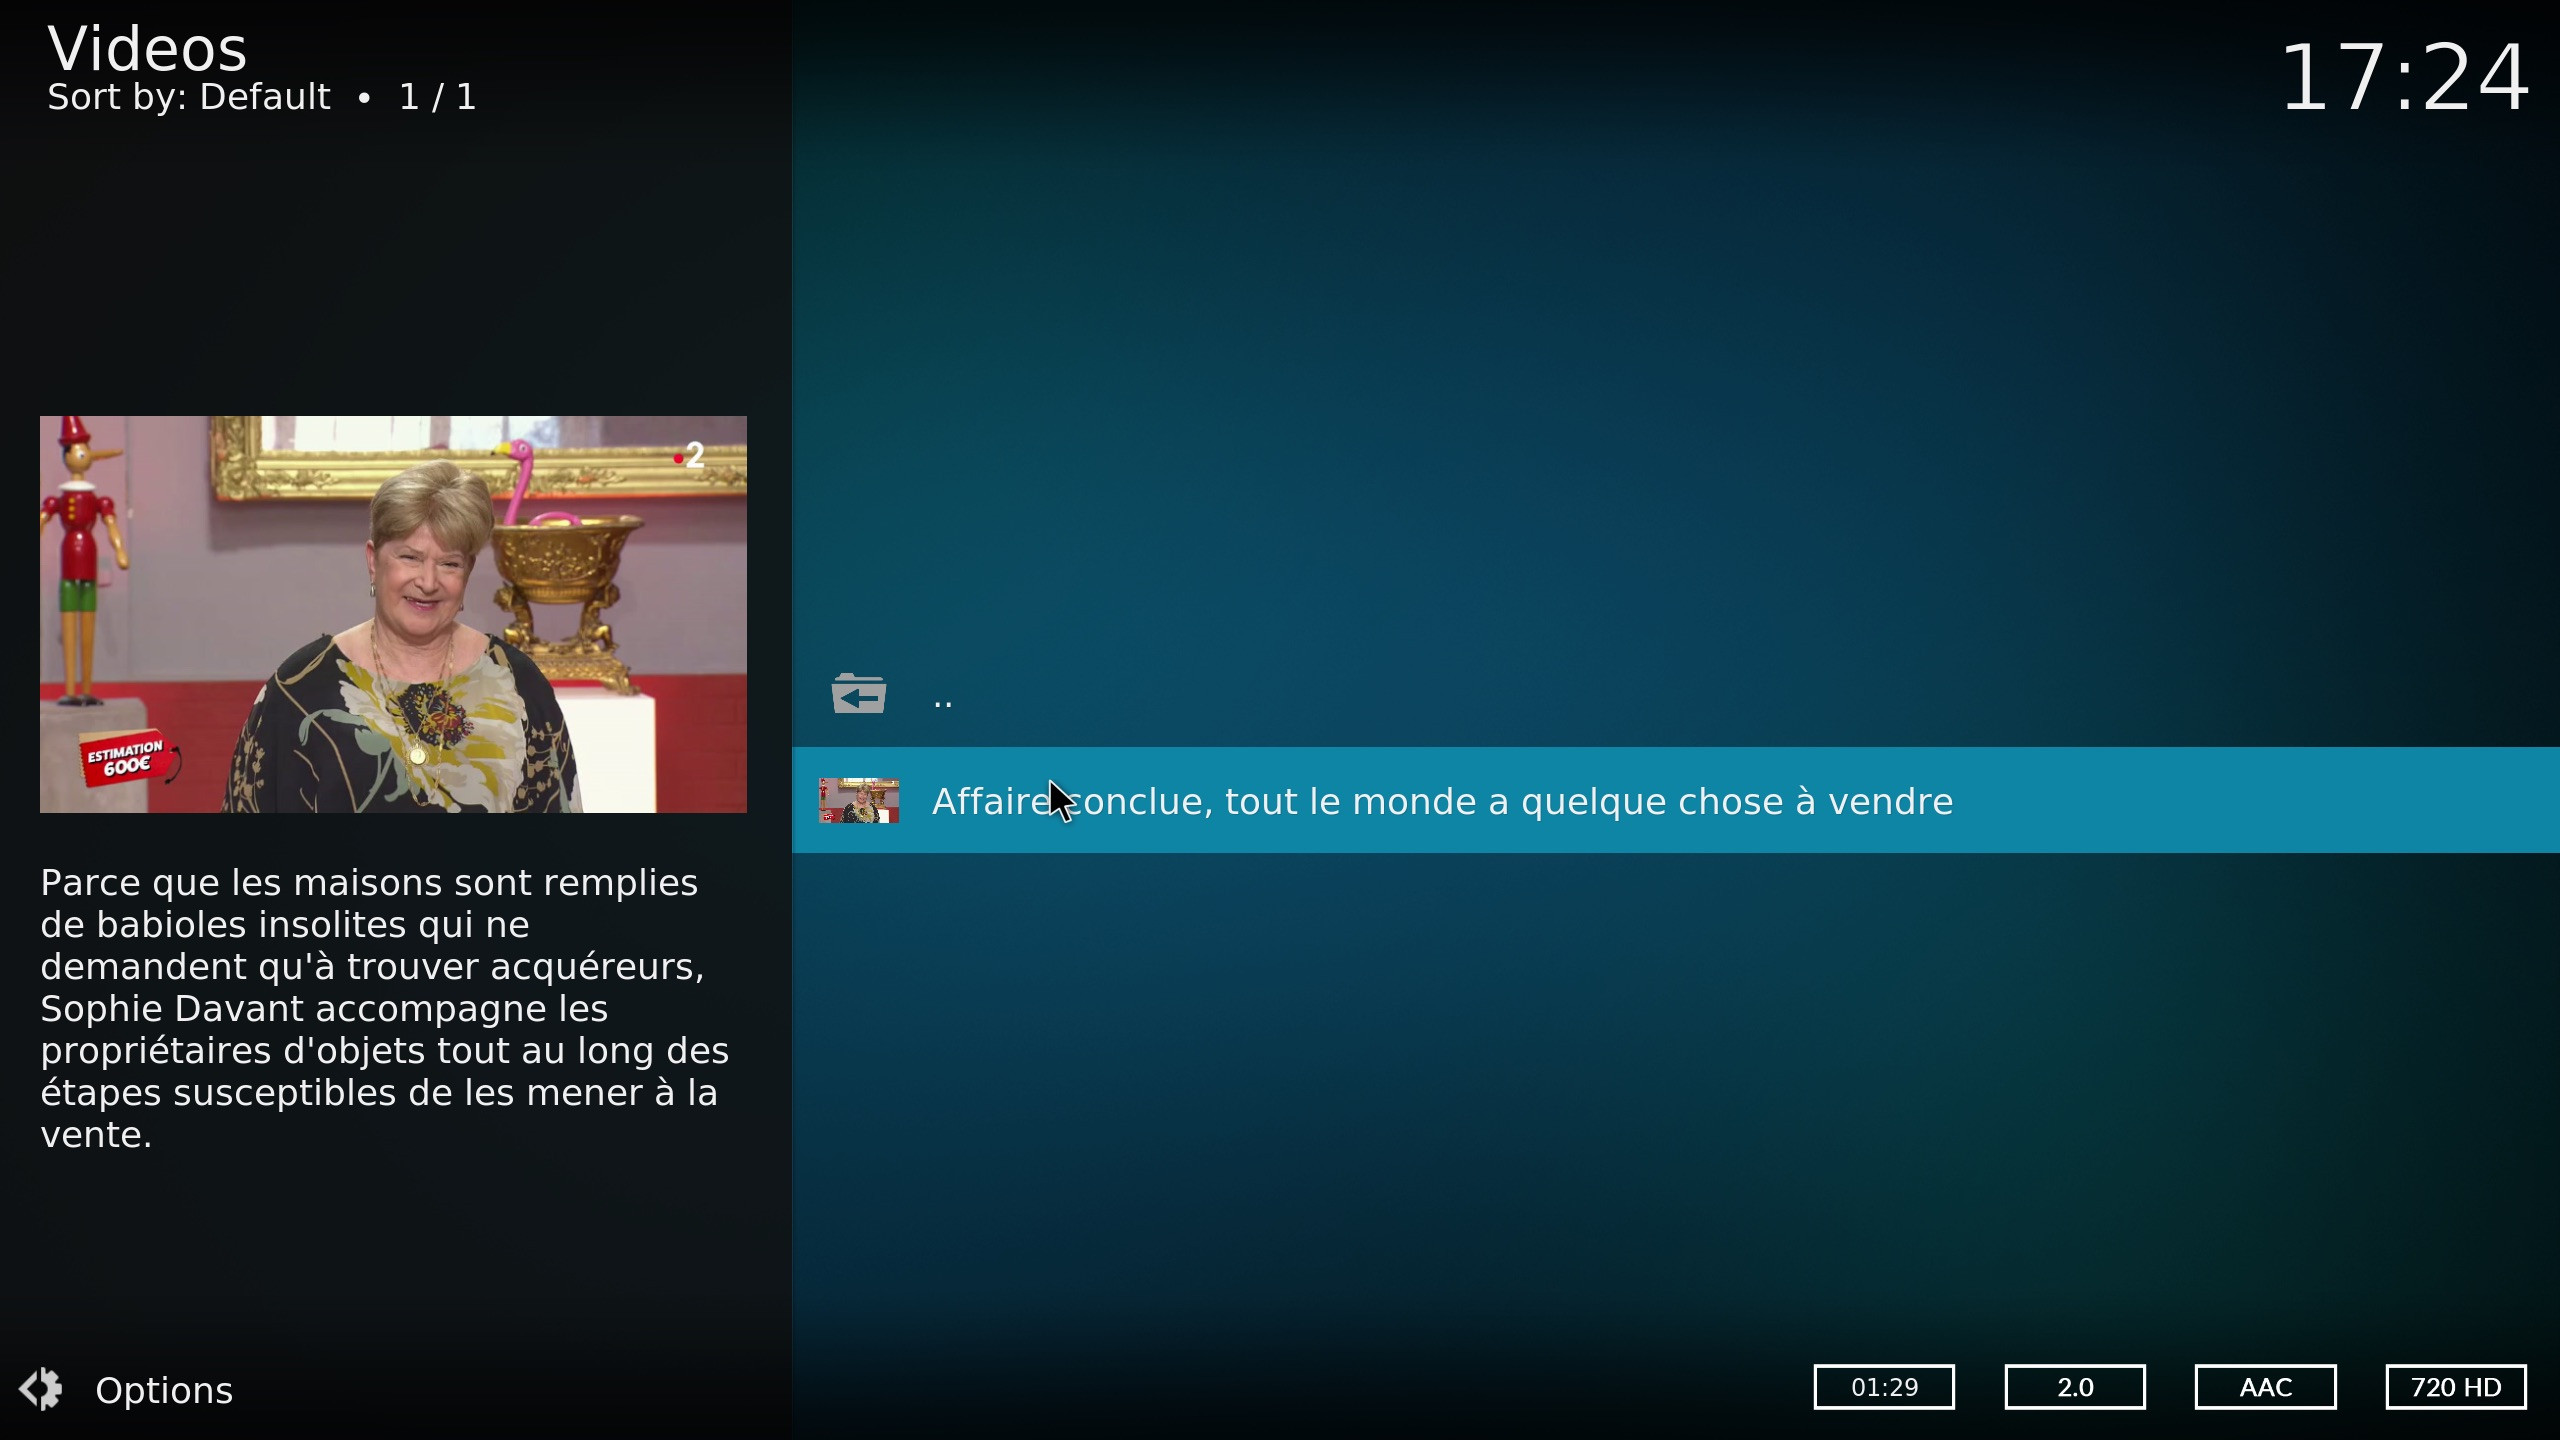
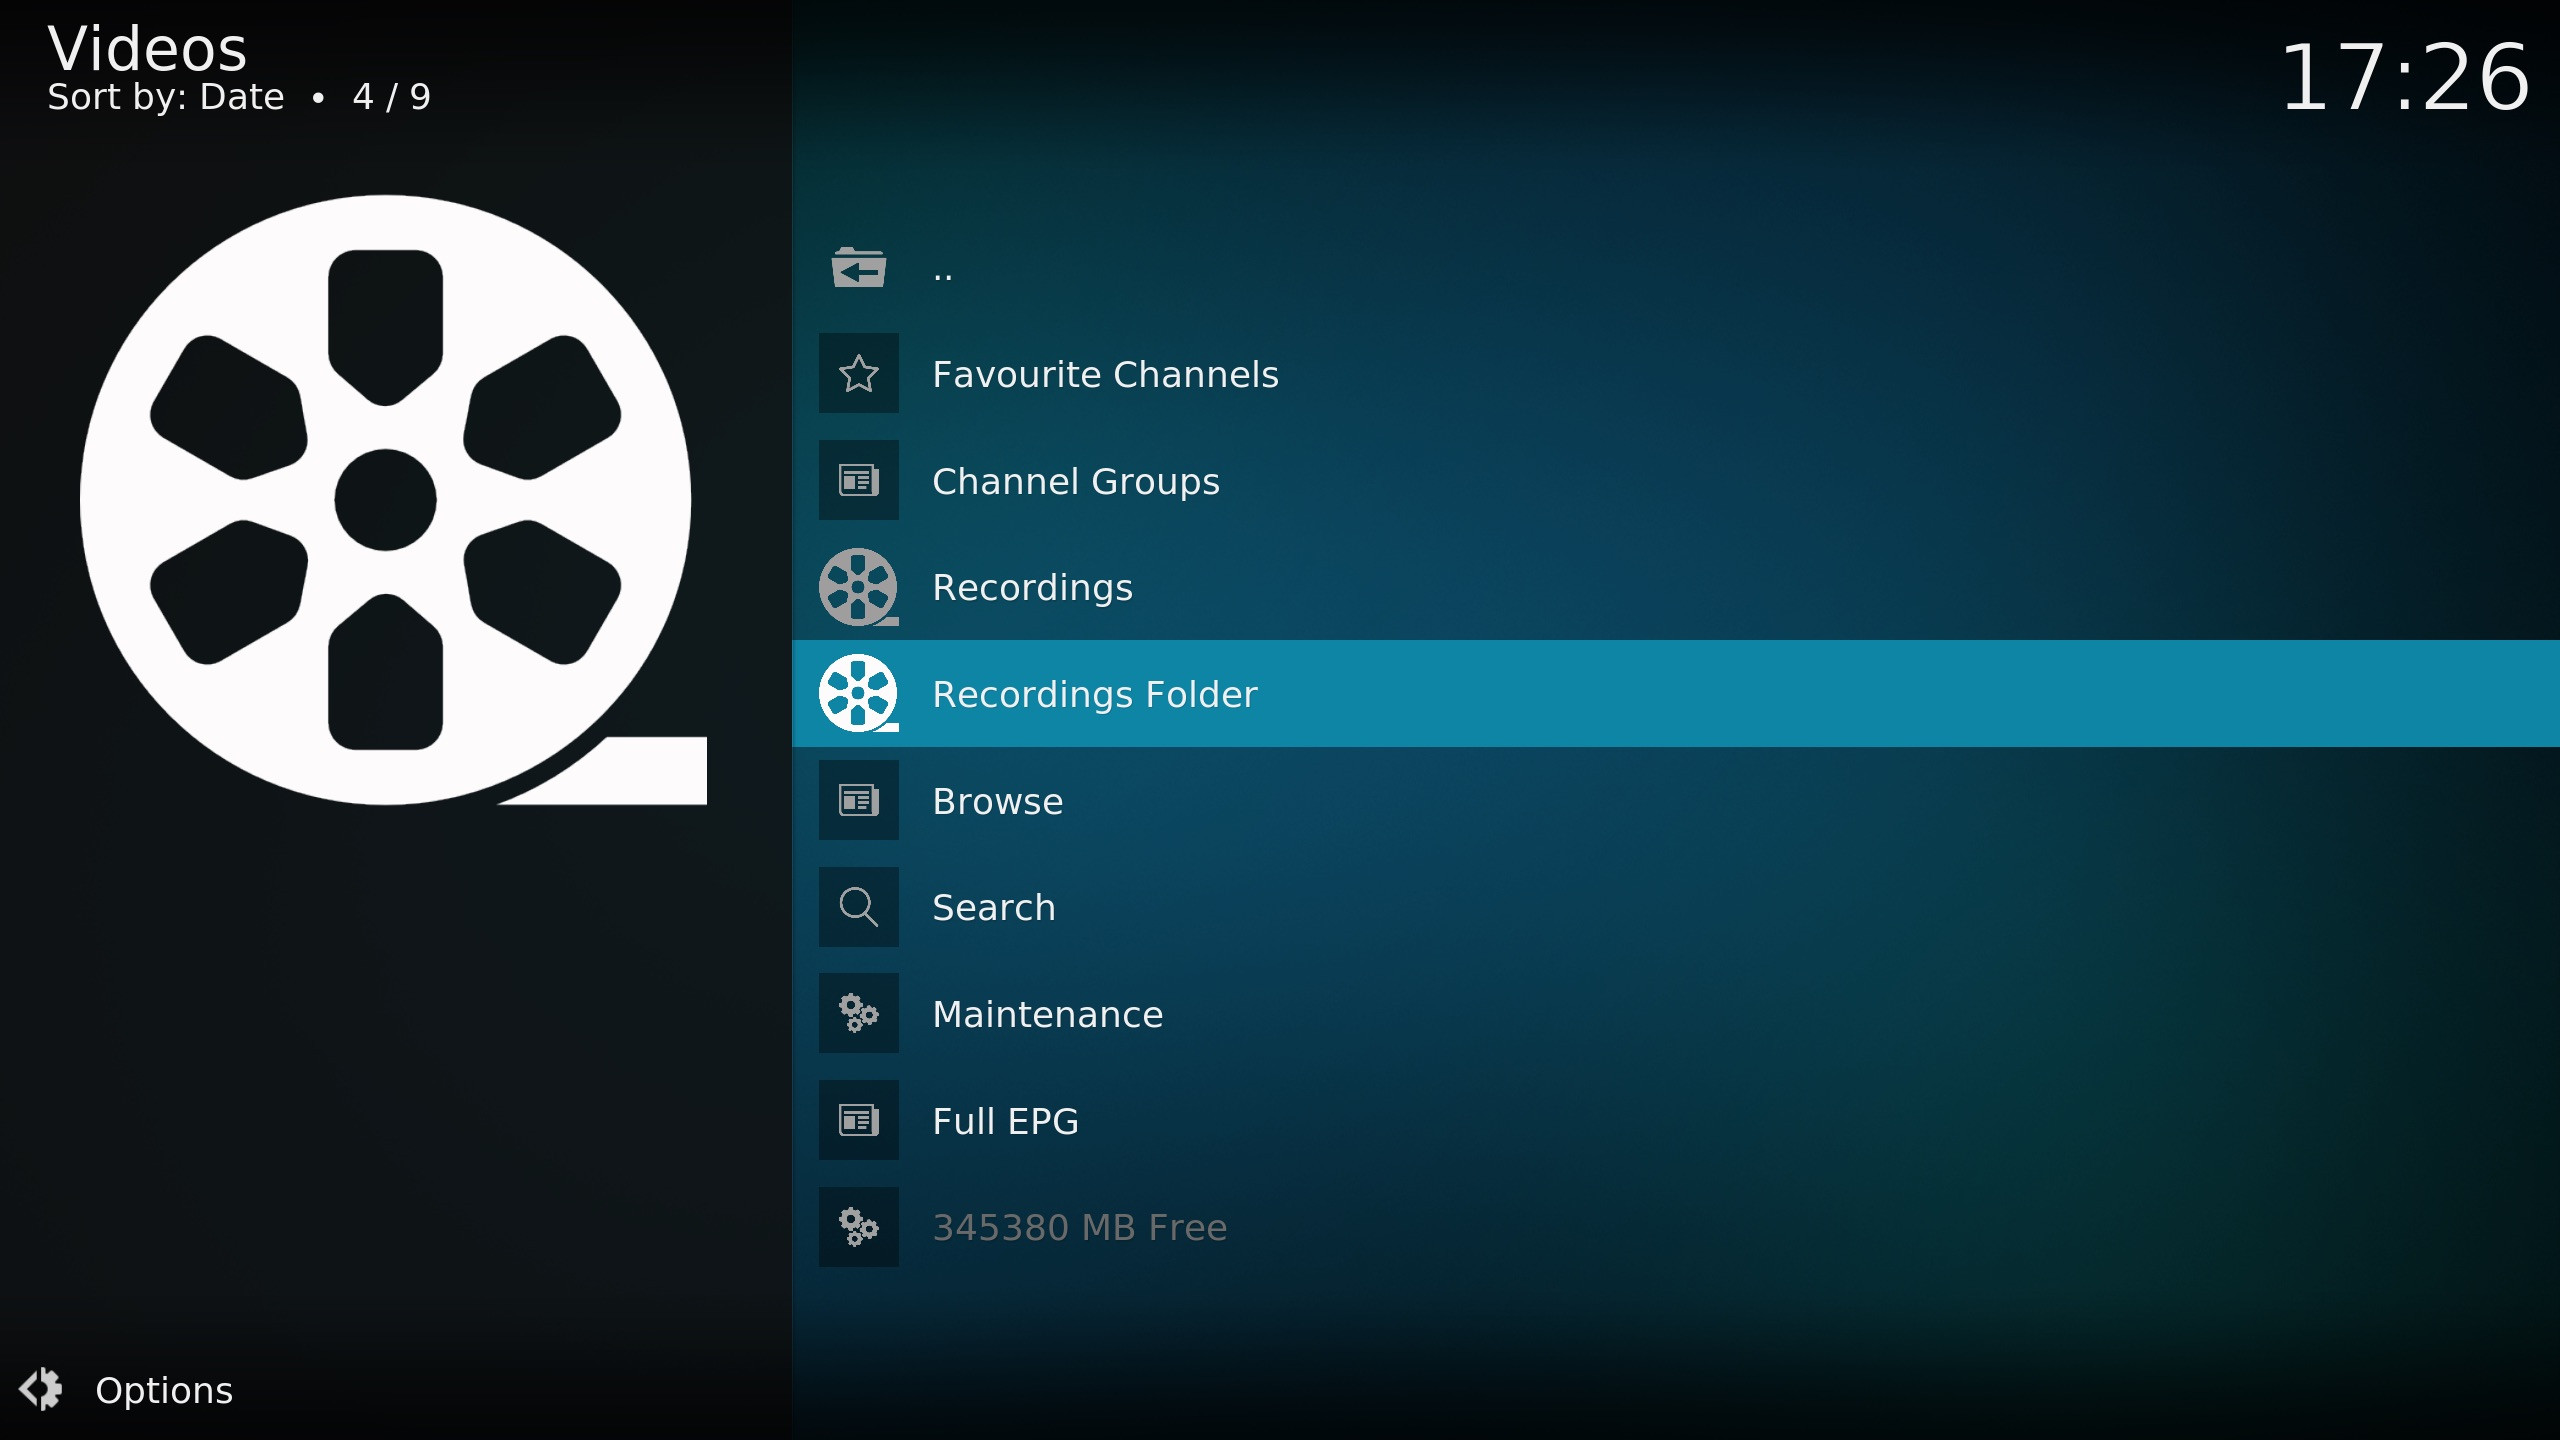
Access Recordings: Find your recordings at the specified path (default is
special://temp/) or through the “IPTV Recorder” addon. You can add this directory to your Kodi video sources.
13. How Can Monstertelevision.Com Enhance My Monster TV Viewing Experience?
At monstertelevision.com, we provide a comprehensive platform for monster TV enthusiasts. Our site offers:
- Detailed Reviews: In-depth reviews of the latest and classic monster TV shows.
- Up-to-Date News: The latest news on upcoming shows, cast interviews, and behind-the-scenes information.
- Community Forum: A vibrant community forum where you can discuss your favorite shows, share theories, and connect with other fans.
- Plot Summaries: Detailed plot summaries and episode guides to help you keep track of complex storylines.
- Actor Information: Information about the cast, including their roles and background.
14. What Are Some Recommended Monster TV Shows To Watch?
If you’re looking for some thrilling monster TV shows, here are a few recommendations:
| Show | Description |
|---|---|
| “Stranger Things” | A group of young friends in Hawkins, Indiana, confront supernatural forces and secret government exploits. |
| “Supernatural” | Two brothers hunt demons, ghosts, monsters, and other supernatural beings in the American landscape. |
| “The Walking Dead” | Survivors navigate a world overrun by zombies, facing not only the undead but also dangerous living factions. |
| “American Horror Story” | An anthology series featuring different characters and settings each season, exploring various horror subgenres, including monsters, ghosts, and psychological terrors. |
| “Lovecraft Country” | In the 1950s, a young Black man journeys across a racially charged America in search of his missing father, encountering terrifying monsters inspired by the works of H.P. Lovecraft. |
| “Penny Dreadful” | Set in Victorian London, this series brings together iconic literary characters, including Dorian Gray, Victor Frankenstein, and Dracula, as they battle supernatural threats. |
| “The Strain” | A CDC doctor investigates a mysterious viral outbreak in New York City that transforms people into vampiric creatures. |
| “Grimm” | A detective discovers he is descended from hunters who fight supernatural forces. |
| “Being Human (US)” | A vampire, a werewolf, and a ghost try to live normal lives as roommates. |
| “Buffy the Vampire Slayer” | A young woman destined to fight vampires, demons, and other forces of darkness balances her slayer duties with high school life. |
| “The X-Files” | Two FBI agents investigate paranormal cases, dealing with monsters, aliens, and government conspiracies. |
| “Teen Wolf” | A teenager gains supernatural abilities after being bitten by a werewolf. |
| “Hemlock Grove” | A small town deals with the aftermath of a brutal murder and the dark secrets lurking beneath the surface. |
| “Channel Zero” | An anthology series where each season is based on a different creepypasta story, featuring terrifying and surreal monsters. |
| “Marianne” | A horror writer realizes that the terrifying characters she writes about are coming to life. |
| “Sweet Home” | After his family dies, a troubled teen moves into a new apartment where monsters are lurking inside the building. |
| “Castle Rock” | A psychological-horror series set in the Stephen King multiverse, exploring the dark underbelly of a small town in Maine. |
| “The Haunting of Hill House” | Siblings who grew up in the most famous haunted house in America are drawn back together after facing family tragedy. |
| “Midnight Mass” | An isolated island community experiences miraculous events – and frightening omens – after the arrival of a charismatic priest. |
| “What We Do in the Shadows (TV Series)” | A look into the daily (or rather, nightly) lives of three vampires who’ve lived together for over 100 years, on Staten Island. |
| “Brand New Cherry Flavor” | A filmmaker comes to LA in the early 90s to make her movie but tumbles down a rabbit hole into a world of sex, magic, revenge – and kittens. |


These shows offer a wide range of monster-related content, from classic creatures to modern interpretations, ensuring there’s something for every monster TV fan.
15. How Do I Stay Updated On New Monster TV Show Releases And News?
To stay updated on the latest monster TV show releases and news, you can:
- Follow Monstertelevision.com: Regularly visit our website for news, reviews, and updates.
- Subscribe to Newsletters: Sign up for newsletters from entertainment websites like Variety, The Hollywood Reporter, and Entertainment Weekly.
- Use Social Media: Follow official show accounts, actors, and production companies on platforms like Twitter, Facebook, and Instagram.
- Set Up Google Alerts: Create Google Alerts for keywords like “monster TV shows,” “horror TV series,” and “sci-fi TV series.”
- Join Online Communities: Participate in forums and groups dedicated to monster TV shows on sites like Reddit and Facebook.
- Use Streaming Service Watchlists: Add monster TV shows to your watchlists on streaming platforms like Netflix, Hulu, and Amazon Prime Video to get notified when new episodes or seasons are released.
By following these steps, you’ll never miss out on the latest monster TV show releases and news.
FAQ About IPTV Manager Kodi
1. What is IPTV Manager Kodi?
IPTV Manager Kodi is an addon that helps organize and manage live TV streams within Kodi, allowing you to integrate various channels into Kodi’s “Live TV” section.
2. Is IPTV Manager a legal addon?
IPTV Manager itself is a tool for managing IPTV streams. The legality of using it depends on the source of the IPTV streams. Accessing copyrighted content without permission is illegal.
3. Can I use IPTV Manager without Catch-up TV & More?
While IPTV Manager can work with other IPTV addons, it is commonly used with Catch-up TV & More to enhance the live TV experience within Kodi.
4. What do I do if my channels don’t appear after enabling them in IPTV Manager?
In the IPTV Manager settings, try “IPTV Simple” -> “Configure IPTV Simple automatically…” and “Channels” -> “Refresh channels and guide now…”
5. How do I update IPTV Manager?
IPTV Manager updates automatically through the repository it was installed from. Ensure your repository is up-to-date to receive the latest version.
6. Can I use IPTV Manager on all Kodi devices?
IPTV Manager is compatible with most devices that run Kodi, including Windows, Linux, Android, and Raspberry Pi.
7. What is FFMPEG, and why is it needed for IPTV Recorder?
FFMPEG is a multimedia framework used by IPTV Recorder to handle the encoding and recording of live TV streams.
8. Where are my recordings saved when using IPTV Recorder?
By default, recordings are saved in the special://temp/ directory, but you can change this in the IPTV Recorder settings.
9. Can I record DRM-protected content with IPTV Recorder?
No, IPTV Recorder cannot record live TV protected by DRM.
10. Is there an alternative to IPTV Recorder for recording live TV on Kodi?
Yes, other PVR addons like TVHeadend offer native recording capabilities, but they require a more complex backend setup.
Ready to dive into the exciting world of monster television? Visit monstertelevision.com now to read in-depth reviews, catch up on the latest news, and join our thriving community of monster TV fans. Don’t miss out – your next favorite show is just a click away!