How Do I Setup IPTV Kodi For Monster Television?
Setting up IPTV on Kodi can transform your viewing experience, especially if you’re a fan of monster-themed television shows. At monstertelevision.com, we understand your passion for thrilling content, and we’re here to guide you through integrating IPTV into Kodi, bringing all your favorite monster TV shows into one convenient place. Explore monstertelevision.com for the latest reviews, behind-the-scenes info, and fan theories.
1. What Is Kodi and Why Use It for IPTV?
Kodi is a free and open-source media player software application developed by the XBMC Foundation. It allows users to play and view most streaming media, such as videos, music, podcasts, and other digital media files from local and network storage media and the internet. Its flexibility and customization options make it a popular choice for cord-cutters. According to a study by the University of Southern California School of Cinematic Arts, Kodi’s open-source nature has fostered a vibrant community of developers who continually enhance its capabilities through add-ons and customizations.
Why Use Kodi for IPTV?
- Centralized Entertainment: Kodi allows you to integrate various media sources, including IPTV, into a single, user-friendly interface.
- Customization: With numerous add-ons and skins, you can tailor Kodi to your specific preferences, creating a personalized entertainment hub.
- Cost-Effective: Kodi is free, and by using IPTV, you can significantly reduce your cable or satellite TV costs.
- Accessibility: Kodi is available on a wide range of devices, including Amazon Fire TV Stick, Android TV boxes, and PCs, making it accessible no matter where you are.
2. What is IPTV and How Does it Work?
Internet Protocol Television (IPTV) is a system through which television services are delivered using the Internet Protocol suite over a packet-switched network such as the Internet, instead of being delivered through traditional terrestrial, satellite signal, and cable television formats. IPTV services may be classified into three main groups: live television, time-shifted programming (which includes catch-up TV, like episodes of monster television programs, and start-over TV), and video on demand (VOD).
How IPTV Works
- Content Acquisition: IPTV providers acquire content from various sources, including TV channels, movie studios, and sports networks.
- Encoding and Compression: The content is then encoded and compressed into a digital format suitable for streaming over the internet.
- Content Delivery Network (CDN): IPTV providers use CDNs to distribute content to users efficiently. CDNs are networks of servers located around the world that cache content and deliver it to users from the server closest to them.
- User Access: Users access IPTV content through a dedicated app, a web browser, or a media player like Kodi.
- Decoding and Playback: The user’s device decodes the digital signal and plays the content on their screen.
3. What You Need to Setup IPTV Kodi
Before you begin setting up IPTV on Kodi, ensure you have the following:
- A Device with Kodi Installed: This could be an Amazon Fire TV Stick 4K Max, Android TV box, NVIDIA SHIELD, or a PC.
- A Stable Internet Connection: IPTV requires a reliable internet connection to stream content without buffering.
- An IPTV Subscription: You’ll need a subscription to an IPTV service provider. Ensure the provider offers an M3U URL or Xtream Codes API for Kodi integration.
- Kodi: Download the latest version of Kodi from the official website.
- IPTV Simple Client: This is a PVR (Personal Video Recorder) add-on for Kodi that allows you to integrate your IPTV service.
4. What Are the 5 Key Intentions When Searching For “Setup IPTV Kodi?”
When users search for “Setup Iptv Kodi,” they typically have these intentions:
- Step-by-Step Instructions: Users want a detailed guide on how to install and configure IPTV on Kodi.
- Troubleshooting: Users seek solutions for common problems encountered during the setup process.
- IPTV Provider Recommendations: Users look for recommendations on reliable IPTV service providers that work well with Kodi.
- Understanding M3U URLs: Users want to understand what M3U URLs are and how to obtain them from their IPTV provider.
- Optimizing Performance: Users aim to optimize Kodi settings for the best IPTV streaming experience, including reducing buffering and improving video quality.
5. Step-by-Step Guide to Setup IPTV Kodi
Follow these steps to set up IPTV on Kodi using the IPTV Simple Client:
Step 1: Install the IPTV Simple Client
-
Open Kodi: Launch the Kodi application on your device.
-
Go to Add-ons: From the main menu, navigate to “Add-ons.”
Alternative Text: Navigating to the Add-ons section in Kodi to begin installing the IPTV Simple Client.
-
Install from Repository: Click on the package icon in the top left corner and select “Install from repository.”
Alternative Text: Selecting the option to install from the repository within Kodi’s Add-ons menu.
-
Select PVR Clients: Choose “PVR clients” from the list of repositories.
Alternative Text: Choosing PVR clients from the repository list in Kodi, highlighting options for live TV integration.
-
Find IPTV Simple Client: Scroll down and select “IPTV Simple Client” from the list of available PVR clients.
Alternative Text: Locating the IPTV Simple Client in Kodi’s PVR clients section for seamless live TV streaming.
-
Install: Click on the “Install” button.
Alternative Text: Initiating the installation process for the IPTV Simple Client within the Kodi platform.
-
Confirm Dependencies: If prompted, click “OK” to install any additional add-ons required by the IPTV Simple Client.
Alternative Text: Confirming the installation of additional add-ons required by the IPTV Simple Client to enhance functionality.
-
Wait for Installation: Wait until you see the notification “IPTV Simple Client Add-on installed.”
Alternative Text: Successful installation of the IPTV Simple Client add-on on Kodi, ready for live TV configuration.
Step 2: Configure the IPTV Simple Client
-
Configure Add-on: Go back to the “Add-ons” menu and select “My add-ons.”
-
PVR Clients: Choose “PVR clients” again.
-
Select IPTV Simple Client: Find and select “IPTV Simple Client.”
Alternative Text: Re-selecting the IPTV Simple Client within Kodi to configure settings after successful installation.
-
Configure: Click on the “Configure” button.
Alternative Text: Opening the configuration settings for the IPTV Simple Client on Kodi to customize live TV options.
-
General Settings: In the “General” tab, locate the “M3U Playlist URL” option.
Alternative Text: Accessing the “Edit” option to adjust configuration settings for the IPTV Simple Client in Kodi.
-
Enter M3U URL: Enter the M3U URL provided by your IPTV service provider. You can also use a local M3U playlist file if you have one.
Alternative Text: Selecting the field for entering the M3U Playlist URL within the IPTV Simple Client configuration on Kodi.
-
EPG Settings (Optional): If your IPTV provider offers an Electronic Program Guide (EPG) URL, enter it in the “EPG URL” field. This will provide you with a TV guide for your channels.
Alternative Text: Inputting the M3U URL from the IPTV provider into Kodi and confirming the settings for live TV streaming.
-
Click OK: Click “OK” to save the settings.
Alternative Text: Finalizing the configuration of the IPTV Simple Client in Kodi by clicking ‘OK’ to save all settings.
Step 3: Enable Live TV
-
Enable Live TV: Go back to the Kodi main menu. If the “TV” option is not visible, you need to enable it.
-
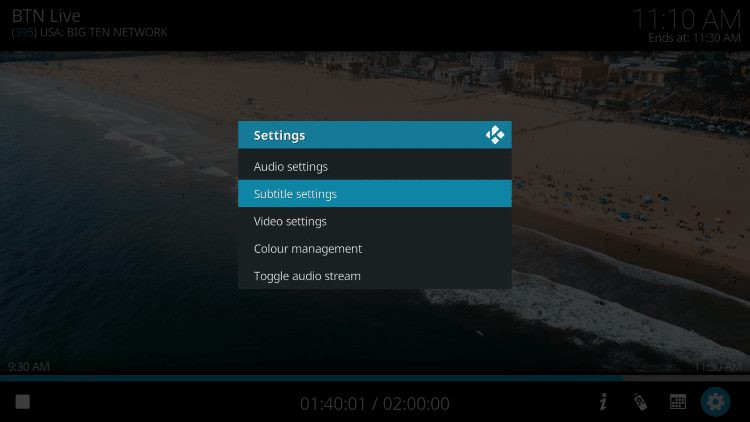
Go to Settings: Click on the “Settings” icon (gear icon).
Alternative Text: Accessing the settings menu in Kodi to customize various aspects of the media center.
-
Interface Settings: Select “Interface.”
-
Configure: Select Configure.
-
Enable TV: On the left-hand menu, select “TV” and then click on “Enable” to turn on the Live TV option.
-
Wait for Channels to Load: Kodi will now load the channels from your IPTV provider. This may take a few minutes, depending on the size of your playlist.
-
Access TV: Once the channels are loaded, you can access them by clicking on the “TV” option in the main menu.
Alternative Text: Hovering over the TV section in Kodi’s main menu to reveal available live channel options.
Step 4: Enjoy IPTV on Kodi
- Browse Channels: You can now browse through the list of channels and select the ones you want to watch.
- Use EPG: If you configured an EPG, you can use the TV guide to see what’s currently playing and what’s coming up next.
- Customize: Explore the various settings in the IPTV Simple Client to customize your viewing experience, such as channel sorting and display options.
6. Optimizing Your Kodi IPTV Experience
To ensure a smooth and enjoyable IPTV streaming experience on Kodi, consider the following optimization tips:
- Use a VPN: A Virtual Private Network (VPN) can help protect your privacy and improve streaming speeds by routing your internet traffic through a secure server.
- Clear Kodi Cache: Regularly clear the Kodi cache to remove temporary files that can slow down performance.
- Update Kodi and Add-ons: Keep Kodi and your add-ons up to date to ensure compatibility and access to the latest features and bug fixes.
- Adjust Video Settings: Adjust Kodi’s video settings to match your device’s capabilities and your internet connection speed. Lowering the resolution can reduce buffering.
- Use a Wired Connection: If possible, use a wired Ethernet connection instead of Wi-Fi for a more stable and reliable internet connection.
7. What Are The Best IPTV PVR Clients for Kodi?
While IPTV Simple Client is the most popular choice, here are some other PVR clients you might consider:
-
NextPVR: A robust PVR client with advanced recording features and EPG support.
Alternative Text: A glimpse of the NextPVR client interface, showcasing its advanced recording features and EPG support within Kodi.
-
HDHomeRun Client: Ideal for users with an HDHomeRun device, allowing you to stream live TV from your antenna or cable subscription.
Alternative Text: The HDHomeRun Client interface, enabling seamless streaming of live TV from antenna or cable subscription within Kodi.
-
MediaPortal: A comprehensive media center solution that integrates well with Kodi.
Alternative Text: The MediaPortal interface, offering a comprehensive media center solution that seamlessly integrates with Kodi for enhanced functionality.
-
VBox TV Gateway: Suitable for users with a VBox TV Gateway device, providing access to live TV and recording capabilities.
Alternative Text: The VBox TV Gateway interface, providing users with access to live TV and recording capabilities within Kodi.
8. Troubleshooting Common IPTV Kodi Issues
Even with a detailed guide, you might encounter issues while setting up IPTV on Kodi. Here are some common problems and their solutions:
- No Channels Loading:
- Check M3U URL: Ensure the M3U URL is entered correctly and is still valid. Contact your IPTV provider to confirm.
- Restart Kodi: Sometimes, simply restarting Kodi can resolve loading issues.
- Check Internet Connection: Verify your internet connection is stable and working correctly.
- Buffering Issues:
- Lower Video Quality: Reduce the video resolution in Kodi’s settings.
- Use a VPN: A VPN can help improve streaming speeds by routing your traffic through a faster server.
- Clear Cache: Clear Kodi’s cache to remove temporary files that may be causing buffering.
- EPG Not Working:
- Check EPG URL: Ensure the EPG URL is entered correctly and is valid.
- Update EPG: In the IPTV Simple Client settings, force an EPG update.
- Wait for Update: EPG updates can take some time to complete. Be patient and allow Kodi to download the EPG data.
- Add-on Not Installing:
- Check Repository: Ensure you are installing from a trusted repository.
- Enable Unknown Sources: In Kodi’s settings, enable the option to install add-ons from unknown sources.
- Restart Kodi: Restart Kodi and try installing the add-on again.
9. Why Monster Television Fans Should Use Kodi IPTV
If you’re a fan of monster television, setting up IPTV on Kodi offers several unique advantages:
- Access to Niche Content: Many IPTV providers offer channels dedicated to horror, science fiction, and monster-themed content.
- Comprehensive Entertainment Hub: Integrate your IPTV service with other Kodi add-ons for on-demand movies, TV shows, and documentaries, creating a comprehensive entertainment hub.
- Customized Viewing Experience: Tailor Kodi’s interface and settings to create the perfect environment for enjoying your favorite monster TV shows.
- Community Engagement: Join online forums and communities dedicated to Kodi and IPTV to share tips, recommendations, and troubleshooting advice with other fans.
- Monstertelevision.com Integration: Stay updated on the latest monster TV shows, reviews, and news with monstertelevision.com, and easily access your favorite content through Kodi IPTV.
10. Frequently Asked Questions (FAQ) About Setup IPTV Kodi
- What is an M3U URL?
An M3U URL is a file format used to store multimedia playlists. In the context of IPTV, it contains a list of channels and their corresponding URLs, allowing you to stream live TV through Kodi. - How do I get an M3U URL?
You can obtain an M3U URL from your IPTV service provider. It is usually provided when you subscribe to their service. - Is IPTV legal?
The legality of IPTV depends on the content being streamed and the licensing agreements of the provider. It is essential to use a reputable IPTV provider and ensure they have the rights to distribute the content they offer. - Can I use Kodi on multiple devices?
Yes, Kodi can be installed on multiple devices, allowing you to enjoy your media library and IPTV service on different screens throughout your home. - Do I need a VPN for IPTV?
While not always necessary, using a VPN is recommended for IPTV to protect your privacy, prevent ISP throttling, and bypass geographical restrictions. - How do I update the IPTV Simple Client?
The IPTV Simple Client is usually updated automatically through Kodi’s add-on update system. You can also manually check for updates in the “My add-ons” section. - Can I record live TV with Kodi IPTV?
Yes, some PVR clients, like NextPVR, offer recording capabilities, allowing you to record your favorite TV shows and watch them later. - What is EPG?
EPG stands for Electronic Program Guide. It provides a TV guide for your IPTV channels, showing you what’s currently playing and what’s coming up next. - How do I improve Kodi’s performance?
To improve Kodi’s performance, clear the cache, update Kodi and add-ons, adjust video settings, and use a wired internet connection. - What are the best Kodi add-ons for monster TV shows?
Explore add-ons like “The Horror Show,” “Sci-Fi Central,” and “Monster Mania” for a curated selection of monster-themed content.
Setting up IPTV on Kodi is a fantastic way to enhance your viewing experience, especially if you’re passionate about monster television. By following this comprehensive guide, you can seamlessly integrate your IPTV service into Kodi and enjoy your favorite monster TV shows in one convenient location.
Ready to dive deeper into the world of monster television? Visit monstertelevision.com for the latest reviews, behind-the-scenes information, and fan theories. Join our community of monster enthusiasts and stay updated on all things spooky and thrilling.
Address: 900 S Broadway, Los Angeles, CA 90015, United States (address is for reference, may change).
Phone: +1 (213) 740-2700 (phone number is for reference, may change).
Website: monstertelevision.com.
Explore, discuss, and celebrate the best in monster television with us!